Windows Defender is a great tool for keeping our computers safe from malware and other threats. However, sometimes it can be a little too aggressive in its scanning, resulting in high CPU and memory usage.
If you’re experiencing this issue, don’t worry! There are a few easy steps you can take to fix it. In this blog post, we’ll show you how to stop Windows Defender from consuming so much memory.
Windows Defender High Memory usage Fix
If you’re seeing high memory usage by Windows Defender, you can try the following solutions:
– Run a full scan of your computer. This will help identify any malware that may be causing issues.
– Add more RAM to your computer. This will help reduce the amount of memory being used by Defender.
– Adjust the settings in Defender to only scan when needed. This will help reduce the amount of time Defender is running, and reduce its impact on your computer’s performance.
AntiMalware Service executable High Memory Windows 11
Windows Defender has a background process called AntiMalware service that runs on scans, scheduled tasks, malware identification, updating virus definitions and full time scan.
These real-time scans protect your Windows 11 system from online threats and local viruses.
So you cannot disable real-time protection even though the process uses high memory, RAM and CPU.
Also Read
- [SOLVED] Fix BUGCODE_NDIS_DRIVER Error in Windows 10 – 5 Solutions
- [Solved] Outlook Error 0x8004010F in 2010 or 2013: Data File Cannot Be Accessed
- [Worked] 0xc000000e Solved on Windows 10 – Boot Error is Fixed
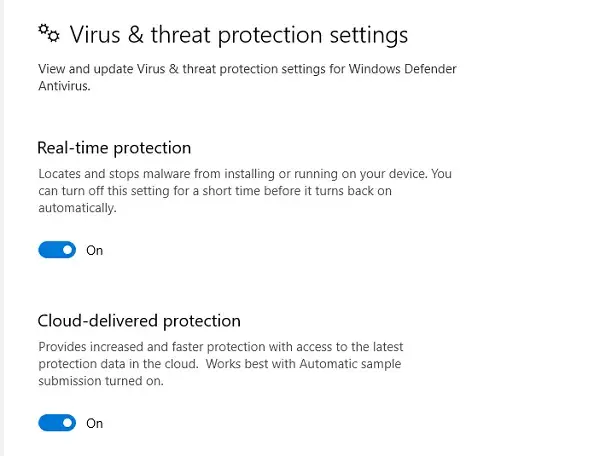
Turn off some features of Virus Threat Protection.
But you can safely turn off the following options.
- Cloud-delivered protection
- Automatic sample submission.
- Double click the Windows Security icon in Windows 11.
- Click on Virus Threat protection.
- Turn off the above options.
Add to Windows Defender Exclusion list
The corresponding file to AntiMalware Service is msmpeng.exe.
This process is used to constantly check online threats and real time protection safety using Windows Defender.
On the other hand, the process behind this file can cause windows defender consuming high memory.
When a full scan is done, even the file msmpeng.exe is scanned. This can cause heavy usage of cpu and other resources. You can add this file or process to the exclusion list in Windows Defender.
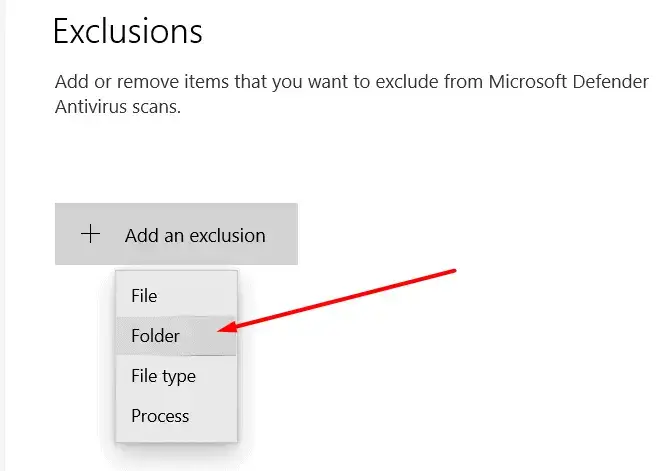
- Open Virus and Threat Protection in Windows Defender.
- Scroll down to the Exclusions section.
- Click the Add an Exclusion button.
- Add the msmpeng.exe file or relevant process by noting the path from the Task Manager.
Also Read
- [Solved] Skype for Business Profile Picture not Showing in Office 365 – Several Fixes
- [Solved] How to Fix Error Code 80070057 to Upgrade to Windows 10
- [Solved] How to Fix Error Code 8024402c in Windows 10 or 8.1 or 7 or Server 2012 or 2008?
Task Scheduler Tasks of Windows Defender in Windows 11
Some of the Windows Defender tasks are triggered while running scans. You can either prevent high priority usage or disable them, to reduce the memory usage.
- Type Task Scheduler in the search box of Windows 11.
- Go the following path – Task Scheduler Library > Microsoft > Windows > Windows Defender
- On the right side, there are 4 tasks related to AntiMalware Service.
- Windows Defender Cache maintenance
- Windows Defender Cleanup
- Windows Defender Scheduled Scan
- Windows Defender Verification
- Double-click each setting and the pop-up window opens.
- Make use of General and Conditions to reduce the usage of memory by Windows Defender.
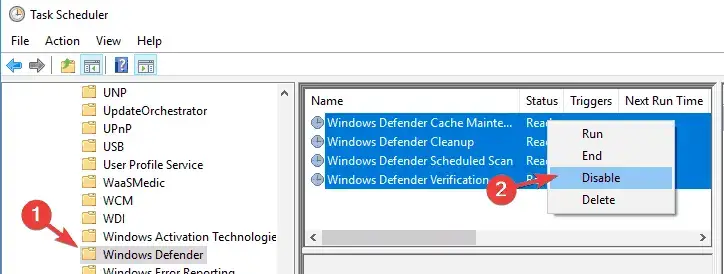
You can turn off Run with highest privileges on the General tab. Still if you see more memory usage, you can delete or disable the item.
Also Read
- Don’t Worry of Windows 11 high Memory Usage (40% is normal) – 8 Solutions
- How to Fix Camera App Error Code 0xa00f4244 in Windows 11/10
- 6 Fixes for Windows 11 not detecting HDMI Monitor
Install the Third-Party Security Service
If you feel that Windows Defender is taking too much resources on your Windows 11 computer, then you install 3rd party internet security. It will automatically disable Windows Defender. This will reduce the high memory usage.
You can also disable the task schedule items of 3rd party AV in the Task Scheduler, if it is causing peak memory usage.

Final Comments.
You can also disable Real-time protection if no other solution works. This will temporarily reduce the high memory usage. When no other AV is found it automatically gets re-enabled.
Even if 3rd party AV is used, Windows Defender keeps running in the background. It fixes ransomware kind of problems or any other problems not detected by 3rd party AV. This could happen if the 3rd party security system is not good enough.
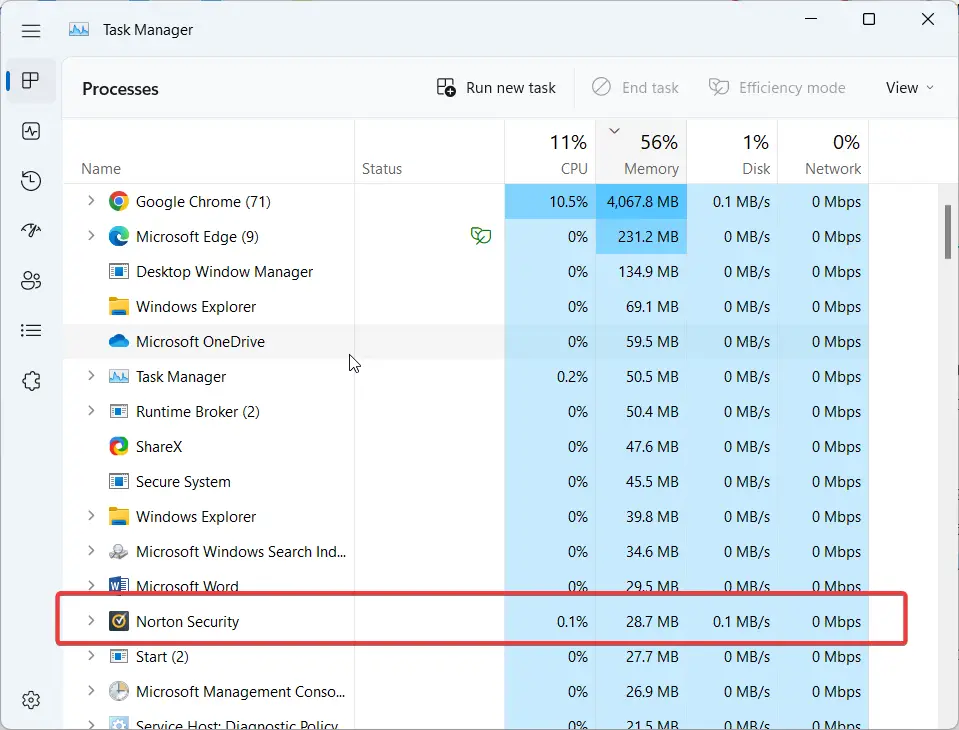
Finally, don’t reduce the security for the sake of memory performance. If your computer is working well with high memory usage without any lag, then you don’t worry about Windows Defender consuming high memory.
The usage goes up on scheduled scans, full scans, virus scans etc. It comes down when the process is complete.
Also Read
- How to Repair Error Code 0xc00000e9 on Windows 10
- How to open Control Panel in Windows 10 – 6 Alternate Ways
Windows Defender Memory Leak
Windows Defender is a built-in antimalware program that helps protect your PC against viruses, spyware, and other malicious software.
Over time, as you install new programs and visit new websites, Defender’s virus and spyware definitions can become outdated.
As a result, Defender may use more memory than usual. Additionally, if you have a lot of programs running at the same time, this can also lead to higher memory usage.
If you notice that Windows Defender is using a lot of memory, you can try the following steps to free up some memory:
– Update Windows Defender: Open Windows Defender, click on the Update tab, and then click Check for updates.
– Scan for malware: Open Windows Defender, click on the Scan tab, and then click Full scan.
– Change when scans are run: Open Windows Defender, click on the Settings tab, expand Scheduled scan, and then select a different time for when scans are run.
How much memory should Windows Defender use?
This is a difficult question to answer definitively as it depends on several factors, such as the size of your hard drive, the number of files you have, the number of programs you have installed, and so on.
That said, in general, Windows Defender should not be using more than a few hundred megabytes of RAM.
If it is using more than that, it could be a sign that there is something wrong with your installation or that your computer is infected with malware.
How to make Windows Defender use less Memory ?
There are a few things you can do to help reduce the amount of memory that Windows Defender consumes.
First, you can try disabling some of the real-time features that Defender uses.
To do this, open the Windows Defender Security Center and click on the “Virus & threat protection” section. Then, click on the “Virus & threat protection settings” option.
Next, scroll down and toggle off the following options: “Real-time protection“, “Cloud-based protection“, and “Sample submission“.
You can also try exclusion certain types of files from being scanned by Defender.
To do this, open the Windows Defender Security Center and click on the “Exclusions” option.
Then, click on the “Add an exclusion” button and select the type of file or folder you want to exclude.
Finally, you can try running a manual scan with Defender instead of using the real-time scanning feature.
To do this, open the Windows Defender Security Center and click on the “Scan options” button.
Then, select the “Full scan” option and click on the “Scan now” button.


