Windows 10 Pro version can have a local account. In version 1903, this facility was not possible. Creation of a Microsoft account is the first preference, even after the 2004 version. Also known as the May 2020 update.
The sad part is that most of the Windows Store apps, services require a Microsoft account. You are without your arsenal. But with a local account you are at peace with privacy and security. Less chances of online fraud.
In Windows 10, you can switch to a local account at the login screen after its creation.
During the OOBE (out-of-the-box experience) setup, there was an option to create a local account in earlier versions of Windows 10. You are required to choose a normal local account or Microsoft account during the installation.
Do I need a Microsoft account for Windows 10? This question arises for old users of Windows, who didn’t require any specific account.
Related Web Story –
- Method #1 - Change to Windows 10 Local Account after Installation
- Method #2 - Create Local Admin Account Windows 10 CMD
- Method #3 - Create Local Account on Windows 10 for Non-Family Users
- Method #4 - How to Create Local Admin Account in Windows 10 if Locked - Using CMD
- Pro and Cons of Local Account
- Windows 10 Home
- Windows 10 Pro
- Which One - Microsoft or Local Account
Method #1 – Change to Windows 10 Local Account after Installation
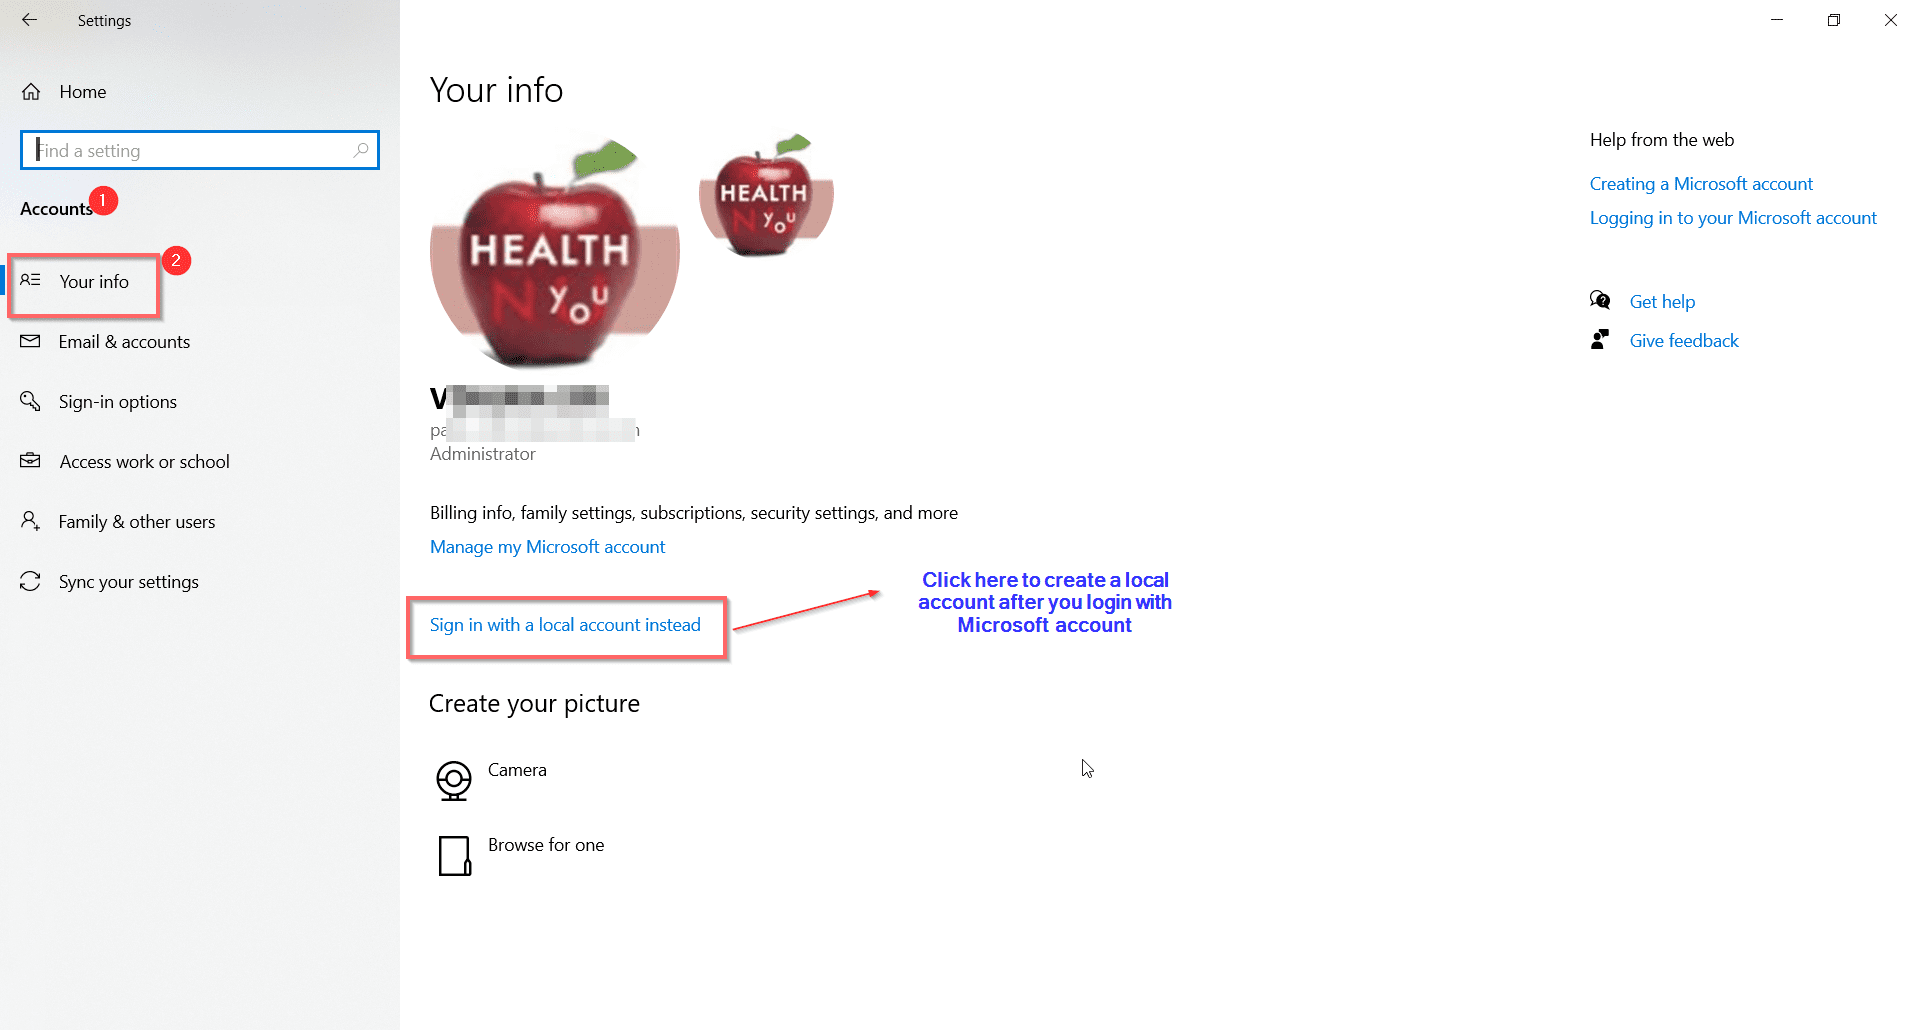
- Press Win + I keys to open Windows Settings.
- Open Accounts > Your Info
- Sign in with a local account instead is visible, on the right-hand side.
- Are you sure you want to switch to a local account? A Pop-up dialog box appears.
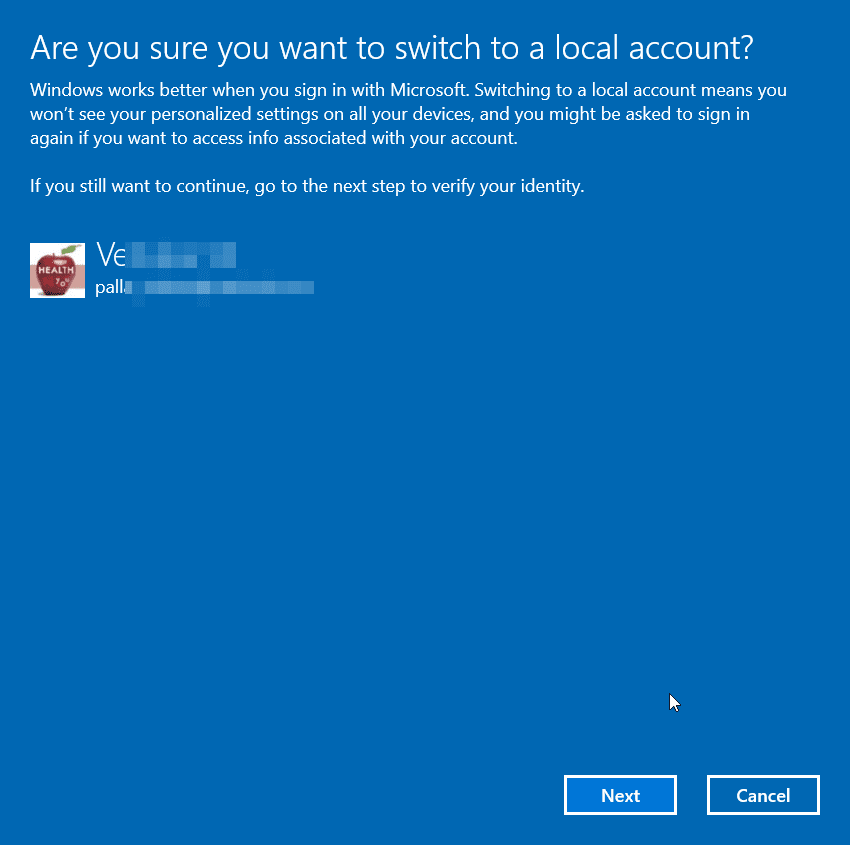
- Click on Next
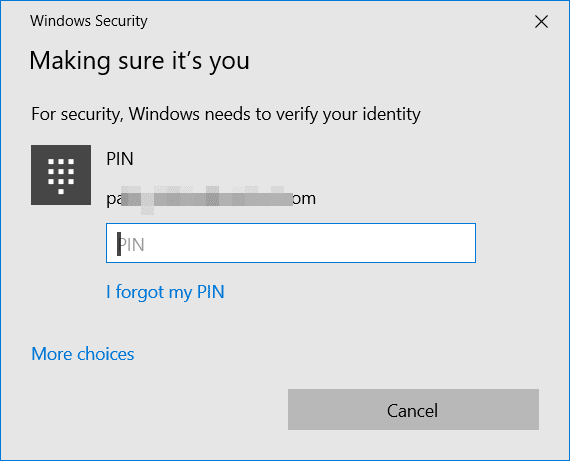
- Enter your PIN or verify your identity on your Microsoft account.
- Enter your local account info
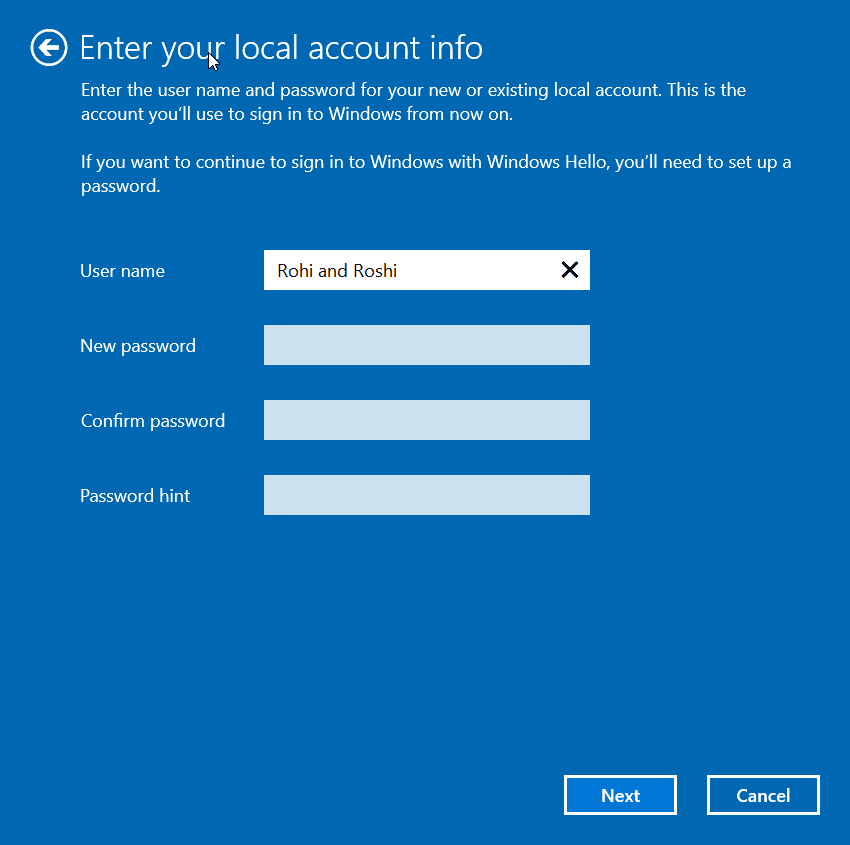
- This includes username, new password, confirm password, password hint.
- Click on Next
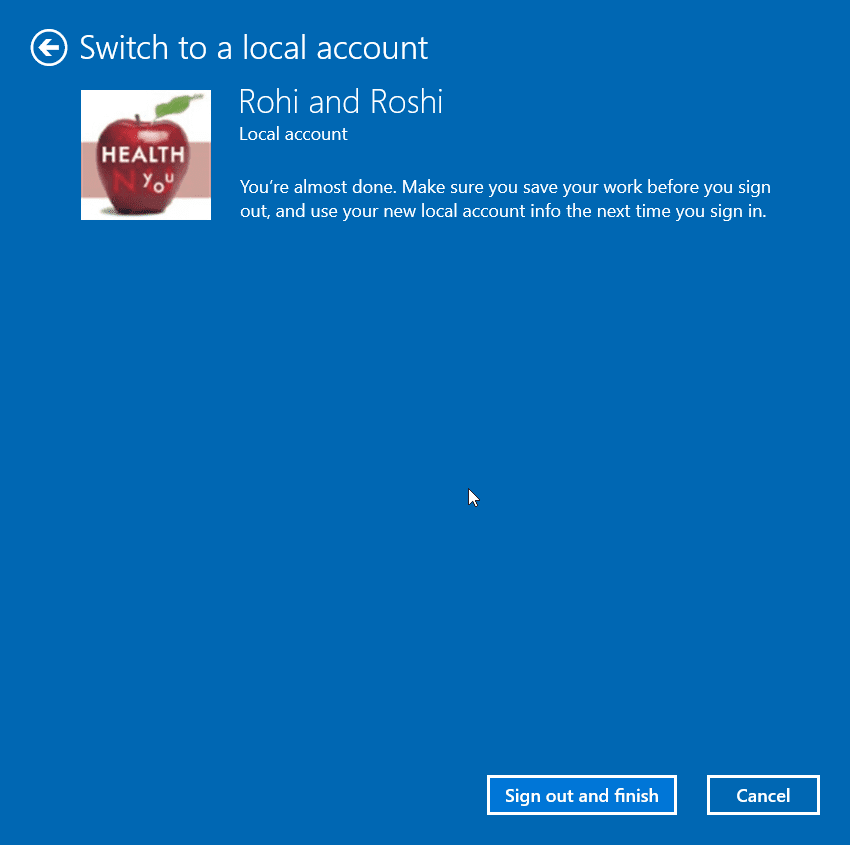
- Then, Sign-out and finish.
Method #2 – Create Local Admin Account Windows 10 CMD
There are different ways to create a local account in Windows 10. Initially, you can add with “standard user” privileges and then convert to an administrator account. This can be done using the Settings app.
What-if it’s not working on your computer or laptop?
Don’t worry, you can still build a local admin account in Windows 10 using the command prompt app.
Just 2 commands are sufficient to add your username and password to the local administrator group.
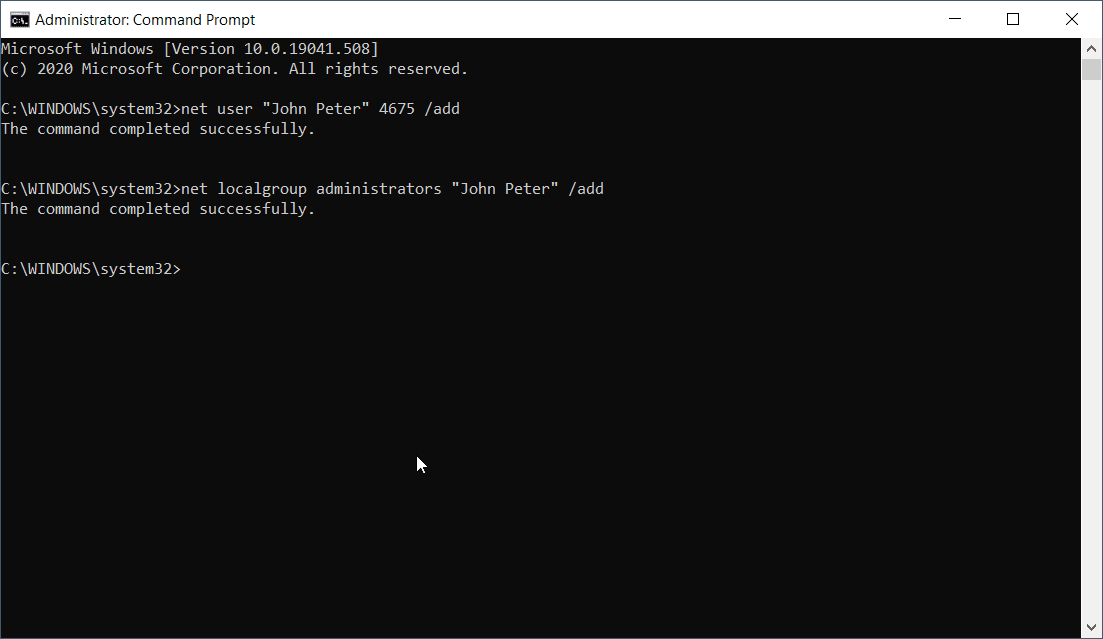
- Open Command Prompt with administrator privileges.
- Type the following command
net user USER_NAME PASSWORD /add
A typical example, will include like this – net user “John Peter” 4675 /add
Here you have to change the USER_NAME and PASSWORD to your requirement.
- Type the next command
net localgroup administrators USER_ACCOUNT /add
Make sure the USER_ACCOUNT is already created.
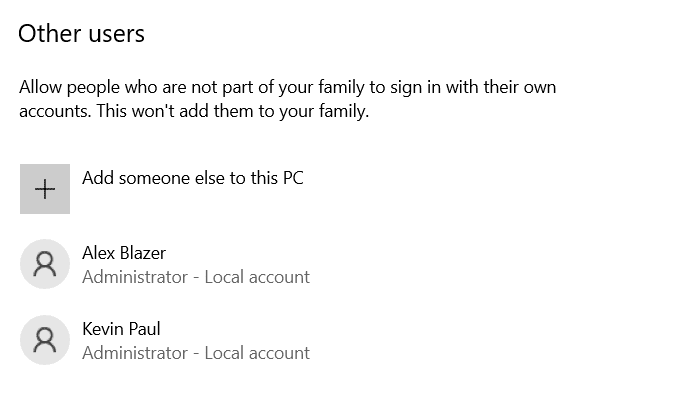
Sign-out of your Microsoft account, if you have already created one. On reboot you can see your “local account” sitting at the bottom of the screen. You can also check the created account in your Settings > Accounts > Family & other users. This works even after the latest 2004 update in Oct, 2020.
Other CMD commands
There are other options to the above commands.
net user username password /ADD /DOMAIN
This will add the local account to a DOMAIN. It is useful in a network or office environment. Replace DOMAIN with your network domain name.
Rename Local Account Name from Command-line
wmic useraccount where name='presentname' rename changename
- presentname = name of the current local user
- changename = new name you want to give to the local user
Apply the above command in elevated prompt.
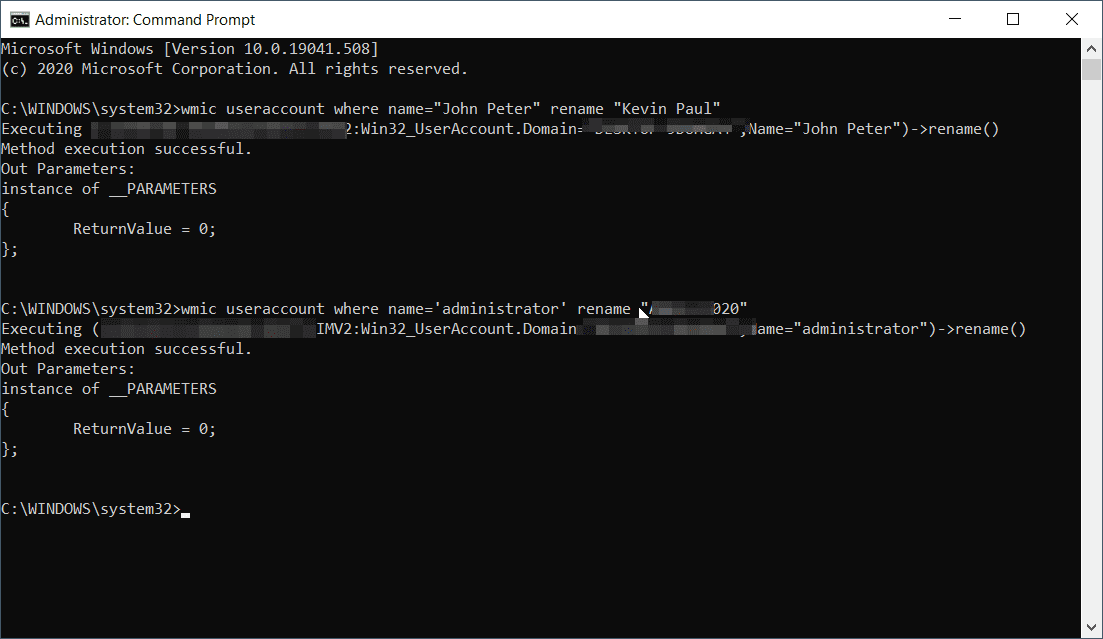
Rename Administrator name to Custom name using CMD
wmic useraccount where name='administrator' rename admin
This will replace the administrator name to the given new name you give. I was expecting the label “Adminstrator – Local Account” to change after this command execution. But it was the same.
Set Full Name with CMD
net user username password /ADD /FULLNAME:"User_Fullname"
Allow User to Change Password
net user username password /ADD /PASSWORDCHG:Yes
Restrict Change of Password
net user username userpasswd /ADD /PASSWORDCHG:NO
Method #3 – Create Local Account on Windows 10 for Non-Family Users
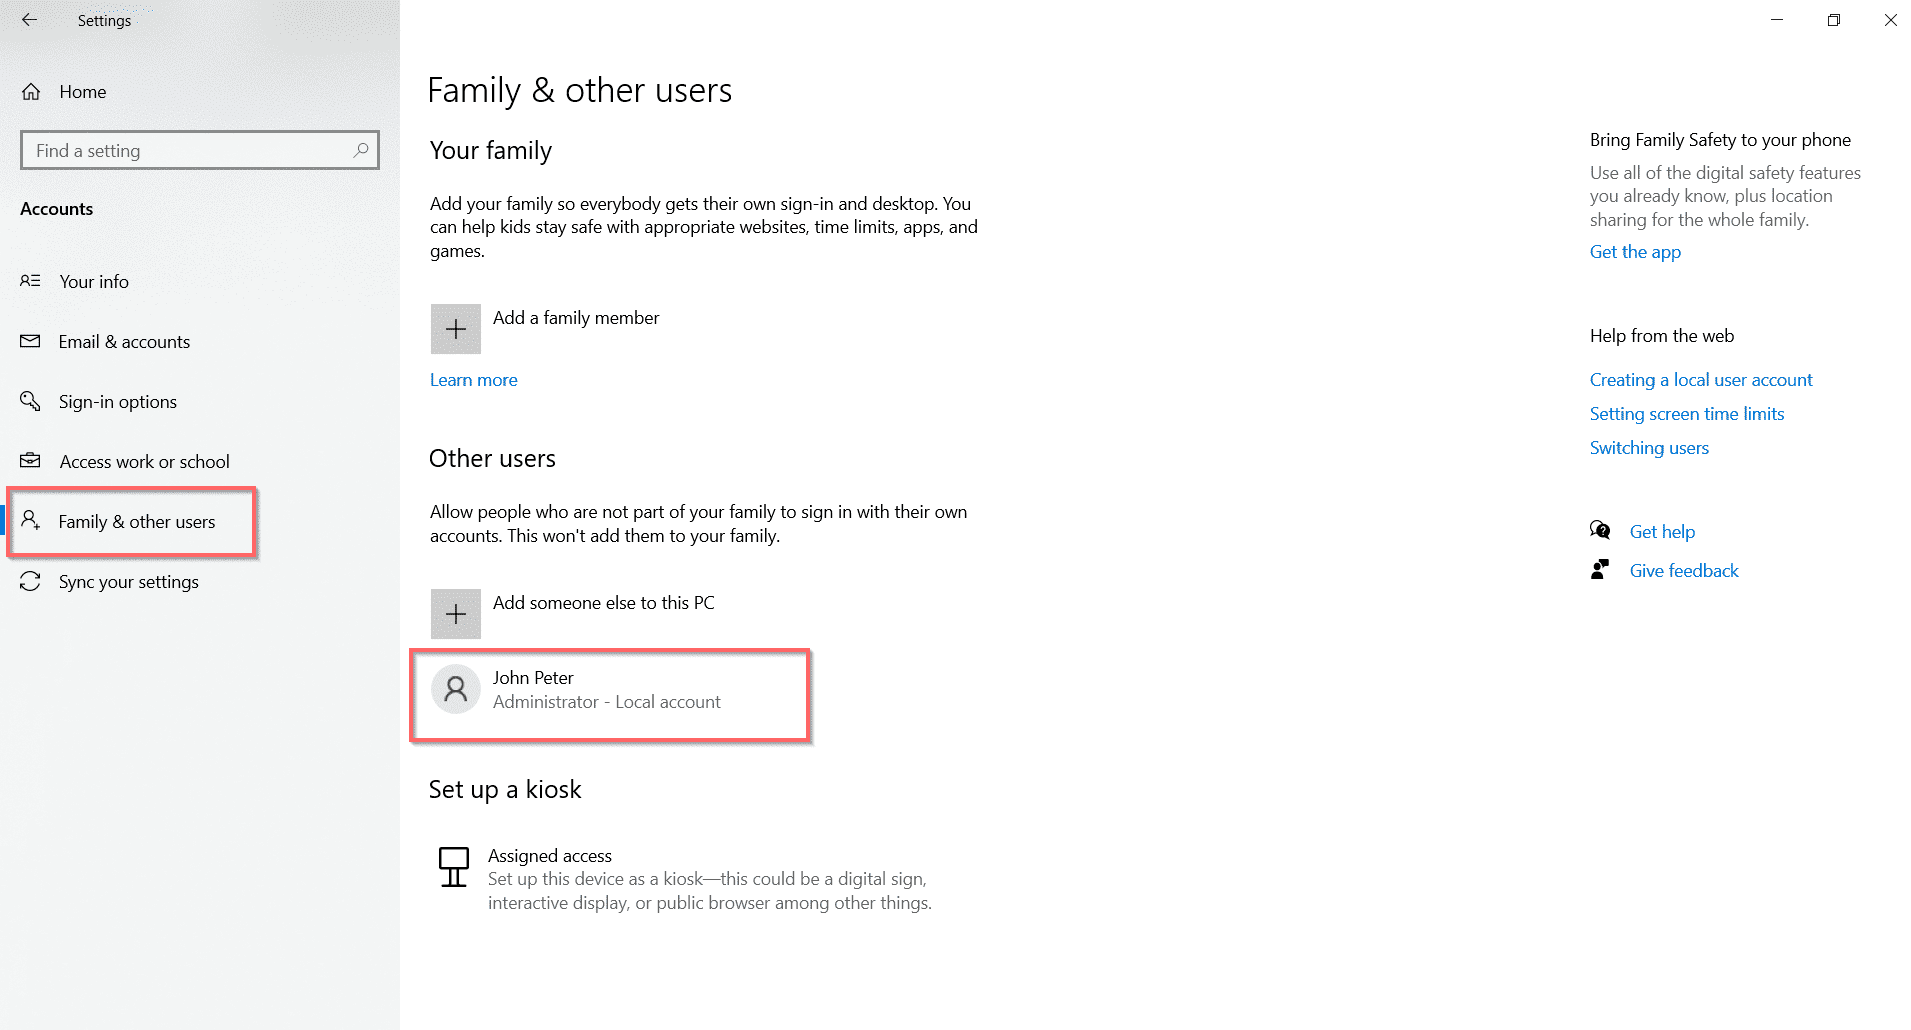
Family & other users is an option in the Accounts section of Settings app. You can add a friend or relative to your Windows 10 computer or laptop, using the “Other users” option. For this purpose, you can create a local account with standard privileges.
Later, you can change to an “Administrator” account. This user can still have his personalized themes, settings and apps without access to your Microsoft account. In this way, you are protected from misuse of your account.
- Press Start > Settings > Accounts.
- Click on “Family & other users” on the left-hand side.
- Click on “Add someone else to this PC”.
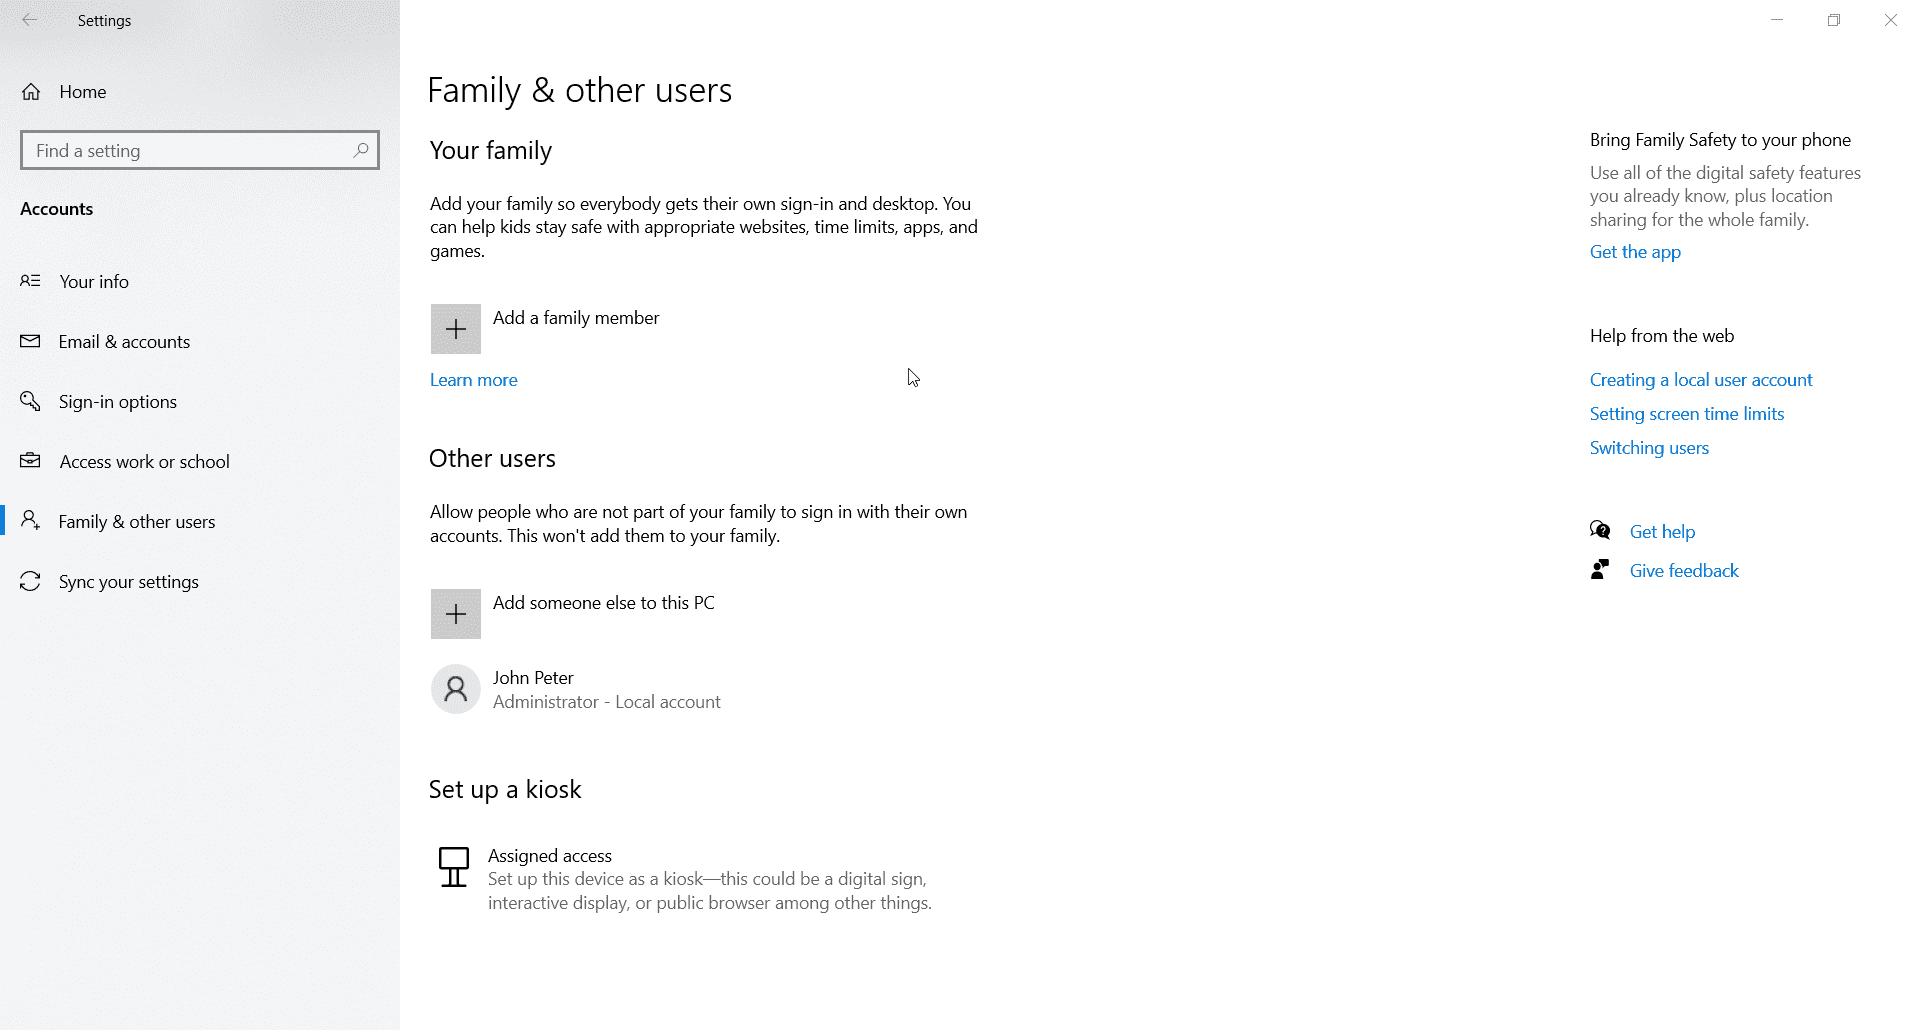
- A Microsoft pop-up will come up. Click the “I don’t have this person’s sign-in information” link at the bottom.
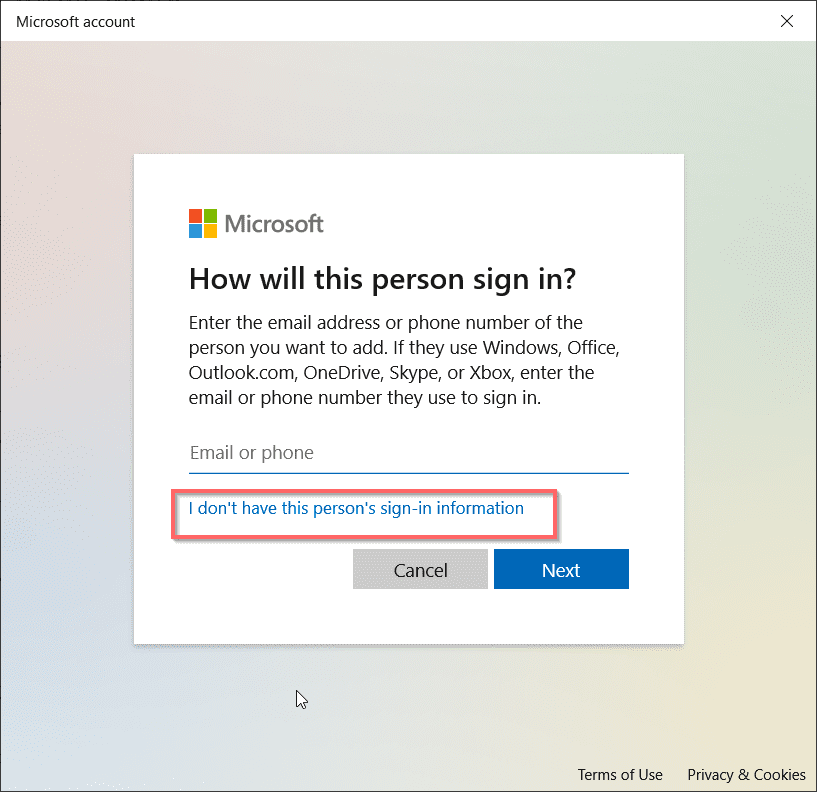
- On the next screen, click on “Add a user without a Microsoft account”.
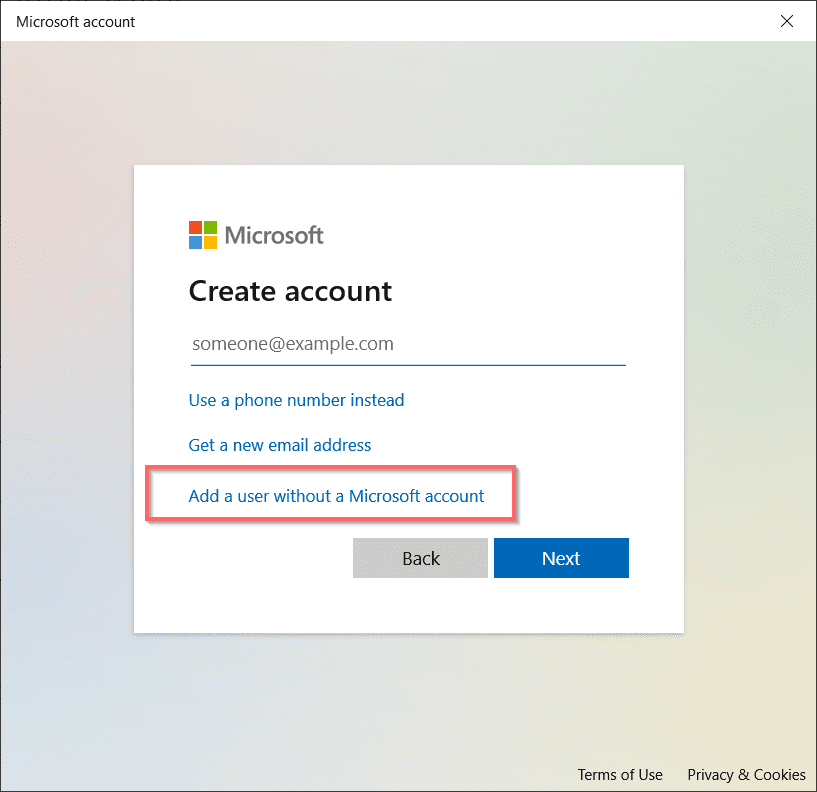
- Then, Create a user for this PC screen shows up.
- Enter the username, password two times.
- After the 1809 version, you are also given the choice to enter the hint questions.
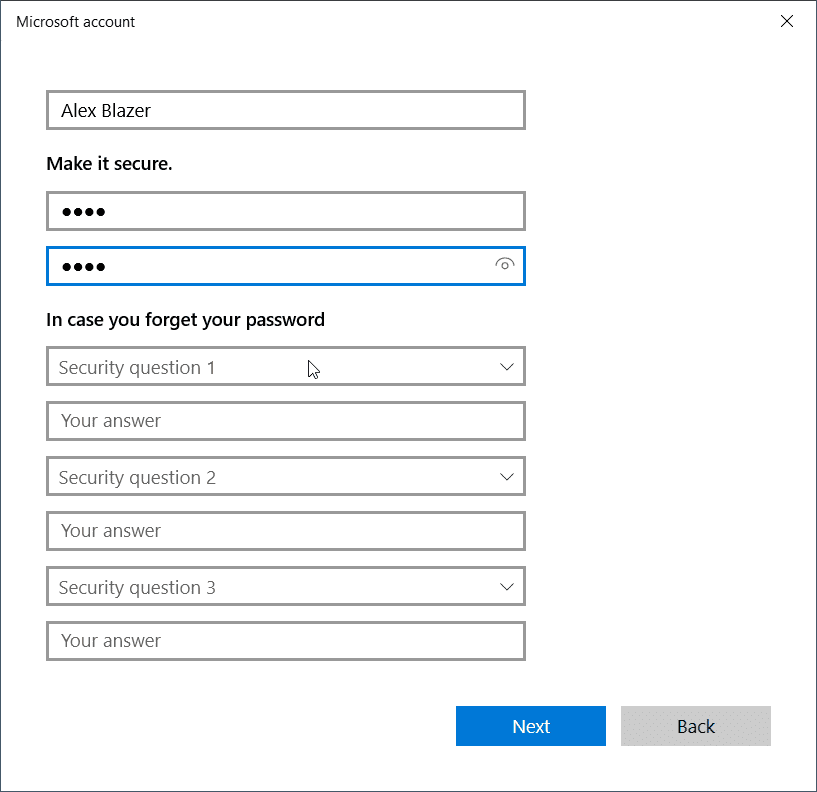
Note: There are generally 3 hint questions.
- Click on Next
- Local account is created.
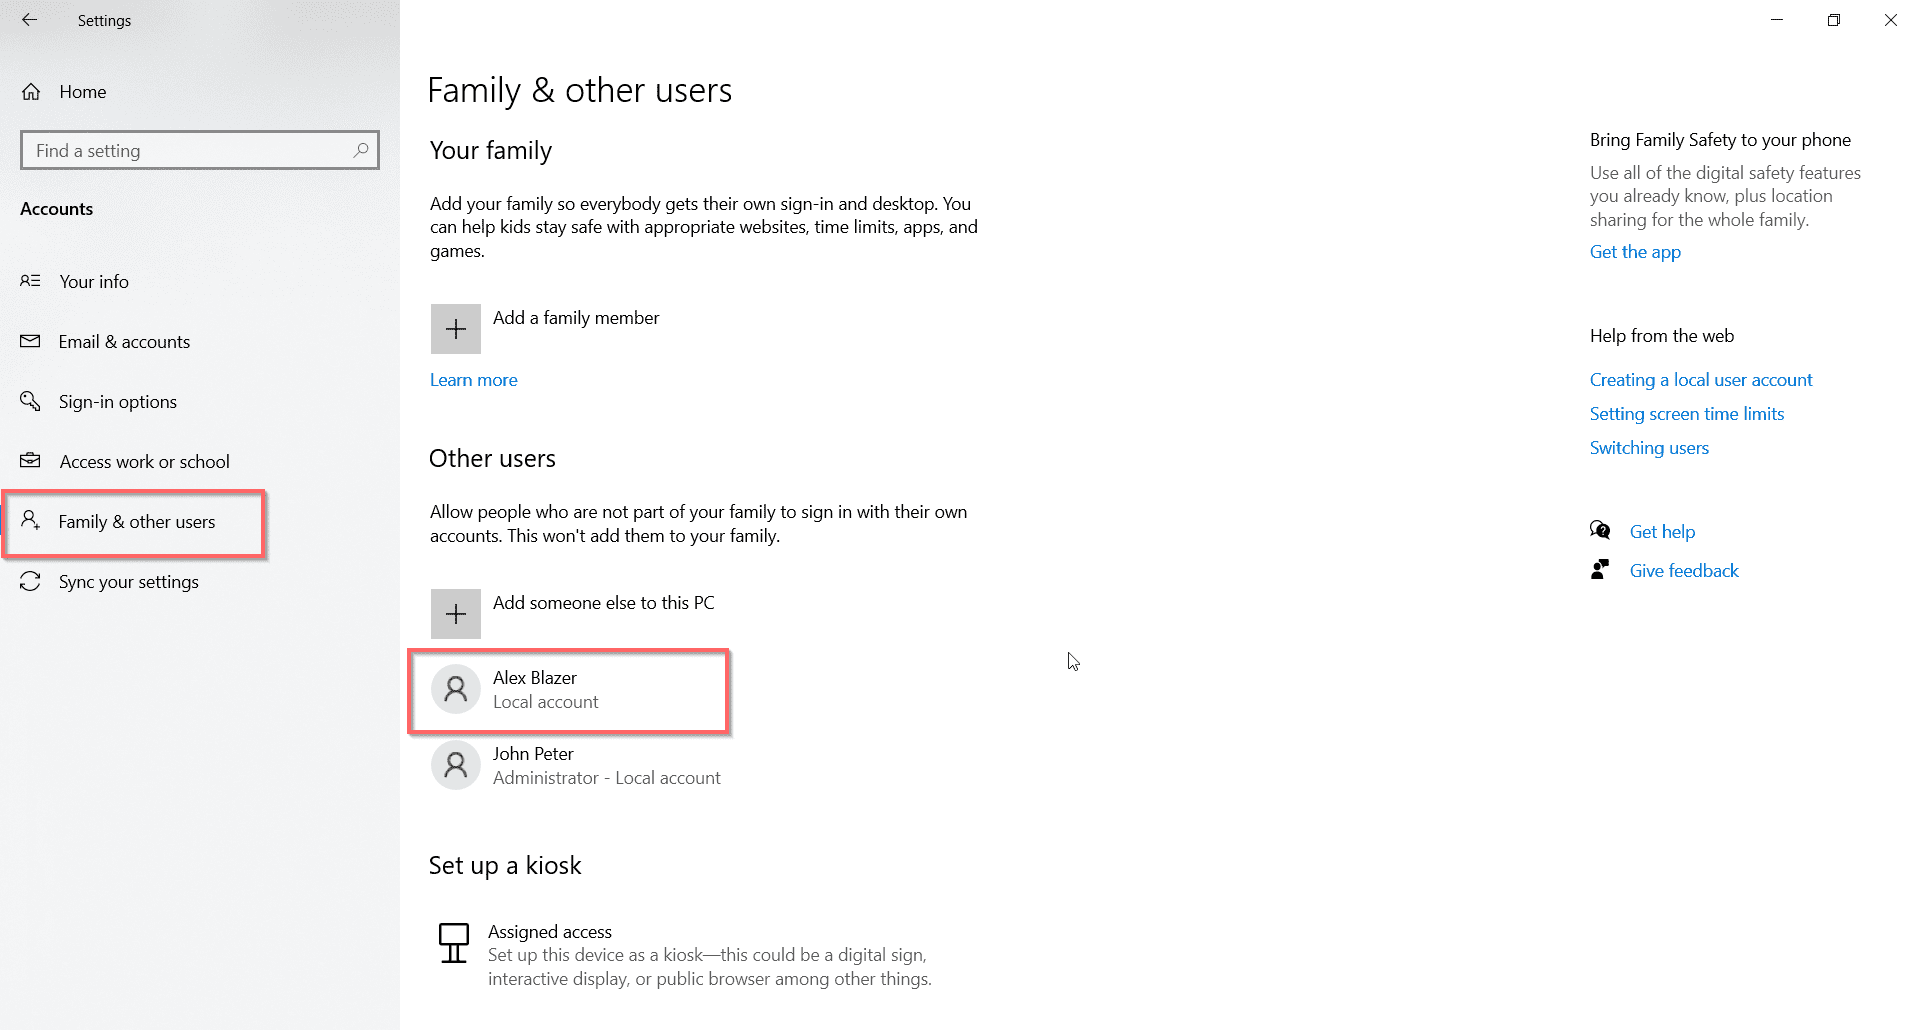
You can sign-out of your Microsoft account to test your new local account.
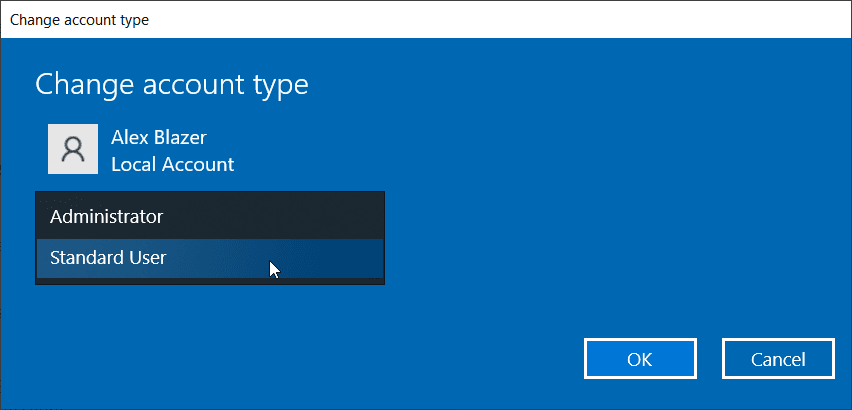
Change local account type to Administrator
- Click the username created earlier.
- Change account type option appears.
- Click on it.
- There are two roles – Administrator and Standard user.
- Select “Administrator” from the drop-down.
- This will make it as an admin account.
Method #4 – How to Create Local Admin Account in Windows 10 if Locked – Using CMD
This requires a Windows 10 installation disc and utilman.exe, cmd.exe files. There can be several reasons when you can’t sign-in to your account. You forgot your password, due to some virus, malware and permissions preventing you from login.
In that case, you can apply these commands.
- Insert your Windows 10 install media and boot from it.
- Press Shift + F10 to open the command prompt.
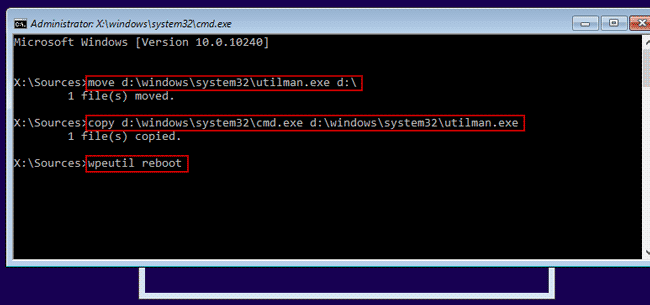
- Change the location of utilman.exe to the root of your system drive.
move c:\windows\system32\utilman.exe c:\
- Then replace utilman.exe in the system32 folder with cmd.exe.
copy c:\windows\system32\cmd.exe c:\windows\system32\utilman.exe
where c: is the os or system drive.
- Remove the Windows 10 Installation CD/DVD or USB.
- Type the following command to reboot from hard-drive.
wpeutil reboot
These are generally applied at X:\Sources of the installation disk.
- On booting, click the Utility Manager icon. This will open the Command Prompt, as we have changed the related system files.
- Now apply the same commands as above to create a local administrator account in Windows 10.
- Restore the Utility Manager.
- Reboot Windows 10 using installation disc. Press Shift + F10 to open the command prompt.
- Then enter the following command.
copy c:\utilman.exe c:\windows\system32\utilman.exe" to restore utilman.exe
Note: It is always better to restore Window 10 to its normal settings after this process is over.
- Restart Windows 10 and sign-in with your new local admin account.
- Then, you can change to your normal Microsoft or local account.
Pro and Cons of Local Account
Microsoft account is the parent for many services. These include OneDrive, Skype, Office, Meetings, Microsoft Store, Microsoft Edge, Microsoft Defender, Personalization and many other things. You can sync settings, files, documents, photos using this online service. The cloud-drive is useful if you are using multiple devices.
The advantage with a local account? You don’t require an internet connection. It is totally offline. So, the time delay of syncing files and connecting to the net, can be totally skipped. Hard-drive or SSD will be the primary source to store your files.
Also, you need to install software for your office and home requirements. This includes Adobe, CCleaner, photo and video-editing software, Office 2013 or earlier versions. The computer speed will increase.
You can directly download installation media of Windows 10 using this link here.
Windows 10 Home
This version does not have the facility to create a local account. After the end of the set-up, you need to register or login with a Microsoft account to use Windows 10.
During installation, Windows 10 automatically detects the Wi-Fi, Ethernet or other types of network. But, the option of a local account does not appear
You need to remove the Microsoft account from the Settings app and then proceed to the creation of a local account. But there is a work-around.
In the Home version, you need to check the label “I don’t have Internet” and skip the step to login to your Wi-Fi. For some users, the option of “Continue with Limited setup” is visible. Unplug the ethernet cable and reverse back to the first page.
Then the option to create a local account is visible. This is a little crooked.
You may end up pulling and inserting the cable several times. You can also use “Airplane mode” if you are using a laptop. This will prevent internet access.
Windows 10 Pro
But in Windows 10 Pro and Enterprise editions, you can always go to Settings to create a local account. This is possible even after the installation and using a Microsoft account.
During installation, the option of “Offline account” is visible at the bottom left-hand corner screen. But this will force you to create or login with a Microsoft account. You have to click the small “Limited Experience” button to create a local account.
Some users had a different experience with this process. If you are in a network, then a related term called “Domain Join” may be mentioned.
Which One – Microsoft or Local Account
The final conclusion is the speed of your computer vs cloud services. In case of a local account you don’t have access to cloud services. You have to manually open a browser and upload files. For other services also, like Microsoft Office 365 you need to either rely on apps.
It is for you to decide which one would you prefer!

