Last Updated:
The recent problem with Windows 10 Build 19041.450 is that it gives error 0x800f081f during installation of KB4571756. This kind of error is related to .NET Framework Installation in the earlier KB updates. As seen in this article, this update was released in Sep, 2020.
There is a known issue in KB4571756 update.
Users of the Microsoft Input Method Editor (IME) for Japanese or Chinese languages might experience issues when attempting various tasks. You might have issues with input, receive unexpected results, or might not be able to enter text.

Image Source: answers.microsoft.com
In this error code of 0x80070020, updates cannot be installed. In another case, there are boot problems due to error code like 0xc0000034
Nothing is mentioned about .NET framework related errors causing problems to installation of KB4571756. But as cited by many sources, earlier KB updates of Windows 10 also faced a similar issue because of .NET version 3.5.
In this article, we are going to look at how to solve 0x800f081f error in Windows 10.
Pre-Fix: Install the latest SSU (KB4577266)
You should update to Windows 10 1909 or 2004 version before resolving this KB related error.
Before installing the latest cumulative update (LCU) of KB4571756, you need to install the latest servicing stack update (SSU). In this regard, the recent SSU has been found to be KB4577266.
If you are using Windows Update, then this SSU is offered automatically. Otherwise, you can search Microsoft Update Catalog to download this SSU.
If you are still getting error 0x800f081f, you can follow these methods as a solution.
Method #1 : Download .NET FRAMEWORK 3.5 files
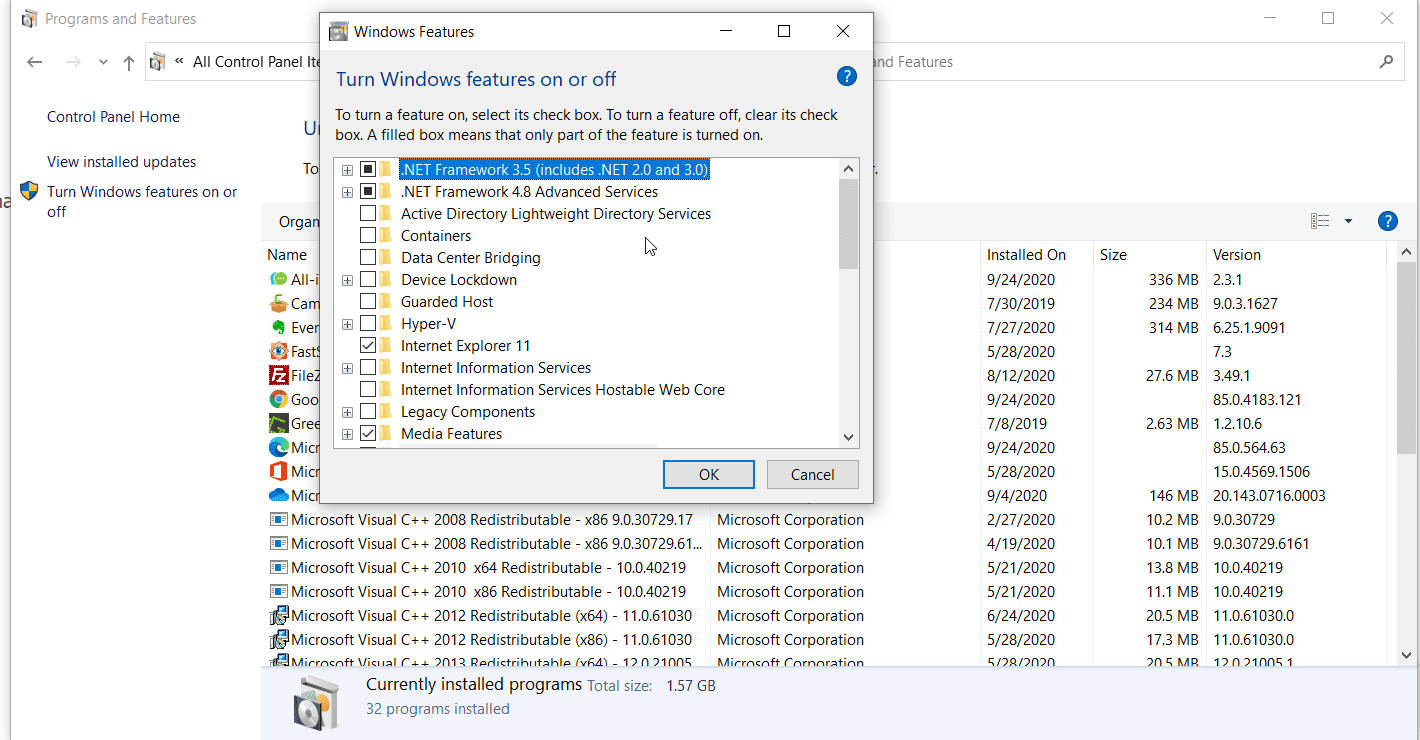
- Open Control Panel in Windows 10. (by typing a few words of it in the search bar).
- Click on “Programs and Features”.
- On the next page, click on “Turn Windows features on or off”.
- A pop-up screen will open.
- NET Framework 3.5 and 4.8 Advanced services can be seen.
- Generally, update to the latest version of Windows 10 to see these .NET installs.
- Uncheck the .NET Framework 4.7 or 4.8, if it’s checked. It will uninstall that .NET version.
- This will remove the .NET 4.7 or 4.8.
- Now check the .NET 3.5 version.
- Press OK of the pop-up to install this .NET version.
- If KB4571756 update installation is successful, re-check .NET 4.7 or 4.8.
Most probably this solution should work. If this didn’t work, go to the next method.
Method #2 : Install .NET 3.5 using DISM tool
To successfully remove 0x800f081f, you need to have Windows 10 installation media. This is because the source files of .NET 3.5 exist in this media. You can download the original Windows 10 source using Microsoft’s media creation tool from their website.
- Mount the USB or DVD where the Windows 10 installation source exists.
- Note the driver letter where it exists.
- Open Command Prompt with elevated privileges.
- Type the following command.
DISM /Online /Enable-Feature /FeatureName:NetFx3 /All /LimitAccess /Source:X:\sources\sxs
-
- Here x: represent the driver letter of Windows 10 installation media. If it is in D:, then the typical command would look like
DISM /Online /Enable-Feature /FeatureName:NetFx3 /All /LimitAccess /Source:D:\sources\sxs
- The recent Windows 10 2004 download consists of both 32 bit and 64 bit versions. Then you have to change the path to point to the related sources. Otherwise, you may see the 0x800f081f error again.
Method #3 : Install .NET 3.5 using Powershell
- Mount the Windows 10 installation media USB or DVD.
- Open Powershell as Windows Administrator.
- You can type it in the search box and right-click to “Run as administrator”.
- Enter the following command in the Powershell.
Enable-WindowsOptionalFeature –Online –FeatureName "NetFx3" –Source X:\sources\sxs -LimitAccess
- If the Windows 10 installation media contains 32bit or 64bit, you have to change the path correspondingly.
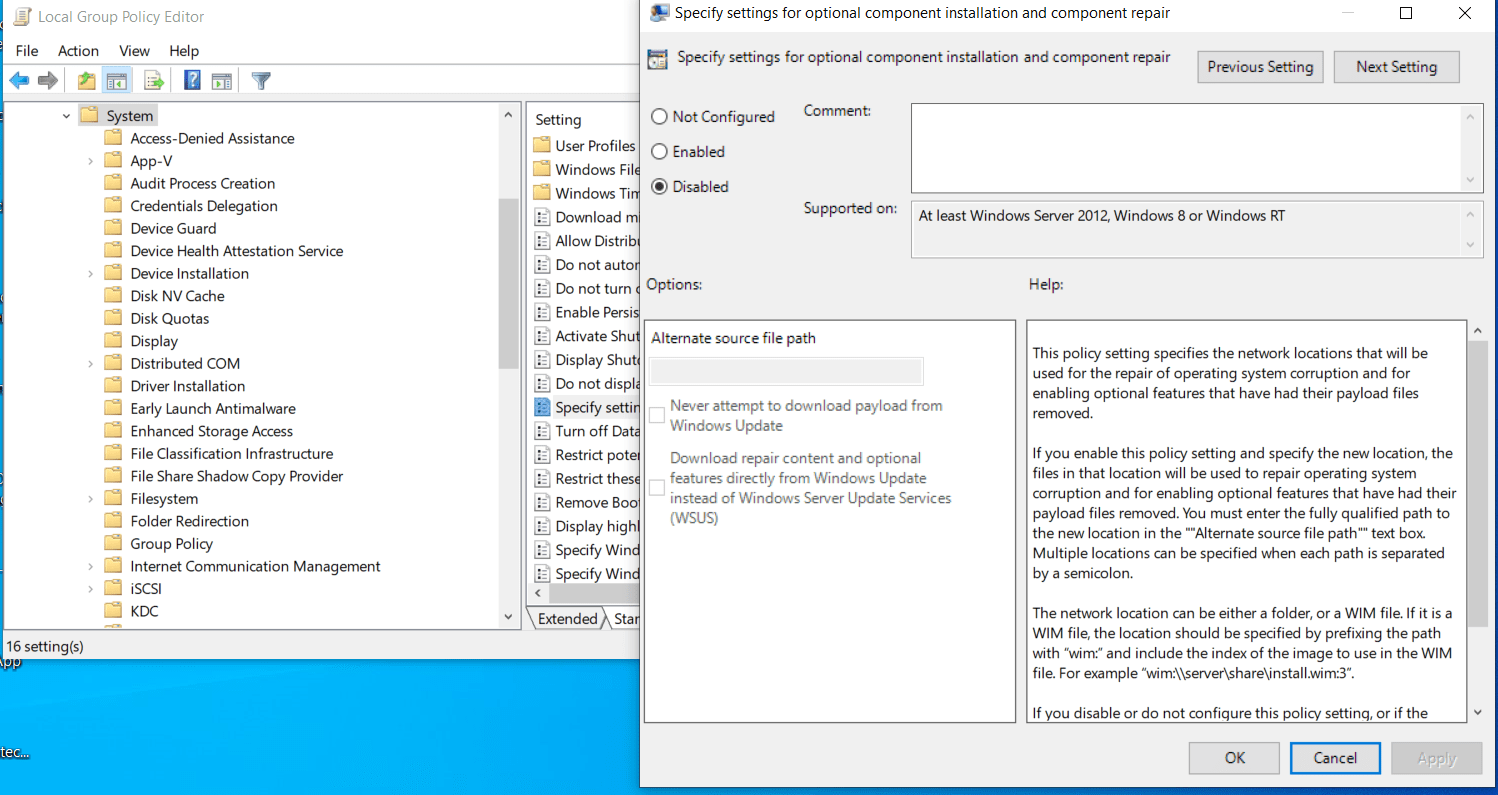
Method #4: Configure Group Policy to Activate Installation
There is a policy setting in Group Policy Editor, called “Specify settings for optional component installation and component repair”. This policy setting is used to find the right network locations of installation files. It aids in repair of operating system corruption and for enabling optional features.
This setting, if disabled, can cause activation issues. It is available for Windows 10 Pro users only.
- Type “gpedit.msc” in the Run dialog to open Group Policy Editor.
- Navigate to Computer Configuration ? Administrative Templates ? System.
- On the right hand side, you can find the entry “Specify settings for optional component installation and component repair”.
- Double-click that setting.
- On the left-top hand side, check the radio button “Enabled”.
- Click on OK.
This will activate the policy and its related functionality. You can read the policy description for its complete understanding.
Method #5 : Repair the Windows Update service
For KB4571756 to successfully install, the Windows 10 Update service should be up and running. If this service has any problem, then also the KB update won’t install properly.
To check if it’s running correctly, you can type services.msc in the Run dialog or open the Services app by typing the search box.
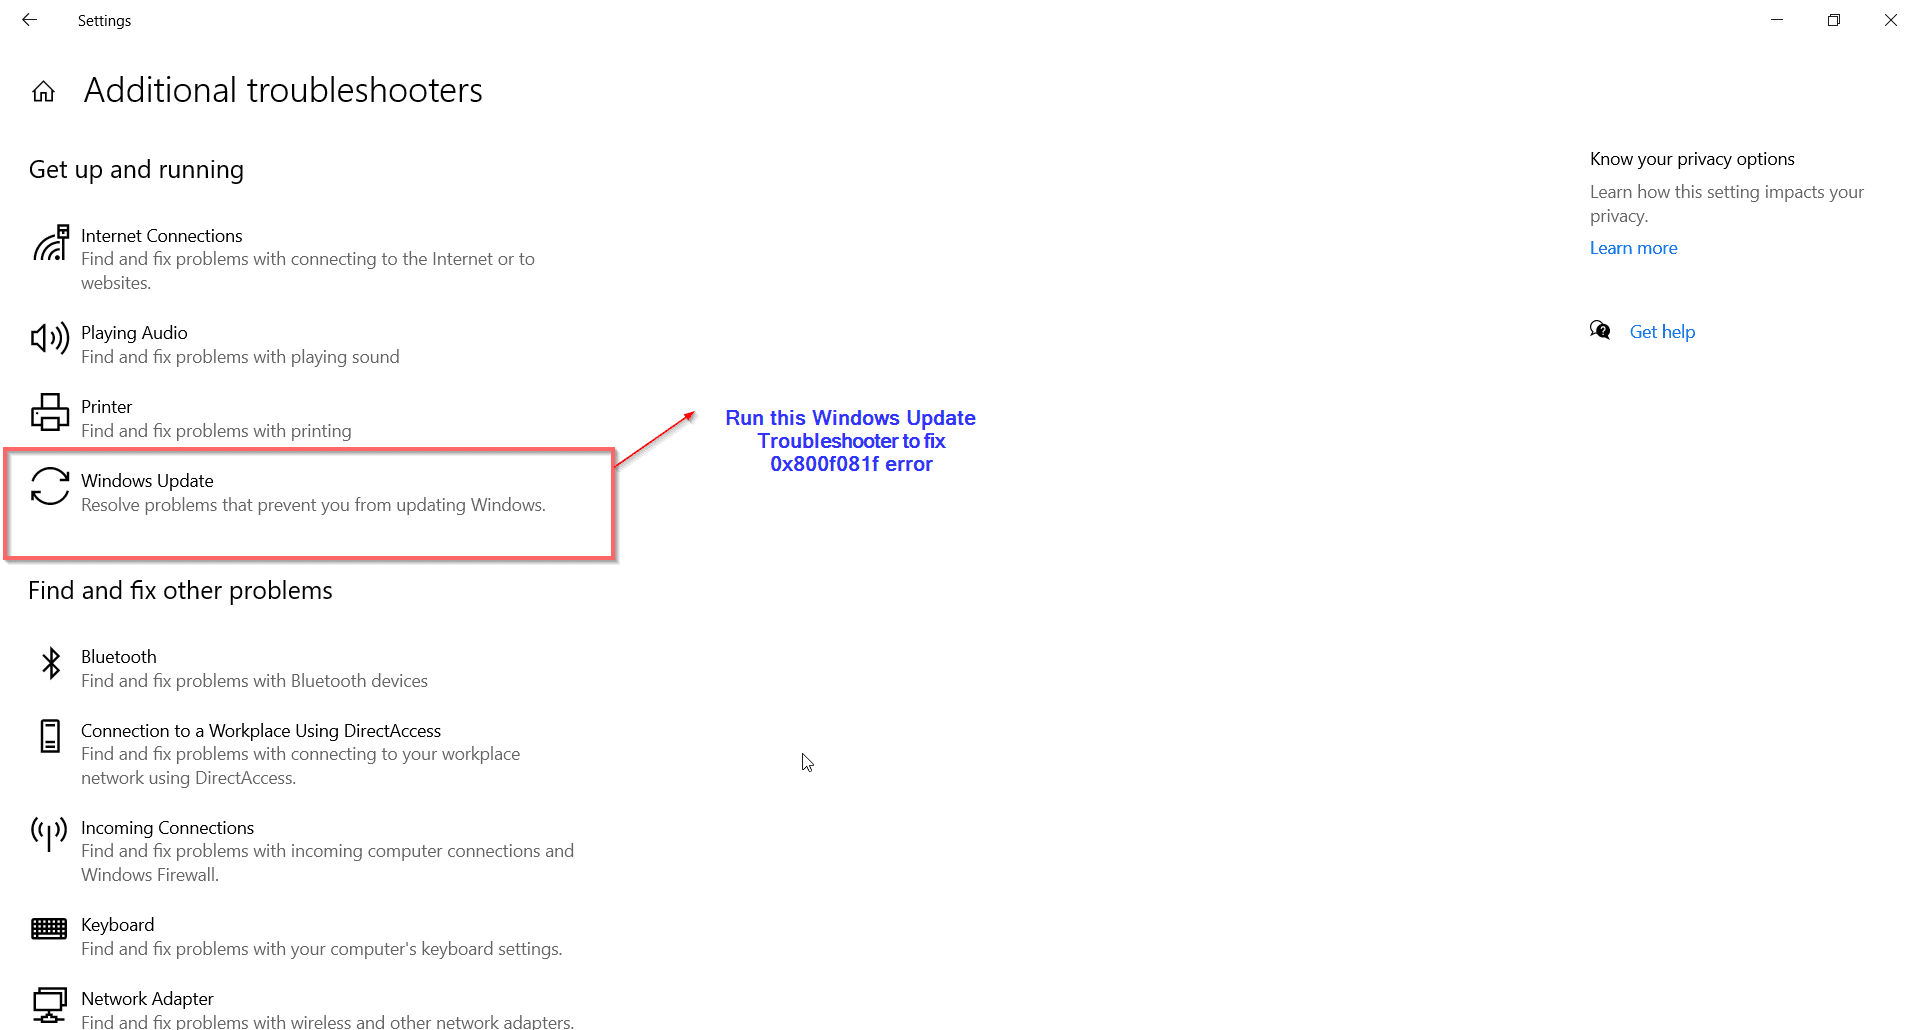
- Go to “Update & Security” in Windows Settings.
- Click on “Troubleshoot” on the right-hand side.
- Click on “Additional Troubleshooters”.
- Run the Windows Update troubleshooter on the next page.
- Most of the time, it finds the common problems related to Windows Update and fixes it.
Method #6: Download the .NET 3.5 CAB file from third-party source
Disclaimer: Please backup your computer or have a repair windows 10 installation media, when you use third-party software.
- Third-party download link – https://bit.ly/3cyqDqG
- Using the following link, download the .NET 3.5 CAB file.
- Then copy it to your root of your Windows 10 system drive like c:
- Launch Command Prompt with administrator privileges and type the following command.
Dism.exe /online /enable-feature /featurename:NetFx3 /All /Source:X:\ /LimitAccess
where x: is the windows 10 installation drive.

- Once it successfully installs, then you can try to install the KB4571756 update.
This should solve the 0x800f081f error.