Last Updated:
If you share your Windows 10 PC with other people, you might want to create a new profile for each user.
A profile is a set of settings and preferences that define how a user interacts with the PC, such as desktop background, theme, apps, and more.
By creating a new profile, you can ensure that each user has their own personalized experience on the PC, without affecting other users’ data or settings.
Create Profile Windows 10
There are two types of profiles you can create on Windows 10: a local profile and a Microsoft profile.
- A local profile is an offline account that does not require an email address or a password.
- A Microsoft profile is an online account that uses an email address and a password, and allows you to sync your settings, files, and Microsoft services across your devices.
In this blog post, we will show you how to create both types of profiles on Windows 10, and how to switch between them.
Create a local profile on Windows 10
To create a local profile on Windows 10, follow these steps:
- Open the Settings app by pressing the Windows key + I, or by clicking the Start button and then the gear icon.
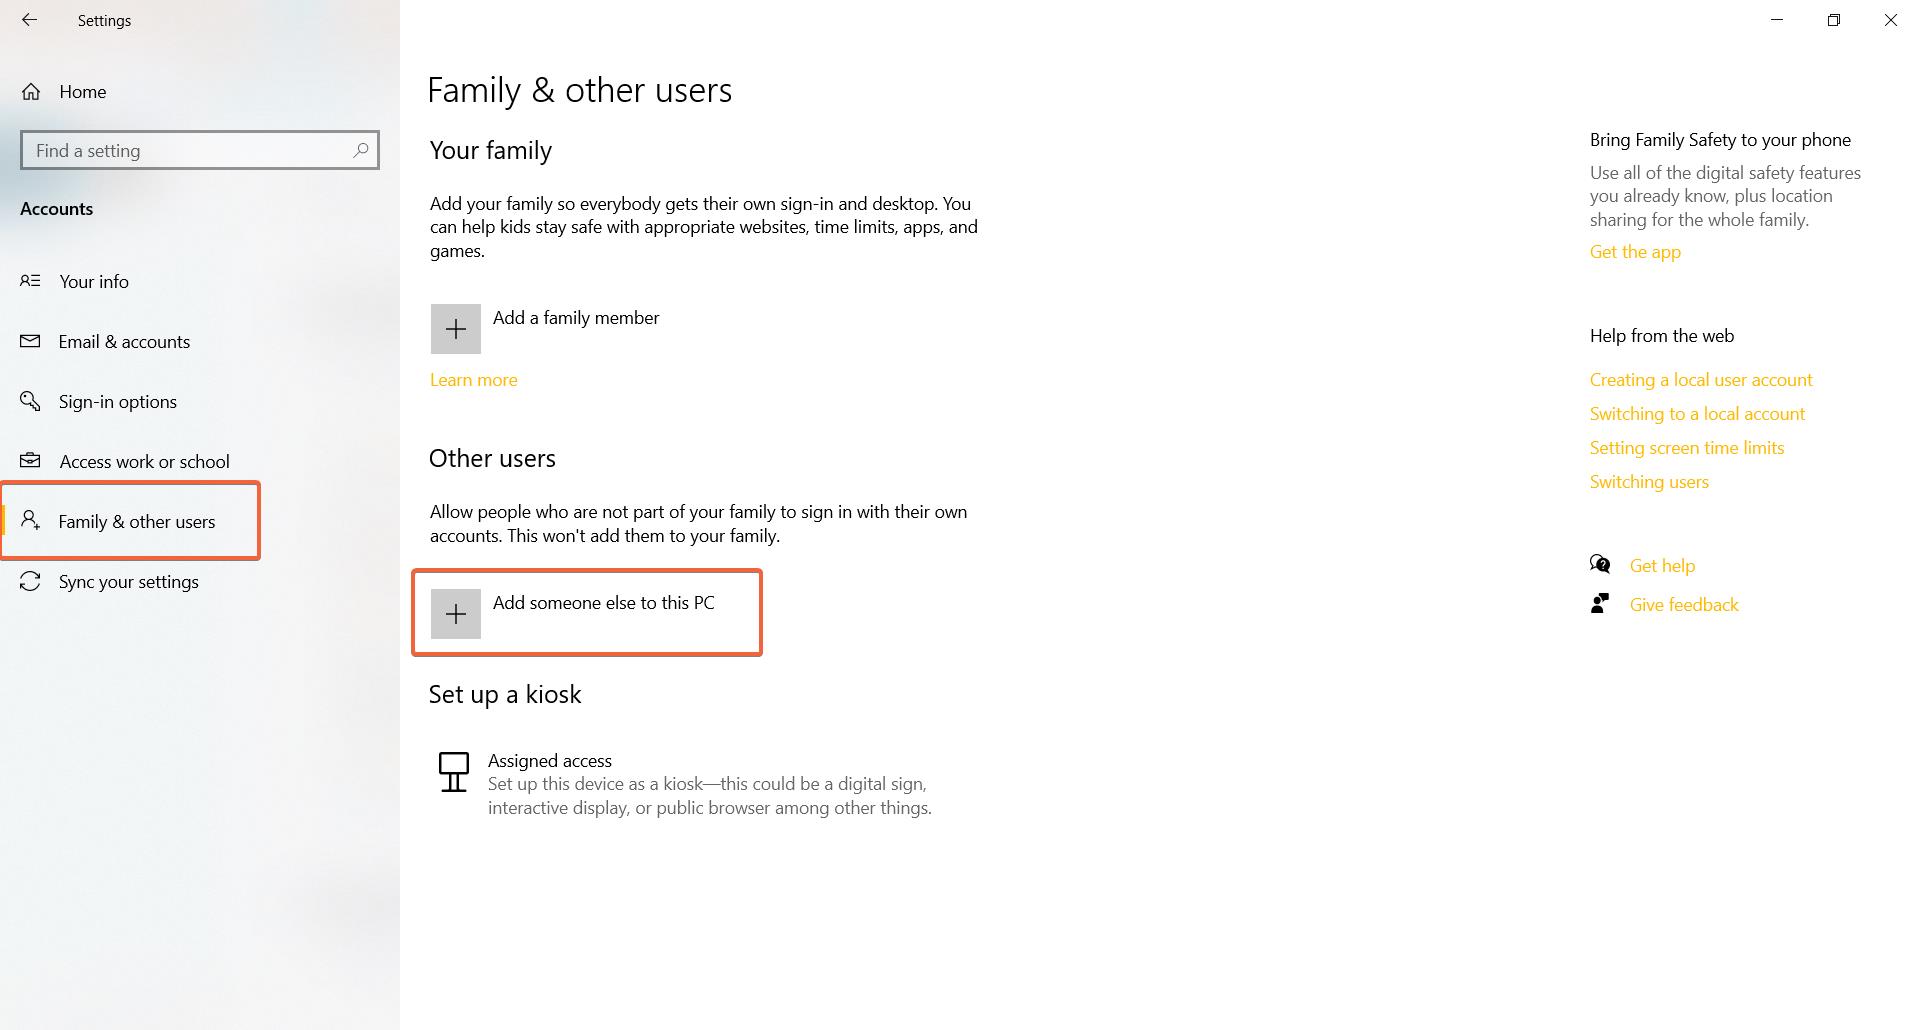
- Click on Accounts, and then on Family & other users in the left pane.
- Under Other users, click on Add someone else to this PC.
- On the How will this person sign in? screen, click on I don’t have this person’s sign-in information.
- On the Create an account for this PC screen, click on Add a user without a Microsoft account.
- Enter a user name, a password (optional), and a password hint (optional), and then click on Next.
- The new local profile will be created and added to the list of other users.
Create a Microsoft profile on Windows 10
To create a Microsoft profile on Windows 10, follow these steps:
- Open the Settings app by pressing the Windows key + I, or by clicking the Start button and then the gear icon.
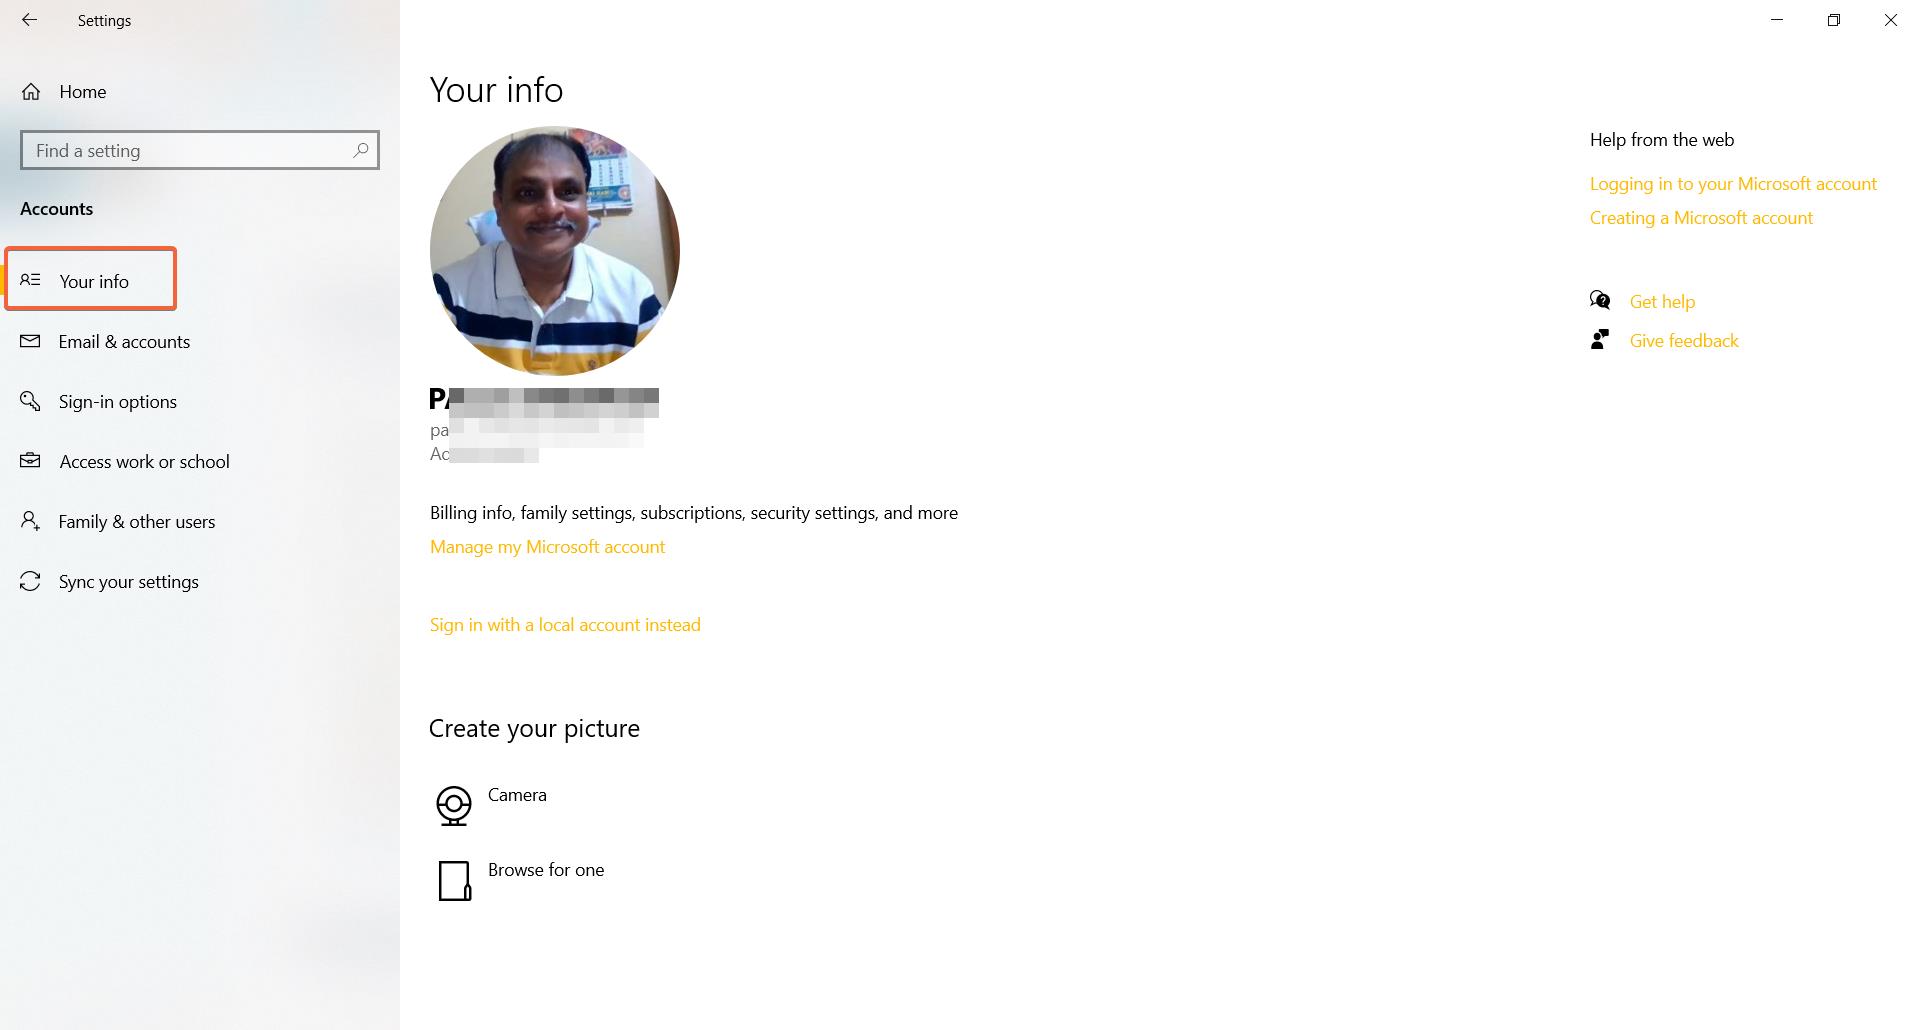
- Click on Accounts, and then on Your info in the left pane.
- Click on Sign in with a Microsoft account instead.
- On the Sign in with Microsoft screen, enter your email address or phone number, and then click on Next.
- Enter your password, and then click on Sign in.
- If prompted, enter a verification code that will be sent to your email or phone, and then click on Next.
- If prompted, choose whether you want to create a PIN for your account, and then follow the instructions.
- The new Microsoft profile will be created and linked to your PC.
Switch between profiles on Windows 10
To switch between profiles on Windows 10, follow these steps:
- Click on the Start button, and then on your profile picture at the top left corner of the menu.
- You will see a list of all the profiles available on your PC. Click on the one you want to switch to.
- Enter your password or PIN if required, and then wait for the profile to load.
You can also use the Ctrl + Alt + Delete keyboard shortcut to access the lock screen, where you can switch between profiles by clicking on them.
Conclusion
Creating a new profile on Windows 10 is a simple way to share your PC with other people without compromising your privacy or preferences.
You can choose between a local profile or a Microsoft profile depending on your needs and preferences. You can also easily switch between profiles whenever you want.
We hope this blog post was helpful for you. If you have any questions or feedback, please leave them in the comments section below.