Last Updated:
Shared Experiences is for cross-platform support in Windows 10.
Bluetooth devices. Mobile phones. Wireless adapters. Wi-Fi. Tablets. All these devices can communicate using this feature.
Moreover, enable this feature to connect Android apps, which allows users to seamlessly integrate their mobile applications with their desktop experience.
In order to send/receive phone messages and see phone notifications on your desktop.
Another highlight is that two Windows 10 devices can communicate with each other.
This functionality is only possible with this setting turned on.
Your Phone app in Windows 10 will only work if this feature is ON.
In some models of Samsung, we can also control the Android apps from a laptop.
The advantage in 2021 is that mobile settings too can be controlled.
In this review, we will examine the details of shared experience settings.
What are the cons?
In other words, most people tend to work on their desktop or laptop.
This includes office applications like Outlook, Excel, Word, Note, and PPT.
However, they prefer to avoid interruptions from notifications and messages on their phones.
People want to use the mobile and desktop as separate entities.
Above all, the important factor is the speed!
In addition, too many devices using Shared Experiences will make Windows 10 computers slow.
For example, opening the Start Menu, using File Explorer, Group Policy Editor, app notifications, and others can slow down.
For this purpose, to speed up Windows 10, users disable Shared Experiences completely.
In the latest 20H2 and 2004 updates, this system setting can be changed very easily.
In this tutorial, we shall see 3 methods to enable and disable Shared Experiences in Windows 10.
Method #1 – Enable/Disable Shared Experiences using Settings app
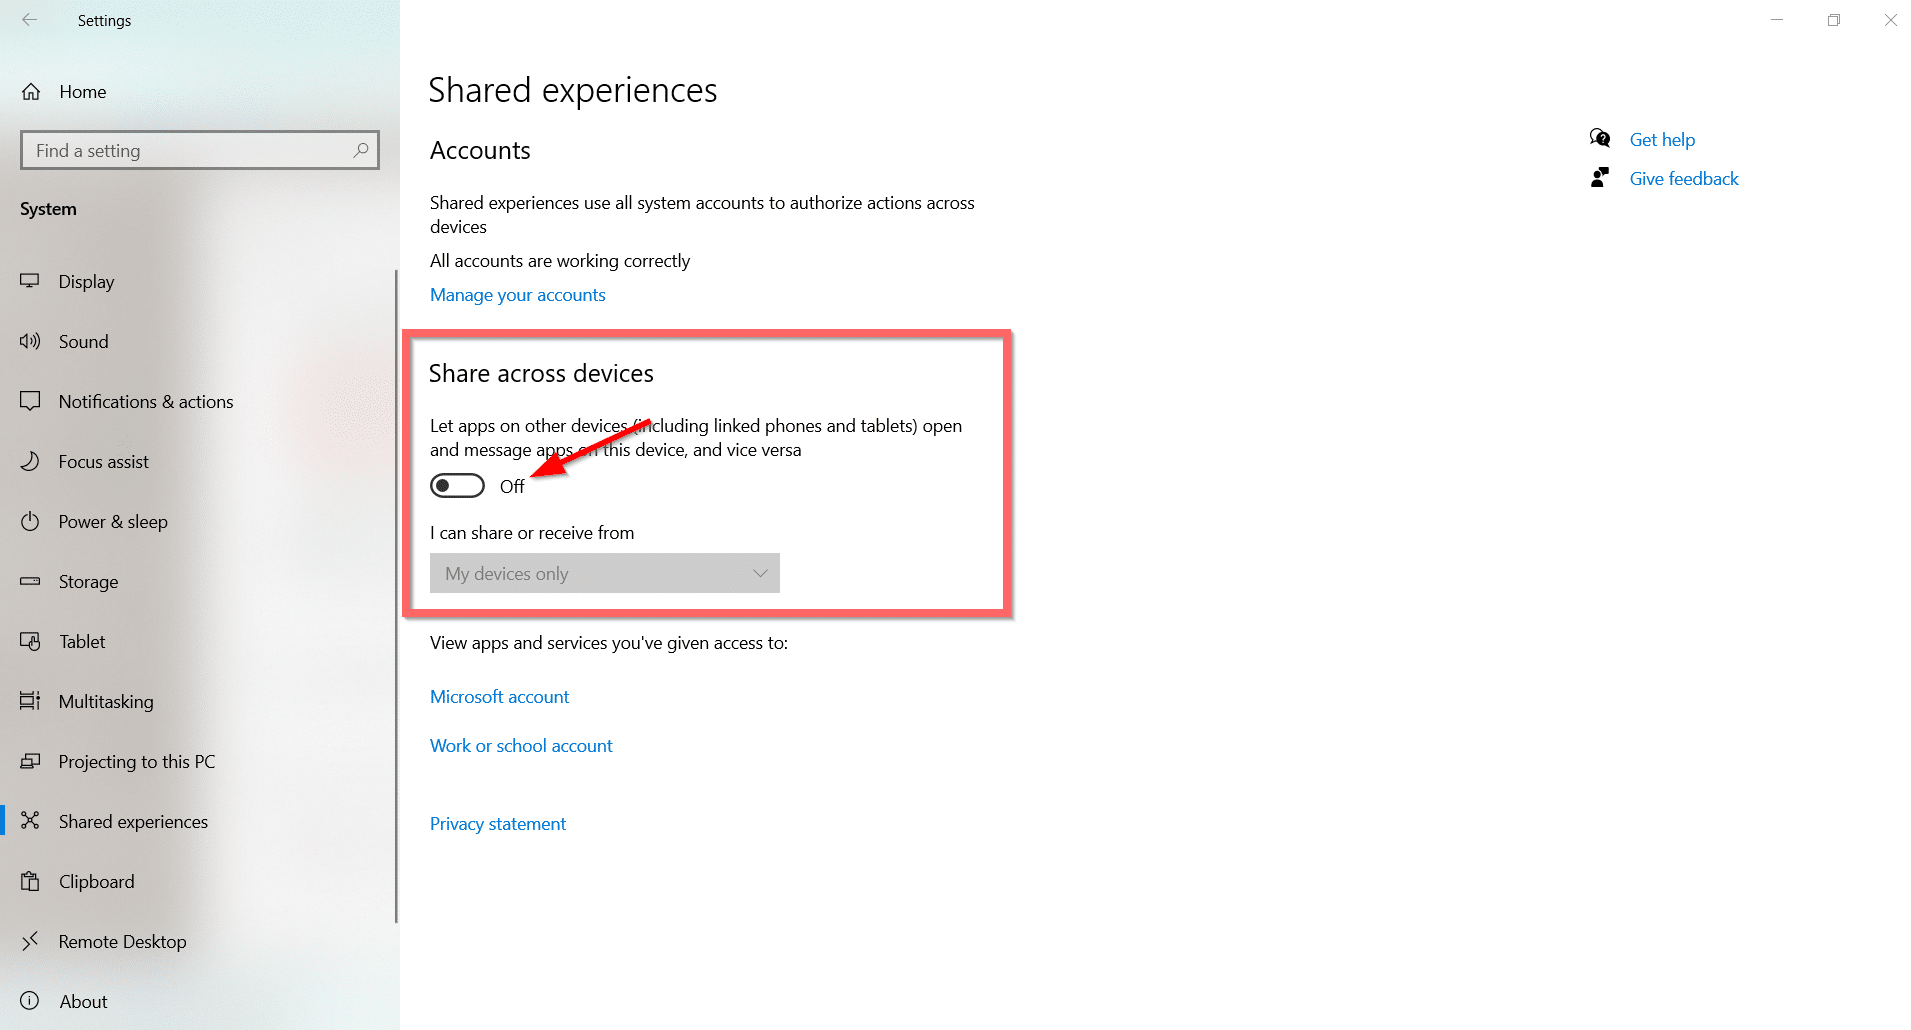
- Press the Win and I keys together to open the Settings app.

- System > Shared Experiences.

- Shared Experiences uses all system accounts to make cross-platform devices work easily.
- Share across devices is available below.
- To enable Shared Experiences, move the slider to ON.

Note: Enable this feature. Apps on other devices communicate with apps on the Windows 10 computer.
Another two options are there below—I can share or receive from
- My devices only
- Everyone nearby
The first option will let you communicate with your personal or family devices. On the other hand, the second option will connect with all the devices that are close by.
- To disable it, move the slider to OFF.
This YouTube review will talk about “what Microsoft shared experience settings are.” You get a brief overview of this feature in Windows 10. How is it useful for cross-platform device support? Real guide on how to enable or disable shared experiences. Connect Your Phone app and other apps to Windows 10.
Method #2 – Enable/Disable Windows 10 Shared Experiences using GPO
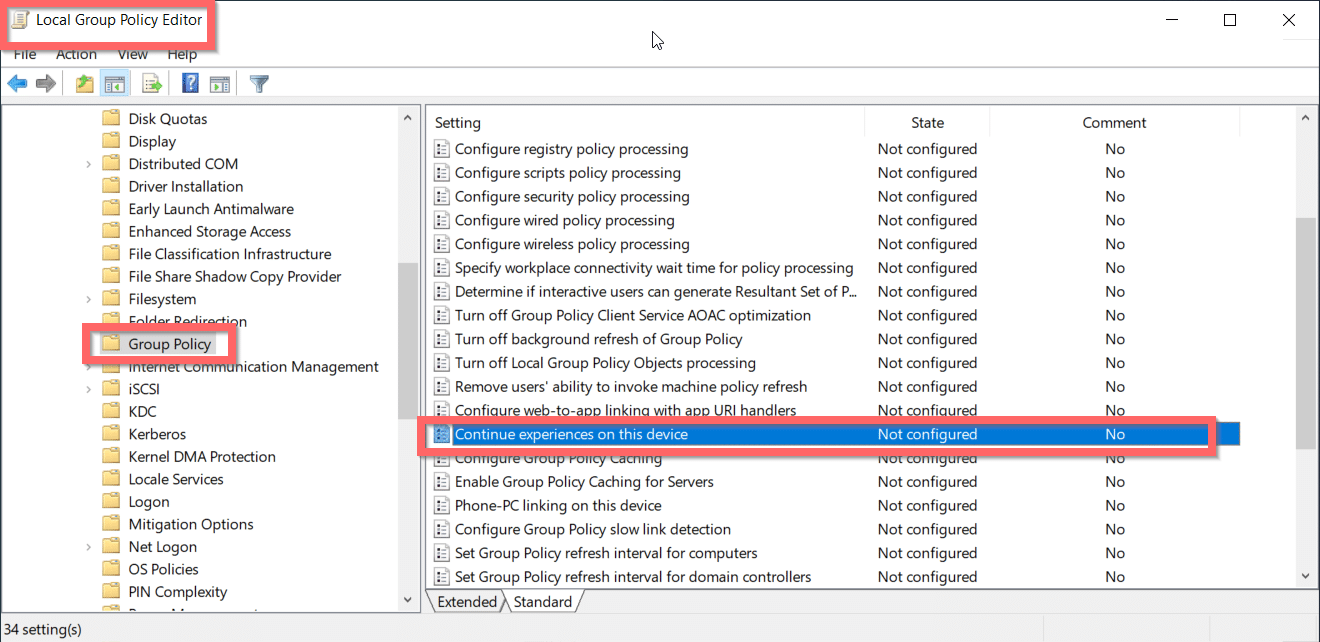
Group Policy Editor can be used to disable and enable the Shared Experience settings.
- Type a few words of “local group policy editor” in the Windows 10 search box.
- “Edit group policy” as a Control Panel item is visible. Click on it.

- An alternate way is to type the command “gpedit.msc” in the Run dialog box.
- Navigate to the following path:
Computer Configuration > Administrative Templates > System > Group Policy
- Select “Standard” from the options on the right-hand side.
- Double-click the setting “Continue experiences on this device” on the right-hand side.
Note: Set to “Not Configured“”,” by default. The Settings app value in Windows 10 is set to “Not Configured” by default.
- To disable Shared Experiences, check the option “Disabled.” Click on Apply. Close the window.
This will work in the Windows 10 Pro version, where you have administrator privileges. Home users are not liable to use the Local Group Policy Editor.
- To enable this setting, check the option “Enabled.” This will apply shared experiences across all the users on this system.
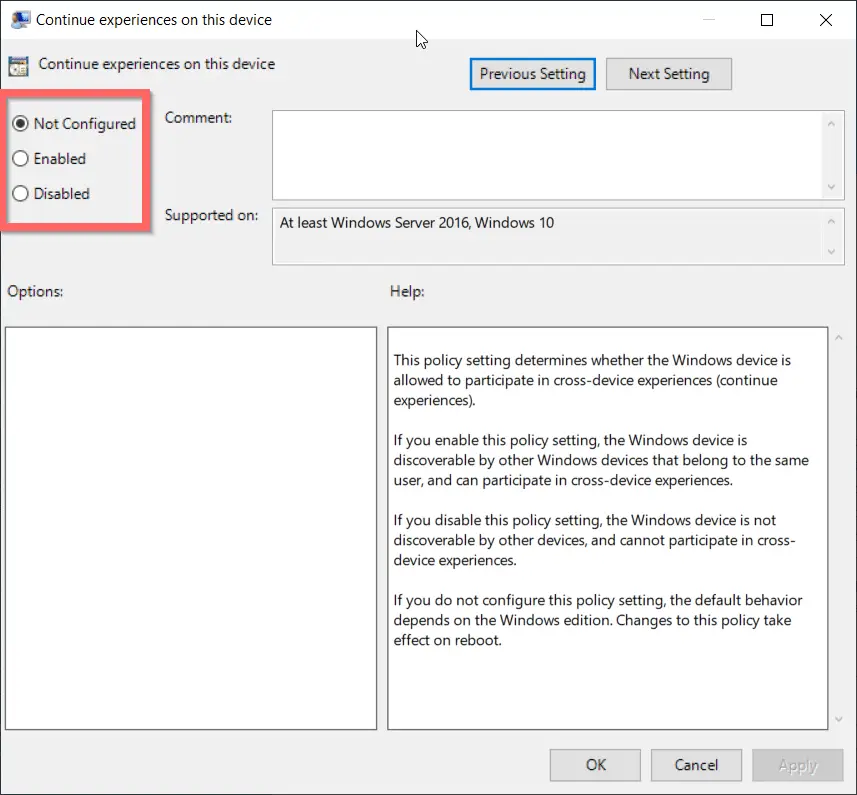
Useful for administrators of a network in an office. They want to disable Shared Experiences across all computers. Run a script or batch file to make this work.
Method #3 – Enable/Disable Shared Experiences in Windows 10 – Registry Editor
- Type “Registry Editor” in the Windows 10 Search box. This will open that app.
- Allow permission settings to make the app work.
- Go to the following path:
HKEY_LOCAL_MACHINE\SOFTWARE\Policies\Microsoft\Windows
- Right-click the Windows folder key and create the “New” folder.

- Name the key “System” and press Enter.

- Right-click the newly created folder key and create “DWORD (32-bit) Value.” ”.
- Name the key “EnableCdp” and press Enter.

- Double-click the key and set the value to “1.”
Close the Registry Editor. Then restart the computer to make registry settings work. From now on, your Shared Experiences is disabled on this computer. This procedure works for Windows 10 Pro versions where you have administrator privileges.
In case you want to enable the feature again, either delete the “EnableCdp” key or set the value to “0.” This way you will get the normal functionality of multiple devices communicating with the Windows 10 system.