
What is a good Windows 11 boot time? A decent Windows 11 boot time is under 15 seconds from the power button to the login screen on a system with an SSD or NVMe drive.
Machines with rapid startup enabled and minimal startup apps often boot in 5 to 10 seconds, while older hard drives can take a minute or more.
INTRODUCTION
Watching the login screen crawl by every morning gets old fast—a slow Windows 11 boot time is one of the most common frustrations home and office users bring to me.
Whether you’re on a desktop or laptop, boot speed affects how quickly you can actually start working, and it’s often fixable in minutes rather than requiring a new PC.
In this guide, I’ll explain exactly what determines how fast your Windows 11 PC starts up, how fast startup and hibernation actually work under the hood, and the specific settings, hardware upgrades, and simple tricks that reliably help your system boot faster.
You’ll also get a step-by-step way to measure boot time yourself so you can confirm every fix is actually working.
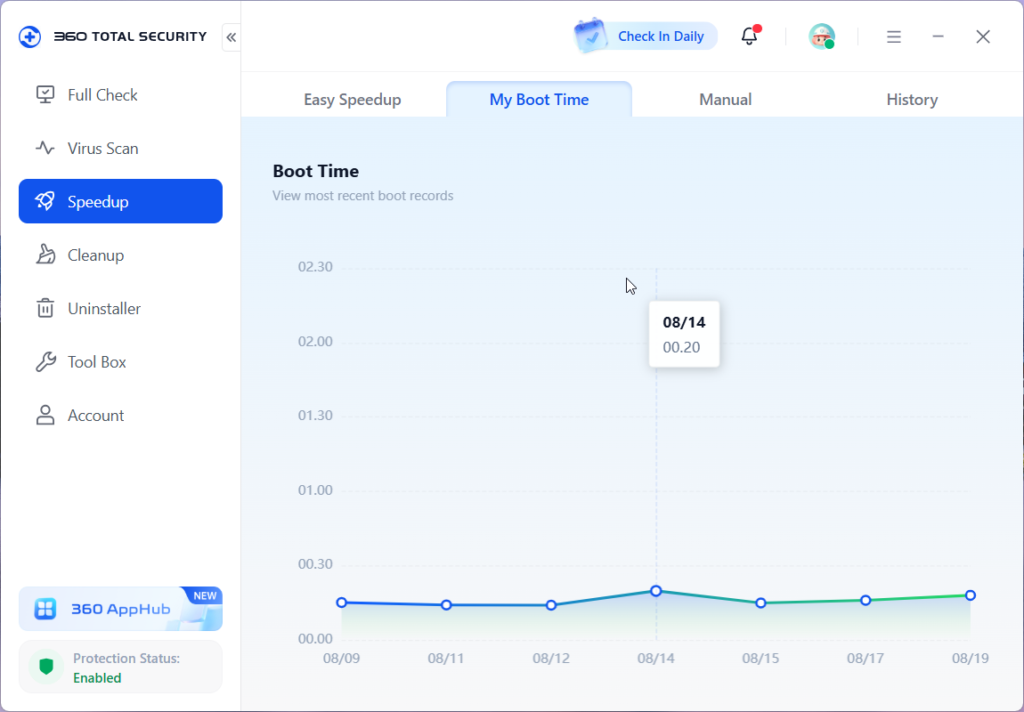
WHAT DETERMINES YOUR WINDOWS 11 BOOT TIME
Before changing settings, it helps to understand what actually controls boot time on a modern Windows 11 PC. Four things matter most:
- Storage type — a solid-state drive or nvme drive boots dramatically faster than a mechanical hard drive
- CPU and RAM—both intel and amd processors handle the boot process differently, and low ram can bottleneck startup regardless of drive speed
- Startup load—how many startup programs and background apps launch the moment you boot into windows
- Firmware and motherboard—your motherboard chipset (whether it’s an msi board, an am5 platform, or an older chipset) and bios settings affect how quickly hardware initializes before Windows even loads
Brands like Acer and prebuilt desktops often ship with unnecessary startup software preloaded, which is one of the most overlooked reasons a brand-new Windows 11 PC already boots slower than it should.
UNDERSTANDING FAST STARTUP: THE FEATURE MOST PEOPLE MISUNDERSTAND
Windows 11 includes a feature called “fast startup” that’s been around since Windows 8 and carried forward from lessons learned since the Windows XP era, when a cold boot meant reloading the entire Windows kernel from scratch every time.
How Fast Startup Actually Works
Fast startup is enabled by default on most systems. Instead of a full shutdown, Windows saves the Windows kernel and loaded drivers into a hibernation file on disk—essentially a saved state—so the next boot resumes from that file instead of starting fresh. This is why fast startup works more like a hybrid between hibernation and a full boot.
Key distinction:
- Full shutdown — everything closes, kernel reloads completely on next boot (slower, but cleanest)
- Fast startup enabled — kernel state is saved to disk, next boot resumes faster
- Sleep mode — session stays in RAM, near-instant resume, but uses power
- Hibernate — full session saved to disk, slower than sleep but no power draw
When to Disable Fast Startup
Ironically, fast startup can sometimes cause boot problems—especially after a driver update or dual-booting with another OS. If your PC won’t boot into Windows properly, try to disable fast startup:
- Open Control Panel > Power Options
- Click “Choose what the power buttons do”
- Click “Change settings that are currently unavailable.”
- Uncheck “Turn on fast startup (recommended).”
- Save changes and reboot
Real Microsoft Forum Fixes That Reduced Windows 11 Boot Time
Most boot-time advice online repeats the same generic checklist. These five fixes are different—each one comes from a real Microsoft Q&A thread where the person asking the question came back and confirmed the fix actually worked, not just a suggested answer that went untested.
The registry tweak that fixed a slow desktop after months of decline
One user watched their MSI PRO DP180 desktop go from a fast boot to a boot time that got worse over several weeks. The solution that got marked as the accepted answer combined three things done together: updating the BIOS to correct an Intel microcode issue, updating the MSI-specific drivers, and disabling BitLocker before making those changes.
On top of that, the user found a second fix that made a real difference — adding a registry value called WaitForIdleState under the Session Manager Power key and setting it to 0. They confirmed the fix directly, saying it “really works.”
A quick note on this one: it’s a community workaround, not an official Microsoft-published setting, so treat it as a last resort and back up the registry first.
Reinstalling every manufacturer driver after a fresh Windows 11 install
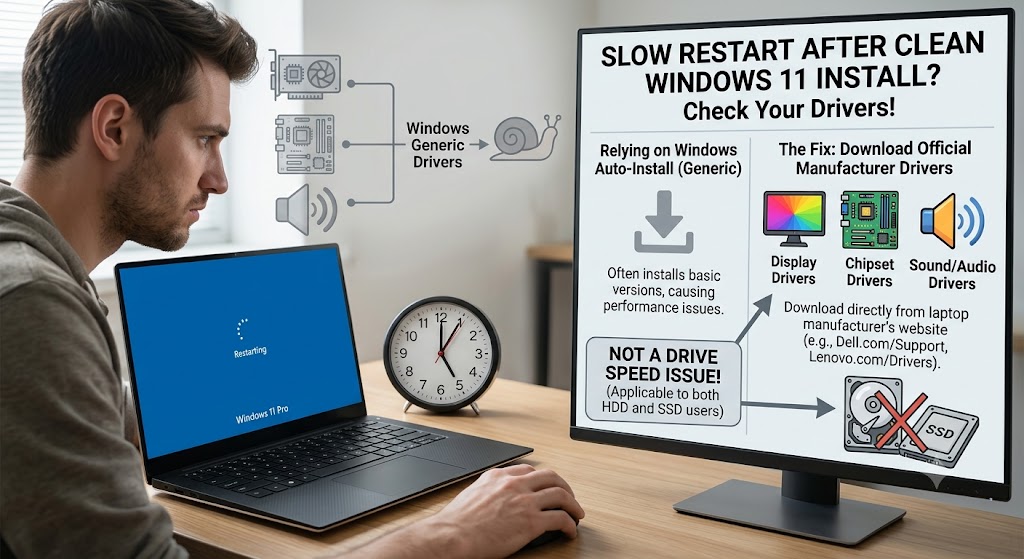
A common trap: after a clean install, Windows often loads generic drivers instead of the ones built specifically for your hardware. One user’s freshly reinstalled Windows 11 Pro had gone from running perfectly to taking a five-minute restart.
The accepted, helpful-voted fix was straightforward—check whether display, chipset, sound, and other required drivers were actually installed after the fresh install and download them directly from the laptop manufacturer’s website instead of relying on Windows to auto-install generic versions.
This rule applies whether you’re on a hard drive or a solid-state drive, since the slowdown here has nothing to do with drive speed.
The clean boot method that took one user from 6 minutes to under 3
This improvement is the most clearly measured result across these threads. A user with a boot time that had stretched to around six minutes followed the standard clean boot process:
- Open System Configuration and select Hide all Microsoft services, then Disable all
- Open the Startup tab, launch Task Manager, and disable every item listed there
- Close Task Manager, then click OK in System Configuration and restart
The user came back afterward and confirmed the real result — boot time dropped to under three minutes, with about two more minutes before the system felt fully usable. That’s a genuine before-and-after number, not just a suggested step.
Fixing a BIOS boot order that keeps changing itself
One of the stranger confirmed issues: a system that kept modifying its boot order and attempting to boot over the network in the middle of the night. A Microsoft Independent Advisor diagnosed this as a side effect of a recent Windows or firmware update adjusting the boot manager for Secure Boot compliance, with network boot options activating if left enabled in BIOS.
The confirmed fix was to enter BIOS, set the preferred boot drive as the first option in the boot order, disable network boot and wake features, and then check Windows Update and the manufacturer’s site for any pending firmware updates.
Updating the full driver stack after a Windows update, not just after installs
This approach is a variation on tip two, but tied specifically to slowdowns that appear after a Windows update rather than a fresh install.
A user whose Windows 11 “randomly got slow” after switching editions had their issue resolved with the same core fix—installing the complete driver set (display, chipset, sound, and other core drivers) from the laptop manufacturer’s website. This suggestion was marked as the accepted answer.
What these five fixes have in common
None of these confirmed fixes are about swapping a hard drive for an SSD. Every one of them points to drivers, firmware, or startup load as the real cause — which lines up with how Microsoft’s own support responses actually treat slow boot complaints.
A hardware upgrade only gets recommended once these software-level causes have been ruled out first.
If your boot time has crept up gradually rather than always being slow, start with the clean boot test above. It takes ten minutes and tells you immediately whether the problem is a background app or something deeper in your driver or firmware setup.
HOW TO MEASURE YOUR BOOT TIME
Before making changes, measure your boot time so you can confirm the improvement.
Method 1: Stopwatch Test
Press the power button, and time from the first sign of the manufacturer logo to a usable login screen. A well-optimized Windows 11 PC with an SSD should land somewhere between 5 seconds and 10 seconds for this stage.
Method 2: Task Manager Startup Impact
Task manager shows exactly how much each app adds to your system’s boot time.
- Press Ctrl+Shift+Esc to open Task Manager.
- Click the Startup tab
- Review the “Startup impact” column—apps marked “High” are your biggest targets
STEP-BY-STEP GUIDE TO IMPROVE BOOT TIME
Work through these in order—each targets a different bottleneck in the boot process.
Step 1: Disable Unnecessary Startup Apps
Open task manager > Startup tab, and disable anything marked High impact that you don’t need running the moment you boot into Windows. This is the single fastest way to improve boot time on most systems.
Step 2: Confirm Fast Startup Is Enabled
Check that fast startup is enabled through Control Panel > Power Options > “Choose what the power buttons do,” as described above. If it’s off and you’re not troubleshooting a boot issue, turning it back on will help your system’s boot time.
Step 3: Run a Clean Boot to Diagnose Conflicts
A clean boot starts Windows with a minimal set of drivers and startup programs, useful for isolating what’s actually slowing things down.
- Open System Configuration (msconfig)
- Under Services, check “Hide all Microsoft services,” then Disable all remaining
- Go to the Startup tab and disable everything via task manager
- Reboot and time your boot time again
Step 4: Run SFC Scannow to Check for Corruption
Corrupted system files can silently slow the boot process. Open Command Prompt as admin and run scannow (sfc /scannow) to repair any damaged Windows installation files.
Step 5: Run Disk Cleanup
A cluttered boot drive takes longer to initialize. Run disk cleanup to clear temporary files, old Windows update caches, and system logs that accumulate over time.
Step 6: Check for Windows updates.
An outdated Windows installation sometimes carries unresolved boot-performance bugs. Go to Settings > Windows Update and install any pending updates — Microsoft regularly ships boot-process performance fixes.
Step 7: Check BIOS Settings
Enter BIOS setup (usually Del or F2 at startup) and confirm Fast Boot is enabled and that your boot drive is correctly prioritized first in the boot order—a misconfigured boot order can add several seconds before Windows even starts loading.
Step 8: Upgrade to an SSD or NVMe Drive
If you’re still running on a mechanical hard drive, this is the biggest single upgrade available. A 500GB SSD or an M.2 NVMe drive, like the WD Black SN850, can cut boot time from over a minute down to 10 seconds or less.
HDD VS SSD VS NVME: BOOT TIME COMPARISON
| Drive Type | Typical Boot Time | Notes |
|---|---|---|
| hdd (mechanical hard drives) | 45–90+ seconds | Spinning platters add mechanical latency |
| ssds (SATA) | 15–25 seconds | Major upgrade over HDD, still bottlenecked by SATA speeds |
| nvme / m.2 | 5–10 seconds | Directly connects to the motherboard for minimal latency |
If your desktop or laptop still uses an HDD as the boot drive, migrating your Windows installation to a solid-state drive is consistently the single most effective fix for Windows 11 boot time.
STATISTICS: PROOF THESE FIXES WORK
- Community benchmarking threads consistently show that switching a boot drive from a mechanical hard drive to an NVMe drive cuts boot time by roughly 70–85%, moving systems from the 45–90 second range down to 5 seconds to 10 seconds.
- Task Manager’s Startup Impact data is frequently cited in troubleshooting threads as the fastest way to identify which startup apps are adding the most delay—disabling just two or three “High impact” apps often shaves several seconds off boot time on its own.
- Fast startup, being enabled by default, is repeatedly flagged in support forums as both a performance feature and an occasional troubleshooting culprit — Microsoft’s own guidance recommends testing with it disabled whenever boot issues appear after a driver or firmware update.
Real fact: Fast startup only affects the transition from a full shutdown—it has no effect on reboot speed, since a reboot always fully reloads the Windows kernel regardless of the fast startup setting.
BEST PRACTICES FOR A FASTER STARTUP
- Keep your boot drive to a solid-state drive or nvme wherever possible—this outweighs almost every software tweak combined
- Periodically review the Startup tab in task manager, since new software often adds itself back to startup after updates
- Run disk cleanup monthly to keep your windows installation from accumulating clutter that slows the boot process
- Check bios settings after major firmware updates, since some updates reset Fast Boot to disabled
COMMON MISTAKES TO AVOID
- Assuming more ram alone will fix a slow boot time — RAM matters more for running apps than for the boot process itself
- Leaving dozens of startup programs enabled without ever checking task manager
- Confusing sleep mode, hibernate, and full shutdown—each behaves differently, and testing boot speed after the wrong one gives misleading results
- Disabling fast startup permanently without a real reason—for most users, fast startup works fine and shouldn’t be turned off by default
RECOMMENDED TOOLS
- Task Manager — built into windows 11, the fastest way to check startup apps and their impact
- Disk Cleanup — built-in utility to clear clutter slowing your boot drive
- sfc /scannow — Command Prompt tool to repair corrupted windows installation files
- A stopwatch or phone timer — the simplest way to measure boot time consistently across changes
PRACTICAL EXAMPLE
A home office user running Windows 10 upgraded to Windows 11 on an aging hard drive and found their system’s boot time had grown to nearly 90 seconds. After migrating the Windows installation to a 500 GB SSD and disabling three high-impact startup apps in Task Manager, boot time dropped to under 10 seconds—with fast startup enabled to do the rest of the work on subsequent boots.
FREQUENTLY ASKED QUESTIONS
Why is my Windows 11 boot time suddenly slower than before?
This is usually caused by new startup programs installed alongside recent software, a pending Windows update, or a nearly full boot drive. Check Task Manager’s Startup tab first, then run Disk Cleanup to rule out clutter.
Does disabling fast startup slow down my PC?
Yes, slightly—disable fast startup and your next cold boot will take longer since Windows reloads the full Windows kernel instead of resuming from the hibernation file. Only disable it if you’re troubleshooting a specific boot issue.
What’s the difference between hibernate and fast startup?
Hibernate saves your entire open session to disk and fully powers off—good for laptops. Fast startup only saves the Windows kernel‘s saved state, not your open apps, which is why it resumes faster than a true hibernation but slower than sleep mode.
Can too many startup apps really affect Windows 11 boot time that much?
Yes. Each startup program loaded at startup adds initialization time before your desktop becomes responsive. Checking Task Manager’s Startup Impact column and disabling unnecessary startup apps are two of the simple tricks that consistently help improve boot time.
Should I upgrade my HDD to an SSD just to boot faster?
If your boot drive is still a mechanical hard drive, yes—it’s the single highest-impact upgrade for Windows 11 boot time, often cutting boot time by more than half regardless of your Intel or AMD processor.
How do I check if fast startup is enabled on my Windows 11 PC?
Go to Control Panel > Power Options > “Choose what the power buttons do.” If the “Turn on fast startup” checkbox is checked, fast startup is enabled; this setting sits under Shutdown settings near the bottom of that page.
CONCLUSION
A slow Windows 11 boot time is usually due to one of a few fixable causes—too many startup apps, an aging hard drive, outdated BIOS settings, or fast startup misconfigured for your setup. Check Task Manager’s Startup tab, confirm your power options, and consider upgrading to a solid-state drive if you’re still using an HDD.
Measure boot time before and after each change, and you’ll know exactly which fix made the difference—most users can realistically get their Windows 11 PC booting in 10 seconds or less without buying new hardware at all.
