If your Windows 11 update keeps failing with error 0x80242016—Failed to Install—you’ve hit one of the most widely reported Windows Update errors in 2025 and 2026.
This error appeared in force during the October 2025 cumulative update (KB5066835) for Windows 11 24H2 and 25H2, affecting thousands of users across the United States, Europe, and India.
The technical name behind this error is WU_E_UH_POSTREBOOTUNEXPECTEDSTATE—a mouthful that simply means Windows tried to finalize an update after rebooting but found the system in an unexpected state.
Left unfixed, this error means your system misses critical security updates, bug fixes, and feature improvements.
In this guide, I’ve gathered five community-verified fixes that have been confirmed to work by real users on Microsoft Q&A, ElevenForum, and the Windows 11 forums — not generic advice, but solutions that people have actually marked as resolved.

What Is Error 0x80242016? (WU_E_UH_POSTREBOOTUNEXPECTEDSTATE Explained)
Error 0x80242016 — also known as WU_E_UH_POSTREBOOTUNEXPECTEDSTATE — is a Windows Update client error that occurs when the update process completes the download and installation phases but fails during the post-reboot finalization step.
Windows expected the system to be in a specific state after restarting, but something caused that state to be different — triggering the error and marking the update as failed.
Featured Snippet Definition : Error 0x80242016 (WU_E_UH_POSTREBOOTUNEXPECTEDSTATE) means Windows Update failed to finalize an update after rebooting. The system was in an unexpected state post-restart, preventing the update from completing. It commonly affects cumulative updates and feature updates on Windows 11 24H2 and 25H2 and requires resetting update components or manual installation.
What does “Post-Reboot Unexpected State” actually mean?
When Windows installs an update, it restarts your PC to apply changes at a kernel level. During this restart, Windows tracks the expected state of the update handler.
If a service, driver, or file isn’t where Windows expects it—due to corruption, a conflict, or a failed previous attempt—the update handler logs the error 0x80242016 and rolls back.
This is a Windows Update client error, not a Windows Setup error. That distinction matters: it means the fixes focus on resetting the update client, not the installation environment.
What Causes the 0x80242016 – Failed to Install Error?
Based on confirmed community reports from Microsoft Q&A and ElevenForum (October–November 2025), these are the verified root causes:
- Corrupted Windows Update cache—the SoftwareDistribution folder contains stale or broken data from a previous failed attempt
- Windows Search Service interference—a known trigger reported by multiple Microsoft Q&A users; the Windows Search index hangs the update finalization
- Component store corruption—Windows component store (WinSxS) contains damaged entries that SFC/DISM can repair
- Specific buggy cumulative updates—KB5066835 (Oct 2025, 24H2) was widely confirmed as problematic across Microsoft community threads
- Incorrect Registry values—registry entries for the Update Handler become corrupted during failed installs
- Proxy or network interference — update components fail to verify package integrity when routed through a proxy
- Third-party antivirus — real-time protection can intercept the post-reboot update finalization process
- Corrupted temporary update files—Windows temporary update staging files become damaged mid-download
Before You Begin: Quick Checklist
Before running any fix:
- Note your exact KB number from Settings → Windows Update → Update History
- Confirm you have at least 10 GB free on your C: drive
- Temporarily disable third-party antivirus real-time protection
- Make sure your PC is connected to the internet via a stable connection (not a proxy or VPN)
- Ensure your PC is plugged in—update finalization failures spike on battery power under low-battery conditions
Fix 1 — Use “Fix Problems Using Windows Update” in Recovery Settings
This is the single most community-confirmed fix for the October 2025 KB5066835 0x80242016 error. Multiple users on Microsoft Q&A and ElevenForum marked this as the solution—and it’s the fix that no popular blog mentions.
In Microsoft Q&A (October 2025), one user confirmed:
“This solution worked for me too. The 24H2 repair was installed (it took an hour)—and then the 2025-10 Cumulative Update automatically installed itself afterwards.”
On ElevenForum, a moderator stated:
“Best way to resolve it is to do a repair update, which is run by Windows Update—Settings → Windows Update → Advanced options → Recovery → Fix problems using Windows Update.”
Steps: Settings → Recovery → Fix Problems Using Windows Update
- Open Settings (
Win + I) - Go to System → Recovery
- Under “Fix problems using Windows Update”, click “Reinstall now”
- Confirm the prompt—Windows will download a repair installation that preserves your files, apps, and settings
- Allow the process to complete (this can take 45–90 minutes)
- After the repair finishes, return to Settings → Windows Update and check for updates
Why this method works: The recovery repair reinstalls Windows Update’s core components in a clean state, resolving the WU_E_UH_POSTREBOOTUNEXPECTEDSTATE error without touching your personal files or installed applications.
⚠️ Note: If you don’t see this option, please ensure your Windows 11 is at least version 22H2 or later. Older versions may not display the “Fix problems using Windows Update” option.
Fix 2 — Run Disk Cleanup and Clear Windows Update Cache (Windows Update Cleanup)
This fix was confirmed by Microsoft Q&A user Mathias Kainrath in October 2025 as resolving the KB5066835 0x80242016 error, with multiple users replying that it worked for them too.
Step-by-Step: Disk Cleanup Method
- Press and type “Disk Cleanup” and open it
- Select your C: drive and click OK
- Click “Clean up system files” (requires admin rights)
- Select your C: drive again
- In the list, check only “Windows Update Cleanup”
- Click OK → Delete Files
- Restart your PC
- Go to Settings → Windows Update → Check for updates
This procedure deletes old Windows Update staging files that may be corrupted—forcing Windows Update to re-download a fresh copy of the failing update.
Reset Windows Update Components via Command Prompt
If the Disk Cleanup step alone doesn’t work, follow it with a full component reset:
- Open Command Prompt as Administrator (
Win + X → Terminal (Admin)) - Run these commands in order (press Enter after each line):
net stop wuauserv
net stop cryptSvc
net stop bits
net stop msiserver
ren C:\Windows\SoftwareDistribution SoftwareDistribution.old
ren C:\Windows\System32\catroot2 catroot2.old
net start wuauserv
net start cryptSvc
net start bits
net start msiserver- Restart your PC
- Return to Settings → Windows Update and retry the update
What this procedure does: It stops the Windows Update service, renames the corrupted download cache (SoftwareDistribution) and the certificate cache (catroot2), then restarts the services—forcing Windows to rebuild both from scratch.
Note for Indian users: The SoftwareDistribution reset triggers a fresh download of the update. On slower broadband connections (BSNL or older Jio plans), this re-download may take 20–40 minutes. Keep your PC connected and plugged in during this time.
Fix 3—Download and Install the Update Manually from Microsoft Update Catalog
When Windows Update keeps serving the same broken 0x80242016 error, bypassing it entirely with a manual download is the most reliable workaround. Microsoft Q&A contributors and ElevenForum moderators confirmed that this method worked for the KB5066835 October 2025 update.
How to Find Your KB Number
- Go to Settings → Windows Update → Update History
- Look under “Failed Updates” for the update name
- Note the KB number (e.g., KB5066835, KB5063878)—you’ll use this to search the catalog
How to Download from Microsoft Update Catalog
- Open your browser and go to:
https://www.catalog.update.microsoft.com - In the search box, enter your KB number (e.g.,
KB5066835) - From the results, click the entry matching your system architecture (x64-based for most PCs)
- Click Download—a popup will appear with a direct
.msudownload link - Click the link to download the
.msufile - Once downloaded, right-click the
.msufile → Install (or double-click to run) - Follow the on-screen prompts and restart when prompted
ElevenForum moderator tip (October 2025): Build KB5066835 26100.6899 has numerous bugs/issues—go with the fix 26100.6901 version from the catalog. The catalog always has the latest revision of a KB.”
If the standard .msu installer fails, install it via DISM:
DISM /Online /Add-Package /PackagePath:"C:\path\to\update.msu"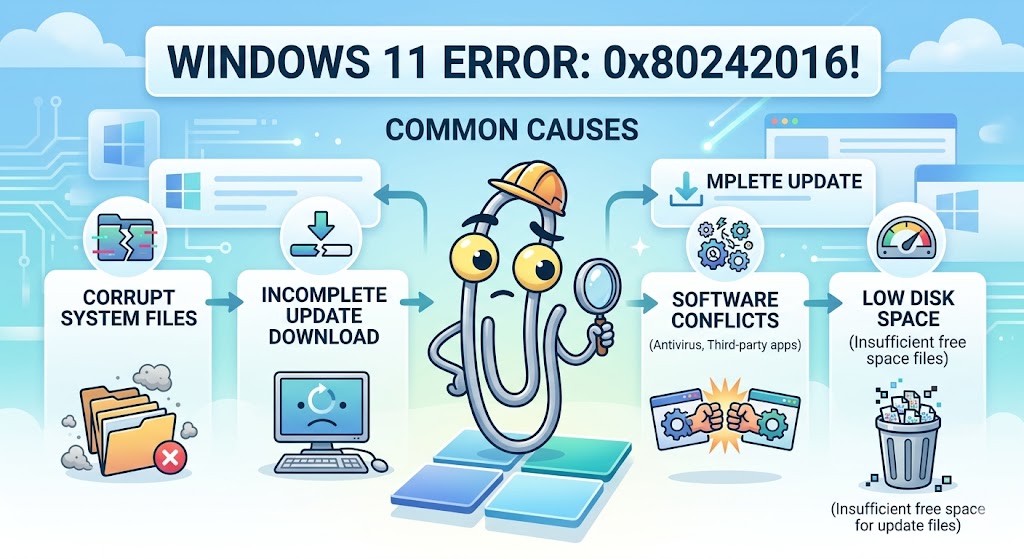
Fix 4 — Repair System Files with SFC and DISM
Component store corruption is a confirmed secondary cause of 0x80242016. Running these three commands in sequence repairs the damage and clears the path for successful update installation.
Run SFC Scan
- Open Command Prompt (Admin)
- Run:
sfc /scannow- Wait for the scan to complete — it takes 10–20 minutes
- Restart your PC
Run DISM StartComponentCleanup
This command clears outdated or superseded components from the Windows component store — a step that SFC alone doesn’t perform:
DISM /Online /Cleanup-Image /StartComponentCleanupWait until it completes (5–15 minutes), then restart.
Run DISM RestoreHealth
This repairs the component store using Windows Update as the source:
DISM.exe /Online /Cleanup-Image /RestoreHealthThis process requires an active internet connection and takes 15–30 minutes. Once done, run sfc /scannow again, then restart and retry the update.
Run all three in this order: SFC → DISM StartComponentCleanup → DISM RestoreHealth → restart → retry update.
Tip for European users: DISM RestoreHealth contacts Microsoft’s servers to download replacement files. If you’re behind a corporate proxy in the UK, Germany, or France, you may need to configure proxy settings in Command Prompt first using
netsh winhttp set proxy.
Fix 5 — Restart the Windows Search Service and Background Services
This fix specifically addresses the Windows Search Service trigger — one of the lesser-documented causes of 0x80242016 that multiple community users reported on Microsoft Q&A. The Search service can lock files that Windows Update needs to finalize during the post-reboot phase.
How to Restart Windows Search Service
- Press
Win + R, typeservices.msc, press Enter - Scroll down to Windows Search
- Right-click → Restart
- If the status is Stopped, right-click → Start
- Right-click again → Properties → set Startup type to Automatic
- Click OK
Check BITS and cryptographic services.
Also verify these two services are running—they’re required for Windows Update to complete the post-reboot finalization:
- In services.msc, find Background Intelligent Transfer Service (BITS)
- Right-click → Restart (or Start if stopped)
- Startup type: Manual (Trigger Start)
- Find Cryptographic Services
- Right-click → Restart
- Startup type: Automatic
After restarting all three services, restart your PC and retry the Windows Update installation.
Bonus: Registry Fix for Persistent 0x80242016 Errors
If all five fixes above haven’t resolved the error, corrupted registry values related to the Windows Update Handler may be the cause. Before editing the registry, create a backup: press Win + R, type “regedit,” go to File → Export, and save a backup.
Navigate to:
HKEY_LOCAL_MACHINE\SOFTWARE\Microsoft\Windows\CurrentVersion\WindowsUpdate\Auto UpdateLook for any entries with values that appear corrupted (non-standard characters or empty values where numbers are expected). Deleting these entries forces Windows Update to rebuild them correctly on the next launch.
⚠️ Registry editing carries risk. Only attempt this step if all five main fixes have failed. If you’re unsure, use the Fix 1 (Recovery Repair) method instead—it achieves the same result without manual registry changes.
Does 0x80242016 mean my Windows 11 update is corrupted?
Not necessarily — the update itself may be fine, but your local update cache or service state is corrupted. In most cases, clearing the SoftwareDistribution folder and restarting Windows Update services resolves the error without any issue with the update content itself. If the update is genuinely corrupted on Microsoft’s servers (as happened with KB5066835 initially), manually installing a later revision from the catalog fixes it.
What is WU_E_UH_POSTREBOOTUNEXPECTEDSTATE and how do I fix it?
WU_E_UH_POSTREBOOTUNEXPECTEDSTATE is the technical name for error 0x80242016. It means the Windows Update Handler expected a specific system state after rebooting, but didn’t find it. To fix it, reset Windows Update components via Command Prompt, use the Recovery Settings repair option, or install the update manually from the Microsoft Update Catalog.
How do I manually install a Windows 11 update to bypass 0x80242016?
Go to catalog.update.microsoft.com, search for your KB number (visible in Settings → Windows Update → Update History), download the x64 .msu file for your system, and run it directly. This bypasses the Windows Update service entirely and installs the package directly. This method is confirmed working for KB5066835 and other cumulative updates.
What does error 0x80242016 mean in Windows 11?
Error 0x80242016 (WU_E_UH_POSTREBOOTUNEXPECTEDSTATE) means Windows Update failed to finalize an update after your PC restarted. Windows expected the system to be in a specific state after the reboot, but something — usually a corrupted cache or service conflict — caused the update handler to find an unexpected state, marking the update as failed.
Conclusion
Error 0x80242016 – Failed to Install is one of those Windows Update errors that looks mysterious but has very specific, fixable causes. The WU_E_UH_POSTREBOOTUNEXPECTEDSTATE message indicates an interruption during the finalization of your update, and in most cases, resetting the update components or performing a manual install resolves the issue.
Here’s the quick recap of what works:
- Recovery Settings → Fix problems using Windows Update—the fastest confirmed fix for the October 2025 KB5066835 failure
- Disk Cleanup (Windows Update Cleanup) + WU component reset — clears corrupted cache and rebuilds fresh
- Manual install from Microsoft Update Catalog — bypasses broken Windows Update delivery entirely
- SFC + DISM StartComponentCleanup + DISM RestoreHealth — repairs the underlying component store
- Restart Windows Search, BITS, and Cryptographic Services — resolves service-level conflicts blocking finalization
Whether you’re on a Windows 11 24H2 system in the US, running 25H2 in Europe, or troubleshooting on a Jio-connected laptop in India, these fixes work across all regions and hardware configurations.
Did one of these fixes solve your 0x80242016 error? Leave a comment below with which method worked—your experience helps other readers skip straight to the right fix.