
Last Updated:
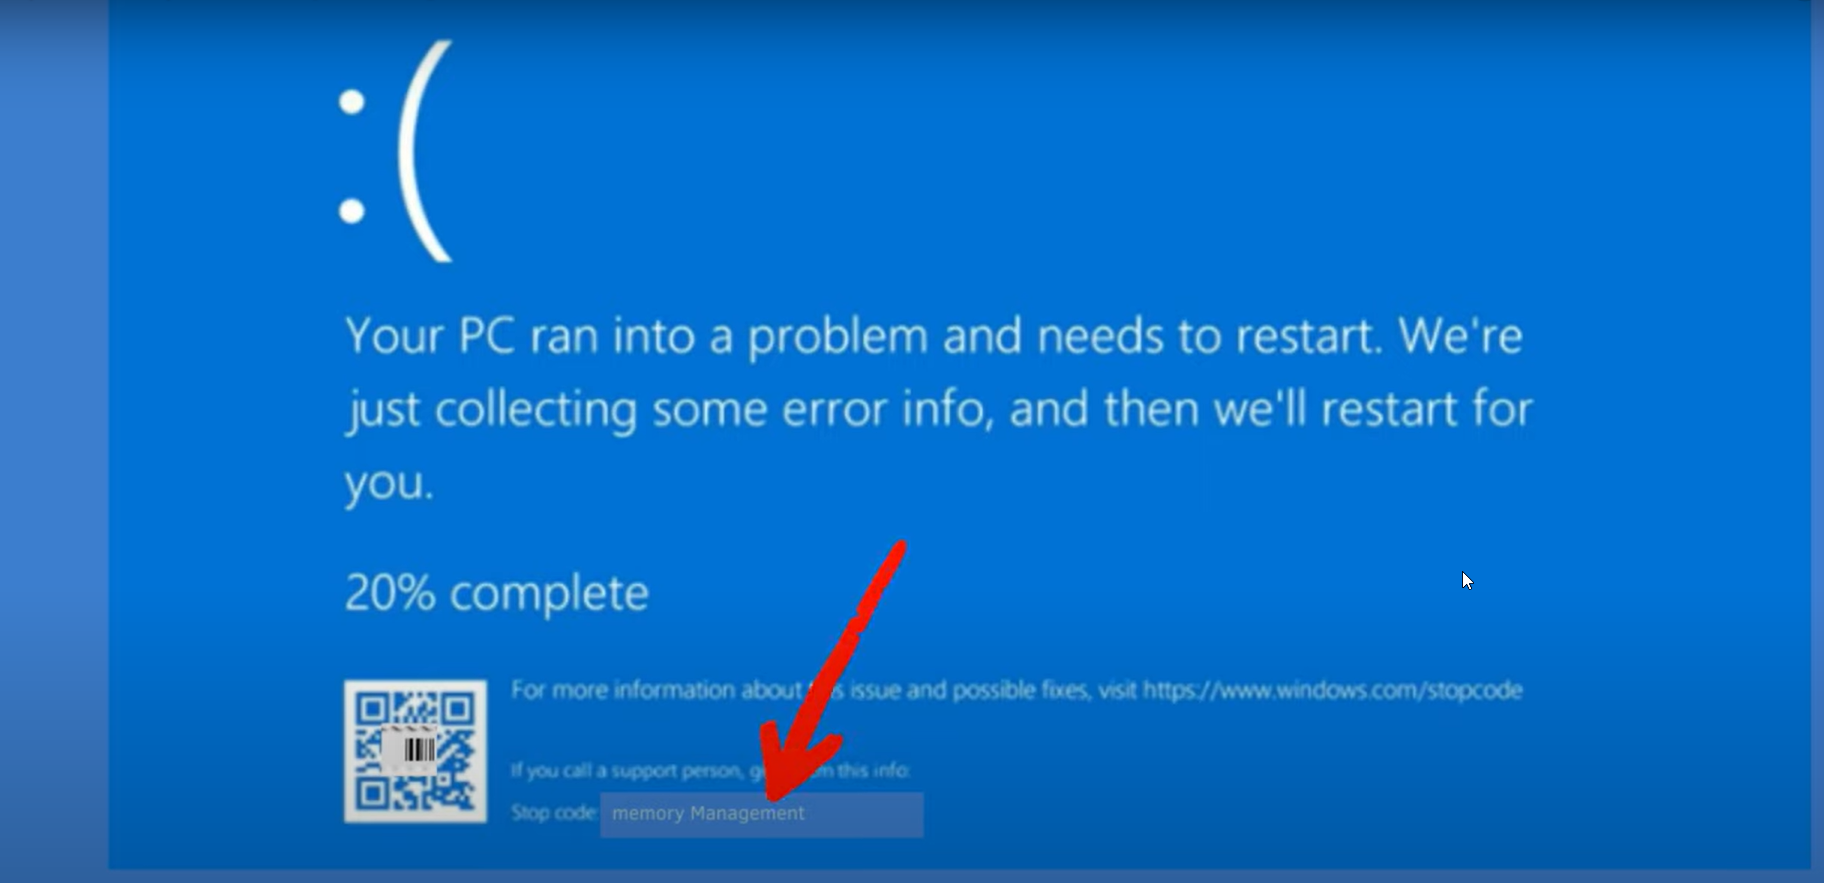
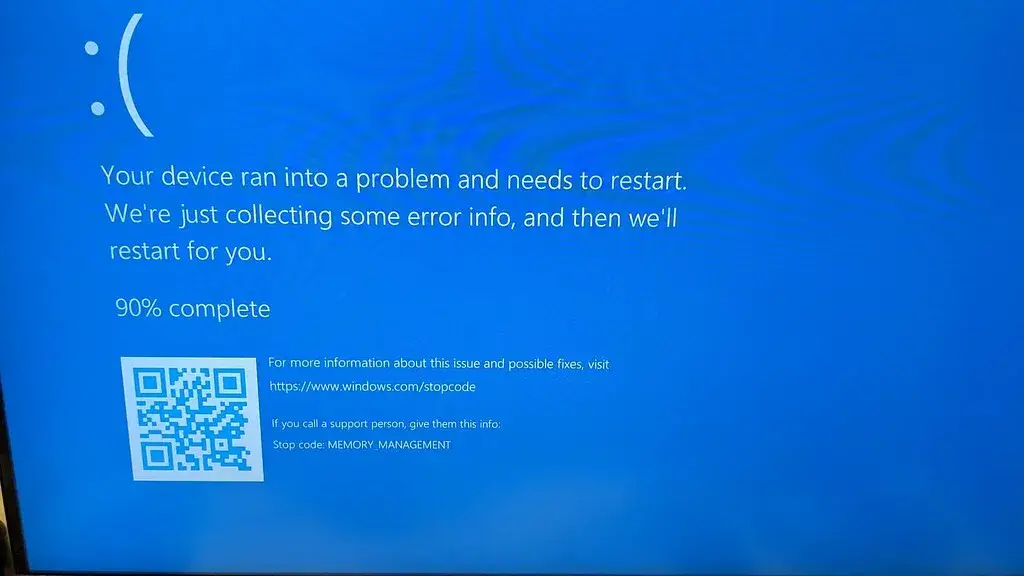
The memory management BSOD on Windows 11 is one of the most alarming crashes you’ll see—a full blue screen with the words MEMORY_MANAGEMENT and, in many cases, the stop code 0x0000001A. It means Windows detected a critical error in how your system is allocating or accessing RAM, and it forced a shutdown to prevent further damage.
This blue screen memory management Windows 11 error is caused by a range of issues: faulty RAM, outdated GPU drivers, corrupted system files, a misconfigured page file, or even an unstable XMP/EXPO RAM profile in BIOS. The right fix depends on your specific cause—which is exactly what this guide is designed to identify.
I’ll walk you through 10 proven fixes in order from quickest to most advanced. Whether you’re a user in the US, India, or Europe dealing with a single crash or a recurring stop code memory management Windows 11 loop, this guide covers your scenario—including how to analyze BSOD crash dumps if the standard fixes don’t resolve it.
What Is the Memory Management BSOD? (Stop Code 0x0000001A)
The MEMORY_MANAGEMENT bug check (value: 0x0000001A) occurs when Windows detects a critical error in how physical or virtual memory is being managed.
When this happens, you’ll see a blue screen with:
- The text MEMORY_MANAGEMENT
- Sometimes the stop code 0x0000001A
- A progress bar and a QR code (Windows 11’s modern BSOD style)
The crash may happen randomly, during startup, while gaming, or after a Windows update. In all cases, Windows is protecting itself from a more serious corruption event.
What Causes the Memory Management Blue Screen in Windows 11?
| Cause | How Common |
|---|---|
| Faulty or failing RAM | Very Common |
| Outdated or corrupt GPU/motherboard driver | Very Common |
| Corrupted Windows system files | Common |
| Unstable XMP/EXPO RAM profile in BIOS | Common (2023–2026 builds) |
| Disk errors on system drive | Common |
| Incorrect virtual memory / page file settings | Less Common |
| Malware corrupting system memory | Less Common |
| Incompatible hardware (new build) | Situational |
| Windows 11 24H2/25H2 bad update | Rare but reported |
Let’s work through each fix systematically.
Fix 1 – Restart and Install Pending Windows Updates
Before anything else, restart your PC and check for pending updates. A single BSOD can be a transient glitch—repeated crashes indicate a deeper problem.
Steps:
- Press
Win + I→ Windows Update - Click “Check for updates” and install all pending updates
- Restart your PC and monitor for further crashes
If the crash only happened once and Windows Update has nothing pending, move to Fix 2Resolution
Fix 2 – Run Windows Memory Diagnostic Tool
The built-in Windows Memory Diagnostic checks your RAM for errors and runs automatically on the next boot.
Steps:
- Press
Win + Sand search Windows Memory Diagnostic - Click Restart now and check for problems (recommended)
- Your PC will restart and run the memory test (takes 5–15 minutes depending on RAM amount)
- After completing, Windows will boot normally and show results in the taskbar notification area
Interpreting results:
- No errors found → RAM may be fine; proceed to Fix 6 (drivers)
- Errors found → Your RAM is likely the cause; see Fix 4
Fix 3 – Run MemTest86 for a Deep RAM Test
Windows Memory Diagnostic misses errors that MemTest86 catches. If Fix 2 shows no errors but crashes continue, MemTest86 is the next step.
Steps:
- Download MemTest86 from memtest86.com on a working PC
- Create a bootable USB drive using the MemTest86 installer
- Boot your PC from the USB (press F12 or your manufacturer’s boot menu key at startup)
- MemTest86 will run automatically—let it complete at least 2 full passes (this can take 4–8 hours for 16GB+ RAM)
- Any red errors indicate a faulty RAM module
If MemTest86 finds errors:
- Test each RAM stick individually (remove all but one, run MemTest86, swap sticks until the faulty one is identified)
- Replace the faulty module
In my experience, running MemTest86 overnight and finding zero errors is strong evidence that RAM is not the cause, which points you toward software or driver issues.
Fix 4 – Reseat or Replace RAM Modules
Physical RAM connection issues—oxidation on contacts, a stick not fully seated—can cause the memory management BSOD without triggering diagnostic errors.
Steps:
- Power off your PC and unplug it from the wall
- Open the case and remove your RAM sticks
- Clean the gold contacts gently with a dry eraser
- Reseat each stick firmly—you should hear a click
- If you have two sticks, try running with only one installed (in the A2 slot per your motherboard manual) to see if crashes stop
- Swap slots if problems continue
Fix 5 – Disable XMP/EXPO RAM Overclocking Profile
This is one of the most underreported causes of the stop code for memory management errors in Windows 11 builds from 2024 to 2026. XMP (Intel) and EXPO (AMD) are RAM profiles that push memory speeds beyond the base JEDEC standard. On some motherboard/RAM combinations, these profiles are unstable.
Steps:
- Restart your PC and press your BIOS key (usually Delete, F2, or F10)
- In BIOS, navigate to the memory or OC settings section
- Find XMP, EXPO, or A-XMP profile settings
- Set it to Disabled or Auto (JEDEC default)
- Save and exit BIOS (F10)
- Test your PC for 24–48 hours to see if BSODs stop
If disabling XMP stops the crashes, your RAM is either incompatible with that profile or needs a BIOS update to run it stably. Check your motherboard manufacturer’s website for BIOS updates that improve memory compatibility.
Fix 6 – Update or Roll Back GPU and Motherboard Drivers
Outdated or recently updated GPU drivers are a leading software cause of the BSOD memory management error. This is especially common after a new driver release for NVIDIA or AMD.
Update GPU drivers:
- Press
Win + X→ Device Manager - Expand Display adapters
- Right-click your GPU → Update driver → Search automatically
- Alternatively, download directly from nvidia.com or amd.com/drivers
Roll back a recent driver update:
- In Device Manager, right-click GPU → Properties → Driver tab
- Click “Roll Back Driver” if the option is available (it’s greyed out if no previous version exists)
Also update your chipset and motherboard drivers from your manufacturer’s support page (ASUS, MSI, Gigabyte, ASRock).
Fix 7 – Run CHKDSK to Check for Disk Errors
Bad sectors or file system errors on your system drive can corrupt memory-mapped files and trigger the memory management blue screen. CHKDSK scans and repairs these.
Steps:
- Open Command Prompt as administrator
- Run:
chkdsk C: /f /r /x - You’ll be prompted to schedule it on next restart—type Y and press Enter
- Restart your PC — CHKDSK will run before Windows loads (this can take 30–60 minutes on a hard drive; it’s much faster on an SSD).
- After completion, Windows will boot normally
The /f flag fixes errors, /r locates bad sectors, and /x forces a dismount. Don’t skip this step if other fixes haven’t resolved the crashes.
Fix 8 – Run SFC and DISM to Repair System Files
Corrupted Windows system files — often caused by bad updates or abrupt shutdowns — are a common cause of recurring memory management BSODs. SFC and DISM repair them directly.
Steps:
- Open Command Prompt as administrator
- Run DISM first:
DISM /Online /Cleanup-Image /RestoreHealth- After it completes, run SFC:
sfc /scannow- Restart your PC
Run DISM before SFC. DISM repairs the Windows component store that SFC draws from, making SFC more effective when run second.
Fix 9 – Fix Virtual Memory / Page File Settings
An incorrectly configured page file (virtual memory) can contribute to memory management errors on Windows 11. Resetting it to system-managed is a clean fix.
Steps:
- Press
Win + Sand search Adjust the appearance and performance of Windows - Click the Advanced tab. → Under Virtual memory, click Change
- Uncheck Automatically manage paging file size for all drives
- Select your C: drive → Choose System-managed size
- Click Set → OK
- Restart your PC
If your C: drive is low on space (under 10 GB free), Windows cannot create an adequate page file—which alone can cause this BSOD. Free up space if needed.
Fix 10 – Use Driver Verifier to Identify Problem Drivers
When the standard fixes haven’t resolved the BSOD memory management, Driver Verifier stress tests all non-Microsoft drivers to identify which one is causing the crash.
Steps:
- Press
Win + R, typeverifier, press Enter - Select Create standard settings → Next
- Select Automatically select all drivers installed on this computer
- Click Finish and restart
Important: Driver Verifier intentionally triggers BSODs when it catches a bad driver. Use your PC normally — if it crashes, the minidump file will identify the exact driver. Check the crash dump in Event Viewer or use WinDbg.
To turn off Driver Verifier after identifying the problem:
- Open
verifieragain → Delete existing settings → Finish → Restart
Fix 11 – Run a Malware Scan
Some malware corrupts system memory allocation tables, triggering the memory management BSOD. Run a full scan before drawing any conclusions about hardware.
Steps:
- Press
Win + I→ Privacy & Security → Windows Security → Virus & Threat Protection - Click Scan options → Full scan → Scan now
- Alternatively, run Malwarebytes (free version) for a second-opinion scan
Fix 12 – System Restore or Reset Windows (Last Resort)
If nothing above has resolved the Windows 11 crash memory management issue:
System Restore:
- Search Create a restore point → System Restore
- Choose a restore point dated before crashes began
- Follow prompts to restore
Reset Windows 11:
- Press
Win + I→ System → Recovery → Reset this PC - Choose “Keep my files” to preserve personal data
- Select Cloud download for a fresh OS copy from Microsoft’s servers
How to Analyze BSOD Minidump Files (Advanced)
Every memory management BSOD creates a minidump file that contains precise information about what caused the crash. Analyzing it identifies the exact driver or module responsible.
Find your minidump files:
- Path:
C:\Windows\Minidump\ - File format:
.dmpfiles named with the date/time of each crash
Analyze with WinDbg:
- Install WinDbg from the Microsoft Store or Windows SDK
- Open WinDbg → File → Open Crash Dump
- Select the
.dmpfile - Type
!analyze -vand press Enter - Look for the MODULE_NAME and IMAGE_NAME fields—these identify the driver or module that caused the crash
This method is the most definitive way to identify the root cause, and it’s what Microsoft support engineers use.
Understanding Windows 11 BSOD Memory Management Errors
Memory management errors in Windows 11 can occur for various reasons, from hardware incompatibilities to driver conflicts and even software-related issues.
These errors can manifest as frequent BSODs, system instability, and even boot problems, making it challenging to use your computer effectively.
Troubleshooting Strategies
Step 1: Eliminate Hardware Conflicts
One of the first things to consider when dealing with memory management errors is the hardware configuration of your system. Ensure that your RAM modules are compatible with your motherboard and that they are installed correctly. Try swapping out the RAM modules or testing each one individually to identify any faulty components.
Step 2: Check for Driver Issues
Outdated or incompatible drivers can often be the root cause of memory management errors. Start by updating all the drivers on your system, particularly the ones related to your graphics card, motherboard, and any peripherals you have connected. You can use the Windows Update feature or visit the manufacturer’s website to obtain the latest drivers.
Step 3: Utilize Windows Diagnostics
Windows 11 offers several built-in diagnostic tools that can help you identify the underlying issue. Run the Windows Memory Diagnostic tool to check for any memory-related problems, and use the BlueScreen Analysis tool to examine the BSOD dump files for clues about the error.
Step 4: Perform a Clean Installation
If the above steps don’t resolve the issue, consider performing a clean installation of Windows 11. This will ensure a fresh start with a clean system, eliminating any potential software conflicts or corrupted system files that could be causing the memory management errors.
Step 5: Optimize Power Settings
Improper power management settings can sometimes contribute to memory management problems. Ensure that your power plan is set to “High Performance” or “Balanced,” and consider disabling any power-saving features that could be interfering with memory allocation.
Step 6: Check for Malware Infections
Malware can often cause system instability and lead to memory management errors. Scan your system with a reputable antivirus or anti-malware tool to ensure that it is free of any malicious software.
Step 7: Upgrade or Replace Hardware Components
In some cases, aging or incompatible hardware components may cause memory management errors. Consider upgrading your RAM, CPU, or even the entire system if necessary to ensure that your hardware is capable of running Windows 11 smoothly.
Troubleshooting Blue Screen of Death (BSOD) Errors After New PC Build
Identifying the Root Cause of Windows 11 BSOD Memory Management Errors
Building a new PC can be an exciting experience, but occasionally, users may encounter frustrating Blue Screen of Death (BSOD) errors that can disrupt the smooth operation of the system. One such issue is the MEMORY_MANAGEMENT error, which often points to underlying hardware or software problems.
In this blog post, we’ll go over the steps you can take to diagnose and resolve the recurring BSOD errors that our reader, stefan_1405, has been experiencing after upgrading to a new PC with the following specifications:
- Motherboard: ASUS TUF GAMING X670E-PLUS (AM5)
- CPU: AMD Ryzen 7 7700X
- GPU: NVIDIA GeForce RTX 4060
- RAM: 2 x 32 GB Corsair Vengeance 5600 MHz
- Storage: Kingston FURY Renegade 1 TB SSD M.2 2280 PCIe 4.0 x4
- Cooling: Be Quiet PURE LOOP 240mm AIO
Troubleshooting Memory-Related Issues
One of the first steps in resolving BSOD errors is to thoroughly test the system’s memory. While the initial Windows Memory Diagnostics test did not reveal any issues, stefan_1405 was advised to run a more comprehensive test using MemTest64.
Tip: MemTest64 is a powerful memory testing tool that can uncover more subtle memory-related problems compared to the basic Windows Memory Diagnostics.
After running MemTest64 for 27 minutes, stefan_1405 reported no errors, but the system still experienced some visual issues, such as screen flickering and trouble loading everything properly. This suggests that the memory may not be the sole culprit, and we need to investigate further.
Eliminating Interference from Third-Party Drivers
The next step in the troubleshooting process is to perform a clean boot to eliminate any potential interference from third-party applications and drivers. This involves disabling all non-Microsoft services and startup items, which can help isolate the root cause of the BSOD errors.
After performing the clean boot, stefan_1405 reported that the system continued to crash, and the resulting dump file indicated a problem with the system kernel, typically caused by a driver issue.
Validating Drivers with the Driver Verifier
To identify the problematic driver, we recommend using the Driver Verifier tool, which puts heavy pressure on the drivers in the system to uncover any misbehaving or poorly written drivers.
Important: Before running the Driver Verifier, be sure to create a system restore point in case the process causes the system to become unstable.
The steps to use the Driver Verifier are as follows:
- Open an elevated Command Prompt and run the
verifiercommand. - Select “Automatically select all drivers installed on this computer” and follow the on-screen instructions.
- Reboot the system and wait for the next BSOD to occur, then collect 2-3 copies of the dump file.
After running the Driver Verifier, stefan_1405 reported that the system crashed quite often, but the resulting dump file pointed to an issue with the ASUS software installed on the system.
Removing ASUS Software
Based on the information gathered from the dump files, it appears that the ASUS software, such as Armoury Crate, may be the root cause of the BSOD errors. Therefore, the next recommended step is to uninstall any ASUS-related software from the system and see if that resolves the issue.
Note: If the BSOD errors persist even after removing the ASUS software, it may indicate a deeper hardware-related problem that requires further investigation or potential RMA of the affected components.
By following this systematic approach to troubleshooting, you can effectively identify and resolve the BSOD errors encountered after building a new PC. Remember, patience and attention to detail are key when dealing with complex hardware and software issues.
If you have any further questions or need additional assistance, please don’t hesitate to reach out to the Microsoft community for support.
Resolving MEMORY_MANAGEMENT BSOD on VMware with Windows Server Insider Build 25099
If you’re a Windows Server administrator or enthusiast, you may have encountered a frustrating issue when trying to install the latest Windows Server Insider Build 25099 on your VMware virtual machine. The dreaded MEMORY_MANAGEMENT BSOD (Blue Screen of Death) can be a real roadblock, preventing you from successfully booting the new build.
Thankfully, the Microsoft community has come together to share their findings and solutions to this problem. In this blog post, we’ll dive into the details of the issue and provide a step-by-step guide to help you resolve the MEMORY_MANAGEMENT BSOD on your VMware setup.
Identifying the Problem – Windows 11 BSOD Memory Management Error New Build
The issue appears to be related to a CPU configuration mismatch between the virtual machine and the underlying physical hardware. As reported by members of the Windows Server Insiders community, the MEMORY_MANAGEMENT BSOD occurs when the VM is configured with multiple CPU cores, but the host system has a different CPU configuration.
This problem was initially observed with Windows Server Insider Build 25099, but it may also affect other Insider builds or even the final release of Windows Server. The key factor seems to be the specific CPU configuration of the virtual machine and the host system.
Resolving the MEMORY_MANAGEMENT BSOD
The solution to this issue is relatively straightforward: adjust the CPU configuration of the VMware virtual machine to match the CPU configuration of the host system. Here’s how you can do it:
- Determine the CPU configuration of your host system: Check the number of physical CPUs and the number of cores per CPU on your host machine. This information will be crucial in the next step.
- Adjust the VM’s CPU configuration: In your VMware Workstation or vSphere client, navigate to the settings of the Windows Server Insider Build 25099 virtual machine. Locate the CPU settings and make the following changes:
- Set the number of virtual CPUs to match the number of physical CPUs on your host system.
- Set the number of cores per virtual CPU to match the number of cores per physical CPU on your host system. For example, if your host system has a single CPU with 4 cores, you should configure the virtual machine to use 1 CPU with 4 cores.
- Reboot the virtual machine: After making the CPU configuration changes, save the settings and reboot the virtual machine. This should allow the Windows Server Insider Build 25099 to boot up without the MEMORY_MANAGEMENT BSOD issue.
According to the feedback from the community, this simple adjustment to the CPU configuration has been effective in resolving the MEMORY_MANAGEMENT BSOD problem. By ensuring that the virtual machine’s CPU settings match the host system’s CPU configuration, you can bypass this frustrating issue and proceed with testing the new Windows Server Insider build.
Here are 5 frequently asked questions (FAQs) about Windows 11 BSOD (Blue Screen of Death) memory management errors and their solutions:
FAQ – Windows 11 BSOD Memory Management Errors and Solutions
1. What is a BSOD memory management error in Windows 11?
A BSOD memory management error in Windows 11 occurs when the operating system encounters a critical problem related to memory allocation, corruption, or insufficient memory. This error causes the system to halt and display a blue screen with an error message, such as “MEMORY_MANAGEMENT.”
2. What are the common causes of BSOD memory management errors?
Common causes of BSOD memory management errors include the following:
- Faulty or incompatible hardware (e.g., RAM, graphics card)
- Corrupted or outdated device drivers
- Malware or virus infections
- Software conflicts or incompatibilities
- Insufficient system memory (RAM)
3. How can I troubleshoot a BSOD memory management error?
To troubleshoot a BSOD memory management error:
- Check for hardware issues by running a memory diagnostic tool (e.g., Windows Memory Diagnostic)
- Update device drivers to their latest stable versions
- Perform a full system scan using an up-to-date antivirus program
- Uninstall recently installed software that may be causing conflicts
- Ensure your system has sufficient RAM for running applications
4. How do I run the Windows memory diagnostic tool?
To run the Windows Memory Diagnostic tool,
- Press
Windows Key + Rto open the Run dialog - Type
mdsched.exeand press Enter - Choose to either restart now and check for problems or check for problems the next time you start your computer
- The tool will run automatically and display the results upon completion
5. What should I do if the BSOD memory management error persists?
If the error persists after troubleshooting:
- Consider performing a clean installation of Windows 11
- Consult with a professional technician to identify and resolve any hardware-related issues
- Ensure your system meets the minimum requirements for running Windows 11
- Contact Microsoft Support for further assistance and guidance
What is the stop code for the memory management error in Windows 11?
The stop code for memory management (0x0000001A) is a BSOD that Windows 11 displays when it detects a critical problem with how memory (RAM) is being allocated or accessed. It appears as a blue screen with the text MEMORY_MANAGEMENT and typically indicates faulty RAM, a corrupt driver, corrupted system files, or an unstable XMP/EXPO RAM profile in BIOS.
What causes the memory management BSOD in Windows 11?
The most common causes are faulty or failing RAM, outdated GPU or motherboard drivers, corrupted Windows system files, disk errors, an unstable XMP/EXPO overclocking profile in BIOS, or incorrect virtual memory settings. Less commonly, malware or a bad recent Windows update can trigger it.
How do I fix the memory management blue screen on Windows 11?
Start with the Windows Memory Diagnostic Tool and MemTest86 to test your RAM. Then update your GPU and motherboard drivers, run CHKDSK, SFC, and DISM to repair files, and disable XMP/EXPO in BIOS if you have it enabled. In most cases, one of these fixes resolves the BSOD memory management error.
Is the 0x0000001A error always caused by RAM?
No. While faulty RAM is the most common cause, the 0x0000001A stop code can also be triggered by corrupt drivers, disk errors, corrupted system files, misconfigured virtual memory, or malware. Run through all the fixes in order to identify the actual cause—don’t assume RAM replacement is needed until diagnostic tools confirm it.
How do I stop Windows 11 from crashing with a memory management error?
Work through these fixes in order: restart and update Windows, run Windows Memory Diagnostic, run MemTest86, reseat RAM, disable XMP/EXPO, update GPU drivers, run CHKDSK, run SFC/DISM, and adjust virtual memory settings. If crashes persist, use Driver Verifier or analyze minidump files with WinDbg to identify the exact cause.
Conclusion
The bluescreen memory management Windows 11 error (0x0000001A) looks catastrophic, but it almost always has a fixable cause.
In my experience, the Windows Memory Diagnostic and MemTest86 together catch the majority of hardware-related causes, while updating GPU drivers and running SFC/DISM handle most software-related ones.
The XMP/EXPO disable fix is especially worth trying on builds from 2023 onward — it resolves a surprising number of cases that look like hardware failure but are actually configuration issues.
Work through the fixes in the numbered order—don’t skip to the last resort until you’ve eliminated the common causes.
The MEMORY_MANAGEMENT BSOD on VMware when attempting to install Windows Server Insider Build 25099 can be quite frustrating, but the solution is relatively straightforward.
Did one of these fixes stop your memory management BSOD? Leave a comment below with which method worked and your hardware configuration. It helps other readers dealing with the same Windows 11 crash memory management problem find the right fix faster.
ENJOYING OUR CONTENT?
Stay up to date with our latest guides, insights, and news. Tap below to follow us directly via your search feed.
