The means of android file transfer to PC can be done through USB, Wi-Fi, cloud transfer, bluetooth and apps. You can send files from android to pc using apps like shareit, shareme, xender, airdroid, send anywhere, zapya etc.
Most of the methods work in Windows 10 or 8.1 or 7. The interface may slightly change from each Windows version.
With the advent of mobile phones, Android has become a house-hold name. PCs still remain and Windows continues to dominate that market. We still need big screen computers in order to view images, videos and movies downloaded from the internet.
- Why to Transfer Files from Computer to Android
- How to Transfer Files or Folders between Android and PC using Apps
- ShareIt – Transer Files from Android to PC
- Manual Transfer using File Explorer in Windows 10 or 8.1 or 7
- Save Photos from Android to Windows 10 PC using Your Phone App
- Using Photos App - Transfer files from Android to PC using USB in Windows 8.1
Why to Transfer Files from Computer to Android
There are different reasons to copy your android files to PC. Since mobile bandwidth is limited, you cannot take backup of your valuable photos, videos, audio files to your favorite cloud storage on your phone.
Also Read – How to Change Font Size in Xiaomi Redmi Note 4 – Working
For example, you have taken family photos with your Android phone and would like to store in your external USB device. For this you need to connect your smartphone to your PC and transfer your files, images etc.
It can be the other way round also. You want to upload pictures on your Windows PC or Mac to your Android mobile. This is for the fact, that it’s easy to carry a mobile phone, than carry a bulky laptop or computer.
Then, you can view your photos in travel, at office and share them with your friends.
In that case, you need to transfer files from Android to PC to save bandwidth and upload quickly to cloud drive. In many cases, USB and bluetooth transfer were used when android apps did not come into existence.
How to Transfer Files or Folders between Android and PC using Apps
After the release of Android 6.x, 7.x, 8.x, 9.x many apps came into existence that can help your transfer files from computer to android and vice versa using Wi-Fi. The best thing about these apps is that they speed up the transfer of files/folders in 2019.
You just have to scan the QR code or enter passcode. Then you can just send and recevie files from Android to PC with just a tap. Some apps are also available for Windows 10 or 8.1 PC. So it becomes easy to send files from your PC to Android also.
Previously, USB was the quickest way to transfer your files from your favorite android smartphone to Windows PC.
But wait, how do you transfer all these files in different formats from PC to mobile or phone to PC ?
Today, we are going to see 4 methods by which you can do the above.
Related :
ShareIt – Transer Files from Android to PC
This is one of the latest app and application which is making noise in the file-sharing world. It works for both Android and Windows 10 or 8.1 or 7. The following are the links for both the versions.
- http://support.lenovo.com/us/en/downloads/ds101236 – Windows
- https://play.google.com/store/apps/details?id=com.lenovo.anyshare.gps&hl=en – Android
The biggest advantage with this software is that it works even without a mobile network. But it requires that both Android and Windows PC have ShareIt installed. I think it will automatically request you to switch on Wi-Fi, if it is not turned on. Otherwise, you can switch on Bluetooth.
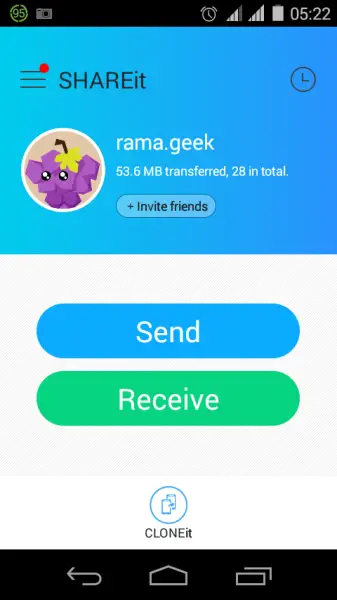
All you have to do is click “Send” and “Receive” on either of your devices.
To transfer files from phone to computer using ShareIt app follow these steps.
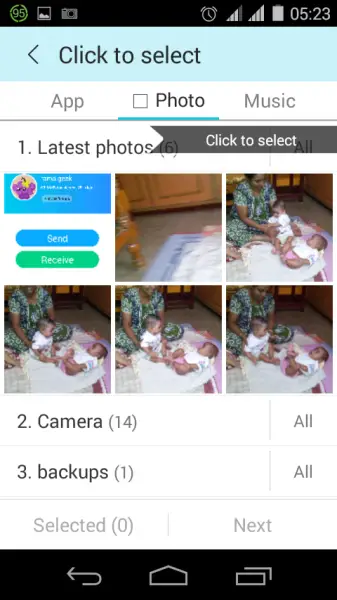
- Click “Send” on your mobile. Then select the related files like images, photos, videos and any other files.
- Then open ShareIt on your computer.
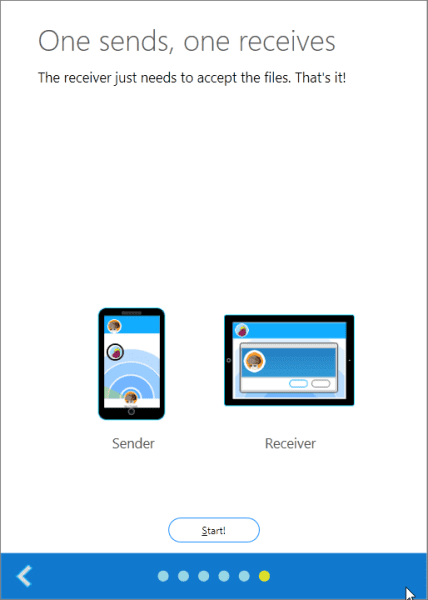
- Then click the “Receive” button on the ShareIt application.
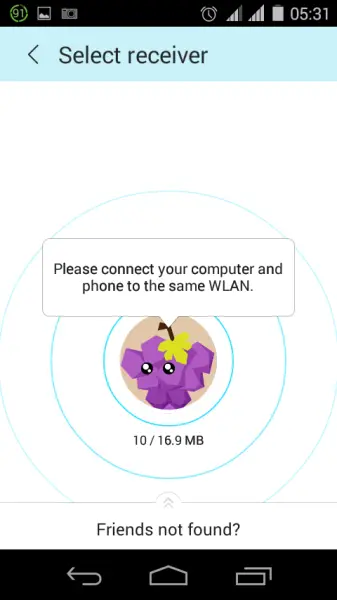
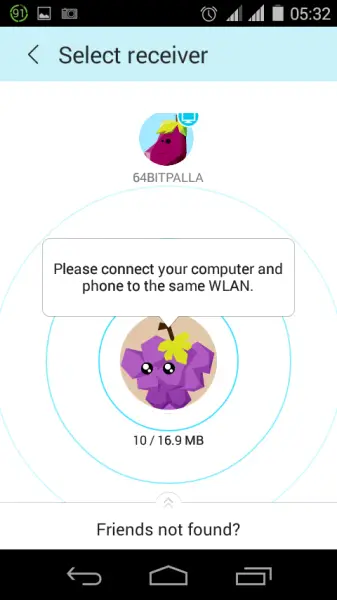
- Your computer name will be visible in the ShareIt app of your mobile.
- Tap the name you found on “Select receiver”.
- The files will be automatically transferred.
That simple!
Related:
You can see the same in screenshots below. The computer name is “64BITPALLA” and the mobile is “rama.geek”. The advantage with this method over blue-tooth is that it’s really fast and you need not enter any security codes for pairing devices.
 Pros and Cons of using ShareIt App
The Lenovo SHAREit software is FREE for use. It works even when there is no network or Wi-Fi connection. Requirement of wires or cables to transfer data between cross-platform devices is removed. Transfer of information between the devices is done rapidly.
But the devices have to be in range. Transfer photos, videos, movies and other files in seconds. It’s 40x faster than Bluetooth. Group sharing is also possible. It supports upto 5 devices at the same time. You can instantly share the same video or photo to five friends at once.
It supports Android smartphones, tablets, iPhone, iPad and even Windows PC. The main advantage is that you can even share private files, though copyright files are prohibited, according to the program’s web page disclaimer policy.
The app has around 34k +1s on Google plus, 160k reviews and has in-between 10 to 50 million downloads. It requires 2.2 Android OS and has 109k, 5 star ratings on the app page.
Manual Transfer using File Explorer in Windows 10 or 8.1 or 7
Once connected to the Android device, you can use File explorer or Windows Explorer to transfer files to PC. Otherwise, you can use a third-party tool like AB Commander. http://www.winability.com/abcommander/
Sometimes, your Android device is not detected by your Windows PC. In that case, you need to find the right driver for that mobile device. For example, my Redmi Note 4 phone and Android One smartphone were easily detectable in my Windows 10 or 8.1 PC.
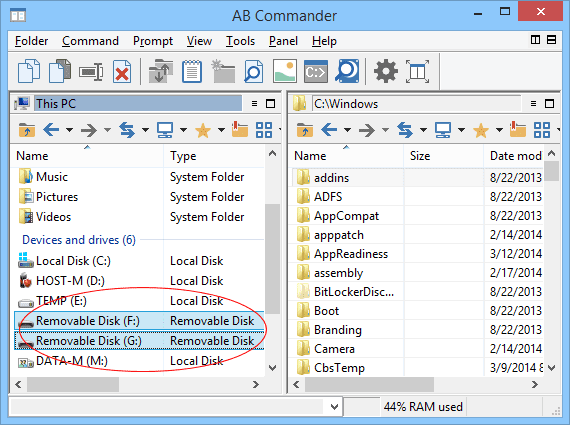
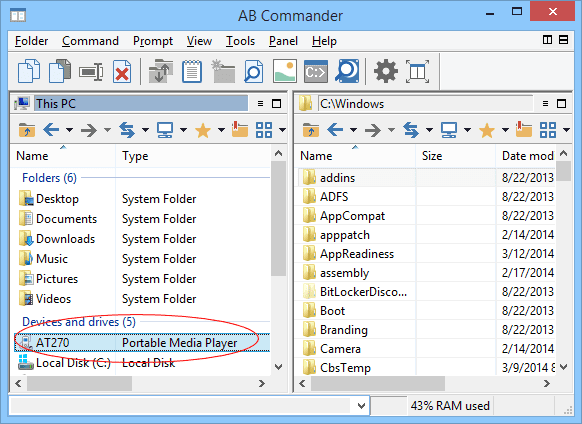
The smartphone or mobile will appear as a removable drive or virtual folder. Sometimes, the internal storage and external ones (like the SD card) are seen as two removable drives. Now there will be two panels in the AB Commander interface.
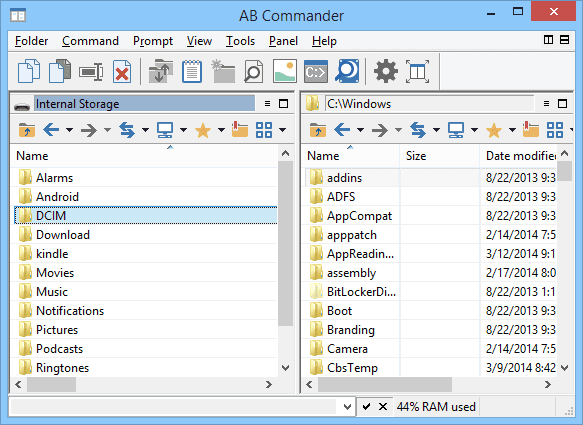
Just select the mobile phone and right storage on the left panel. In the right panel, just select the local computer hard-drive.
Navigate to that folder on your mobile device and select the required files. Now just drag and drop.
In this way it will minimize the number of operations required to transfer files between both your devices, compared to normal File Explorer.
Save Photos from Android to Windows 10 PC using Your Phone App
This app comes preinstalled in Windows 10. But, in Android Smartphone you have to install it. The app is called “Your Phone Companion“.
Start the “Your Phone” app in Windows 10. It will send you notification link to the Android app, if you have not installed on your phone.
For troubleshooting during PC to mobile connection, you can visit the following link. https://support.microsoft.com/en-us/help/4459358/windows-10-your-phone-app-help#troubleshooting
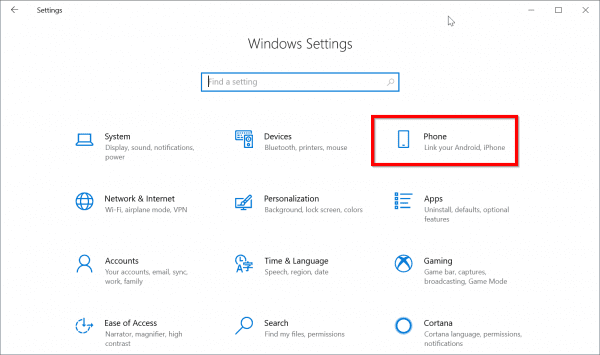
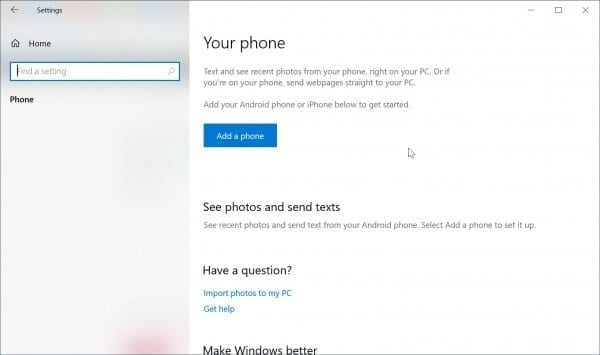
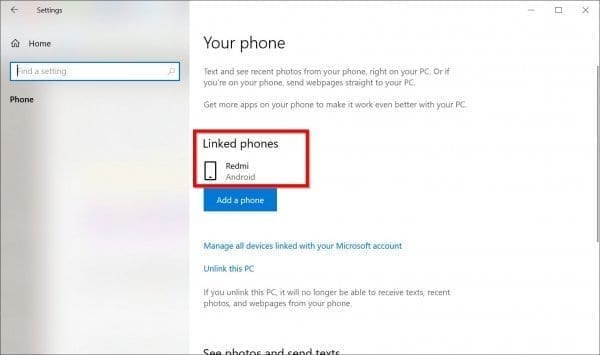
Once you have done that, you should see your mobile phone in “Windows Settings” in Windows 10. This should be available from 1803 version onwards. It means that your PC and smartphone are connected.
If everything went well, you can restart “Your Phone” app on your PC and Android.
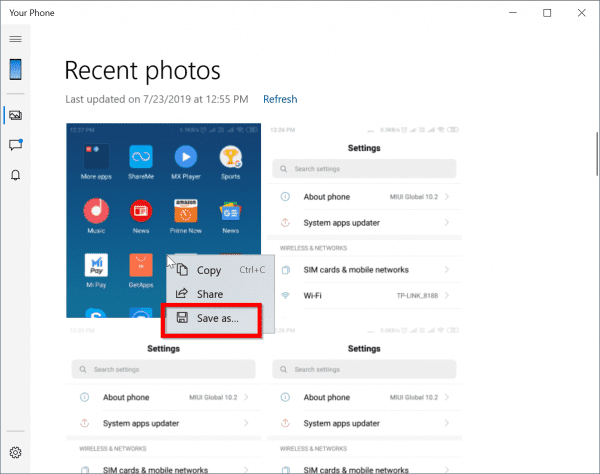
In the desktop app, you can see photos, messages, notifications on the left-hand side.
To transfer a screenshot, right-click the photo and select “Save As”.
Using Photos App – Transfer files from Android to PC using USB in Windows 8.1
For this purpose, you need to connect your Android Phone to Windows using USB cable. Press the “Windows” key and type “Photos”. You should see that app installed by default in Windows 8 or 8.1. You can also use the Search feature of Charms bar to select that particular app. Open the Photos app.
http://windows.microsoft.com/en-us/windows-8/import-photos-videos
If you are using a mouse, right-click the app. Then tap or click “Import” at the bottom. Select the device you want your photos or files to be imported from. The app automatically searches for all photos and videos which are not imported before and selects them. You can also select each photo or video you want to import. You can also click “Select all” to import all the found files. Click on “Import”.
Then the files are saved in the Pictures folder within a sub-folder named with the current date.

![How to Remove Google Account from Redmi Note 4 [2020]](https://www.windowstechit.com/wp-content/images357/2019/06/add-remove-google-accounts-redmi-note-4-768x1365.png)


![How to Uninstall Apps in Windows 10 [Inbuilt or PreInstalled or Default]](https://www.windowstechit.com/wp-content/images357/2019/03/uninstall-inbuilt-apps-windows-10-768x622.png)
