Last Updated:
AI-powered virtual assistant introduced by Microsoft as part of the new operating system. Sometimes it can be annoying. To disable Copilot in Windows 11, use the Settings app, Group Policy Editor, or Registry Editor.
Designed to enhance user experience and productivity, Copilot helps users navigate their computer, perform tasks, and find information more efficiently.
With natural language processing and machine learning capabilities, Copilot can understand and respond to voice commands, as well as provide personalized recommendations based on user behavior and preferences.
This intelligent assistant is integrated into various aspects of the Windows 11 user interface, making it easier for users to interact with their computer and streamline their workflow.
Whether you need help finding a specific file, setting a reminder, or optimizing your system settings, Windows 11 Copilot is there to assist you every step of the way.
In this blog post, we will guide you through 5 steps to disable Copilot on Windows 11 using 3 different methods.
Method 1: Disable Copilot Windows 11 through Settings
You can find this setting in both old and new versions of Windows 11. If this setting is not available, you can follow the Windows 11 Home setting.
Step 1: Open the Windows Settings app by pressing the Windows key + I.
Step 2: Navigate to the “Privacy & security” section.
Step 3: Scroll down and click on “Copilot.”
Step 4: Toggle off the switch next to “Enable Copilot.”
Step 5: Restart your computer for the changes to take effect.
Method 2: Disable Copilot Windows 11 using Group Policy Editor (for Pro, Enterprise, and Education editions)
If you have turned off Copilot using Windows 11 settings, it is fine. But if you still have a problem, you can follow these steps. Usually it is found in the computer configuration, but sometimes, you can see this setting in the user configuration.
Step 1: Press the Windows key + R to open the Run dialog box.
Step 2: Type “gpedit.msc” and press Enter to open the Group Policy Editor.
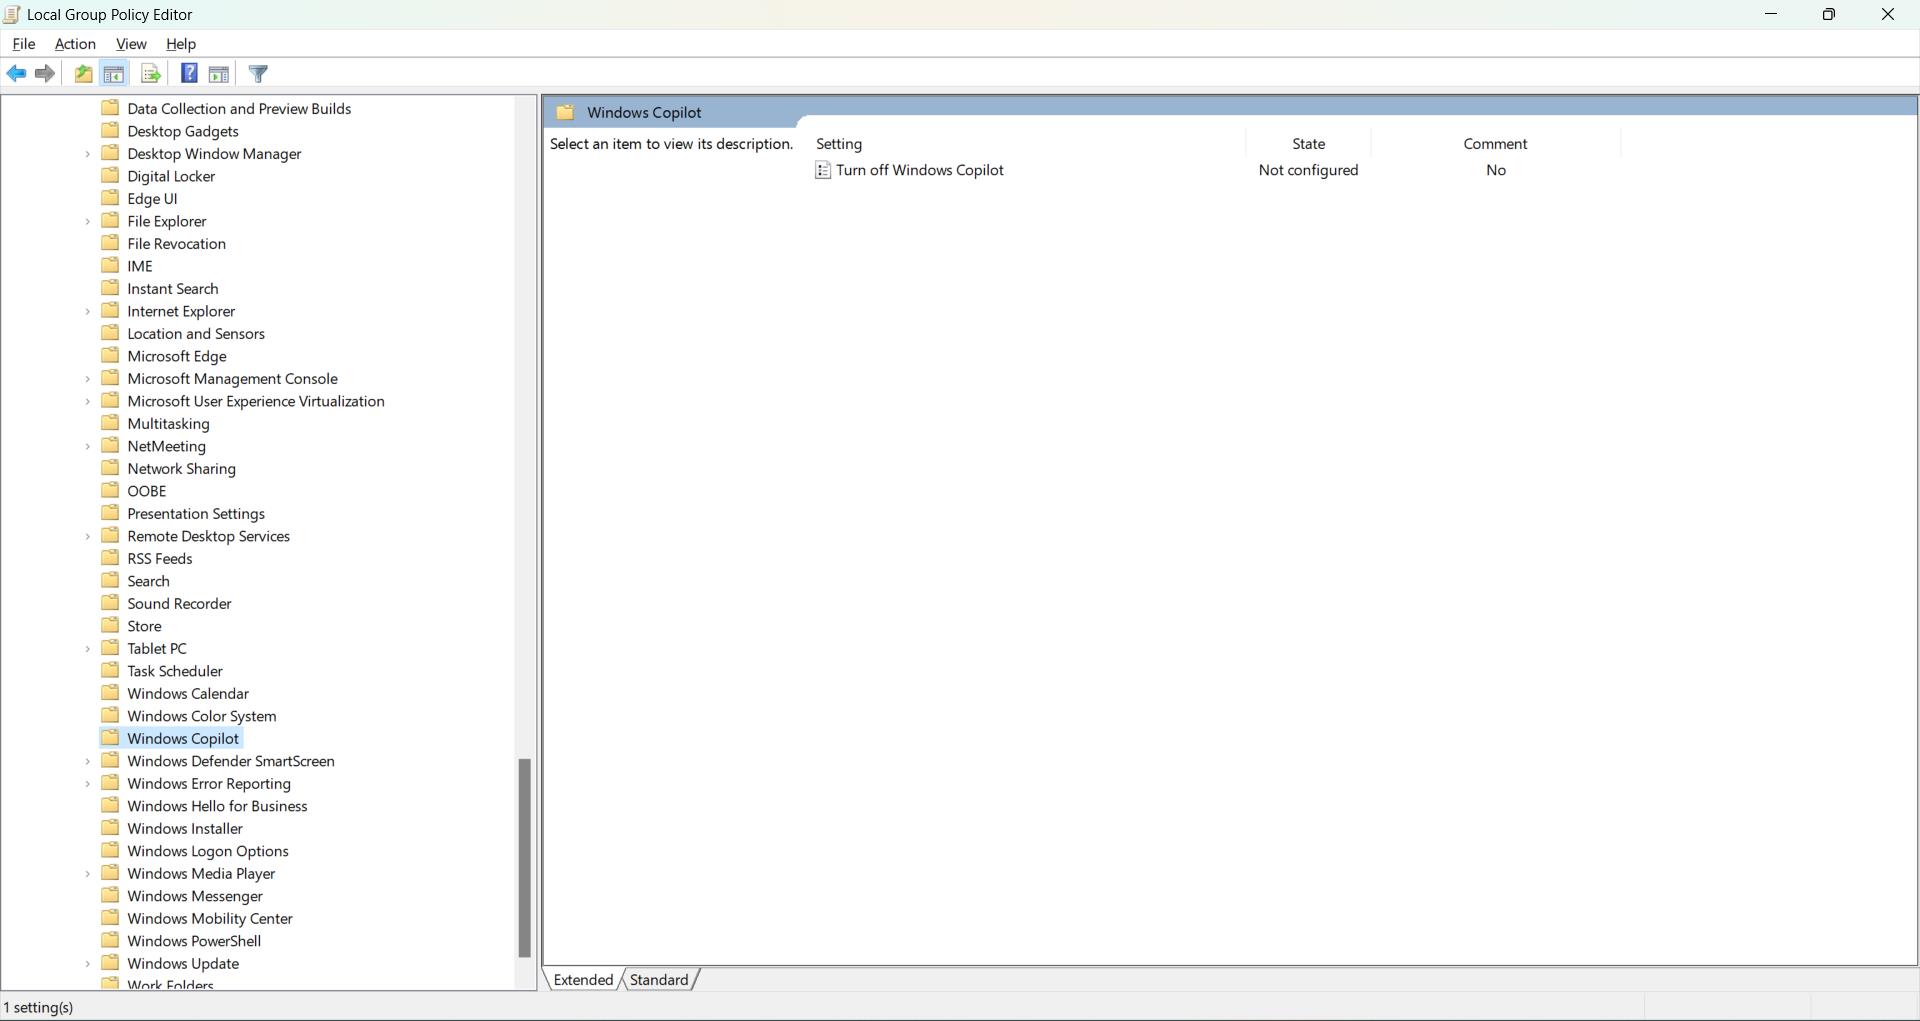
Step 3: Navigate to User Configuration > Administrative Templates > Windows Components > Windows Copilot.
Step 4: Double-click on the “Disable Copilot” policy and set it to “Enabled.”
Step 5: Click “Apply” and “OK,” then restart your computer.
Method 3: Disable Copilot Windows 11 using the Registry Editor (for all editions)
Step 1: Press the Windows key + R to open the Run dialog box.
Step 2: Type “regedit” and press Enter to open the Registry Editor.
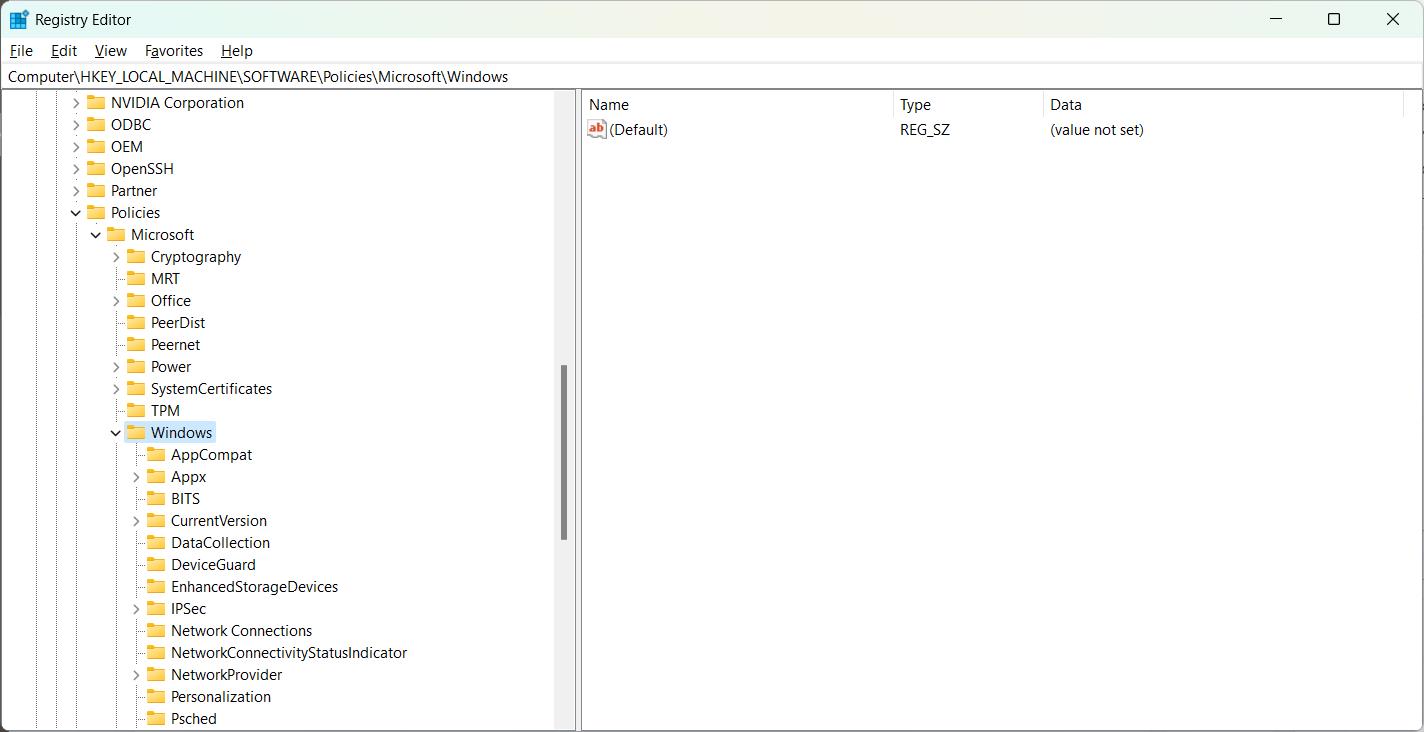
Step 3: Navigate to HKEY_LOCAL_MACHINE\SOFTWARE\Policies\Microsoft\Windows\Copilot.
Step 4: Right-click on the “Copilot” key, select “New,” and then click “DWORD (32-bit) Value.”
Step 5: Name the new value “DisableCopilot,” double-click it, and set its value to 1. Restart your computer.
How to Disable Copilot Windows 11 Home Edition
If you’re using Windows 11 Home edition and wish to disable Copilot, the AI-powered assistant, you can do so by following these 5 simple steps. This guide will walk you through the process of turning off Copilot on your Windows 11 Home computer.
Total Time: 3 minutes
Step 1: Right-click the Taskbar
To begin, press the Windows key + I on your keyboard to open the Windows Settings app. This is where you’ll find the options to manage various aspects of your Windows 11 system, including Copilot.
Step 2: Click on Taskbar settings
Once you have the Windows Settings app open, look for the “Personalization” section in the left-hand menu. Click on it to access the Taskbar settings for your Windows 11 Home computer.
Step 3: Navigate to Personalization > Taskbar
Within this section, scroll down until you find the “Copilot” option under Taskbar items. This is where you can manage the settings related to the Copilot assistant on your Windows 11 Home edition.
Step 4: Toggle Off the “Copilot in Windows (preview)” Switch
To disable Copilot, simply click on the toggle switch next to “Enable Copilot.” By turning this switch off, you’ll effectively disable the Copilot assistant on your Windows 11 Home computer.
Step 5: Restart Your Computer
After you’ve toggled off the “Enable Copilot” switch, it’s important to restart your computer for the changes to take effect. Once your computer has restarted, Copilot will be disabled, and you’ll no longer see the AI-powered assistant on your Windows 11 Home edition.
Conclusion
Disabling Copilot on Windows 11 is a straightforward process that can be achieved through various methods. Whether you prefer using the Windows Settings app, Group Policy Editor, or Registry Editor, following these 5 steps will allow you to successfully disable Copilot. Choose the method that best suits your needs and enjoy a Copilot-free Windows 11 experience.