Last Updated:
Windows Defender is also known as Microsoft Defender Antivirus in the latest versions of Windows 10.
Check Windows Security to see if it’s turned on. It has built-in spyware, rootkits, ransomware, and cloud protection.
The best way to permanently disable Microsoft Defender is using the Local Group Policy Editor and Registry Settings.
It should work on 20H2 and 2004 versions. Some things changed from the 1909 version.
But I checked on my Windows 10 64-bit desktop with the latest updated version and successfully disabled them.
The Group Policy solution is only possible in the Pro edition, where you have administrator privileges. The Registry change will even work on Windows 10 Home.
Why Microsoft Defender Is a Necessity
Whenever there is a virus in a file or app, it automatically scans that software and takes necessary action. You can either quarantine that file or remove it immediately. It keeps your computer safe from all kinds of viruses.
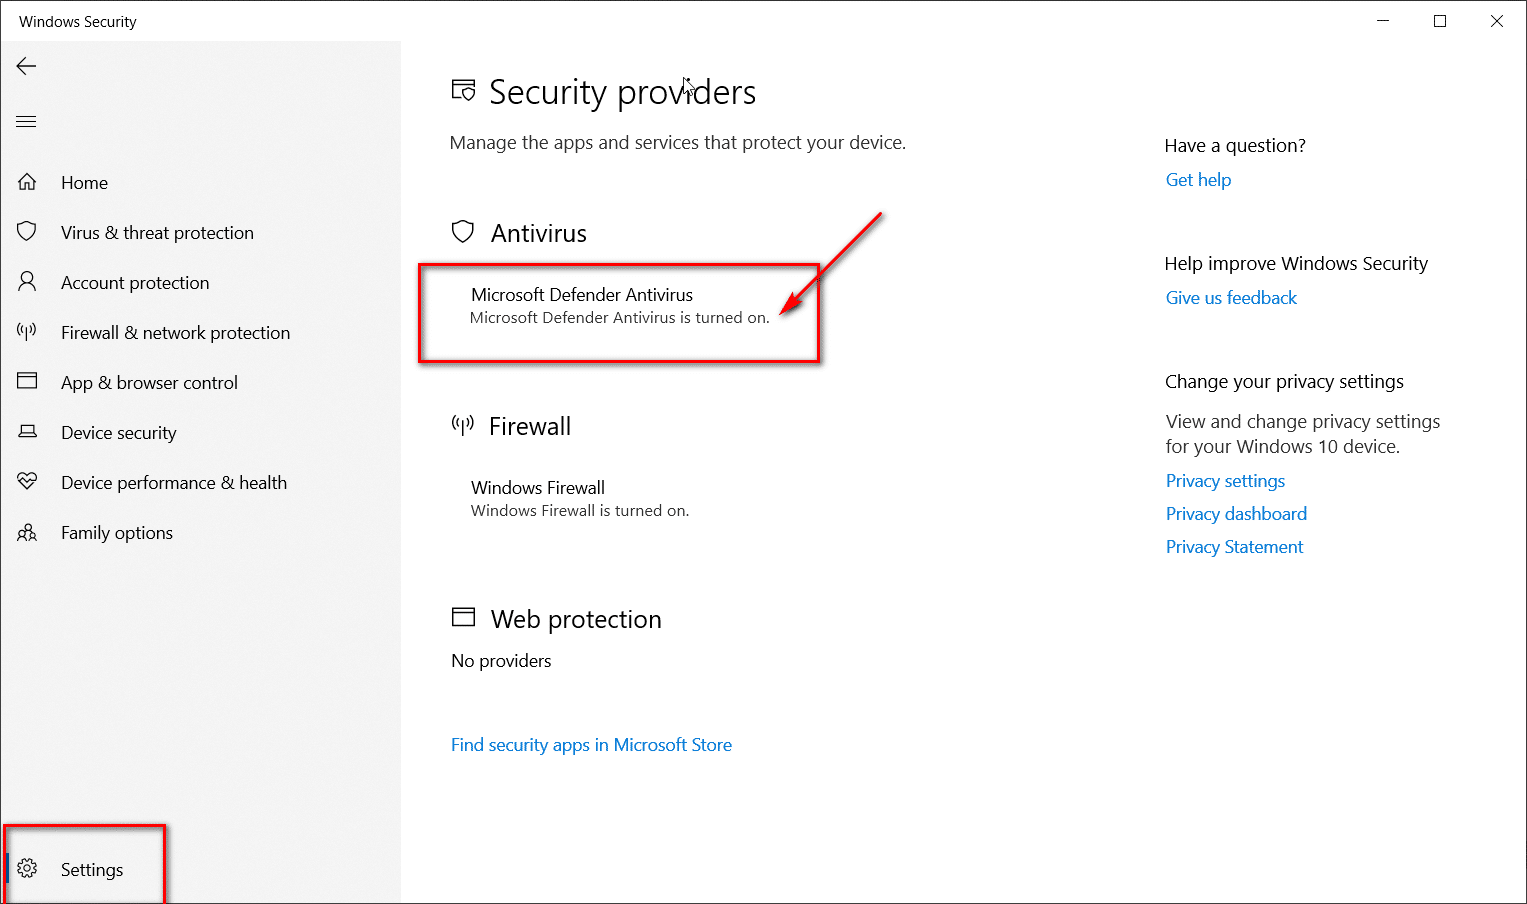
This is the ideal antivirus solution for all types of desktop and laptop users. If you need to know if it’s working, open Windows Security from the Notification area. Otherwise, you can use the search box of Windows 10.
Go to Settings > Manage providers. You can see the “Microsoft Defender Antivirus is turned on” message. It means that it is enabled, running, and working.
Protection against unwanted apps, files, and websites is also done with the help of other tools, such as Windows Defender SmartScreen and controlled folder access, which enhance overall device security. Device security and app browser control are also essential. Microsoft account protection is one of the features of Windows Security.
Why Disable Microsoft Defender Antivirus in Windows 10?
Though this security solution provides excellent protection against all kinds of threats, you want extra protection. Then, it would be best if you searched for third-party solutions like Kaspersky Antivirus, Norton Antivirus, Bitdefender Antivirus, and ESET NOD32 Antivirus.
I run the paid version of Bitdefender Internet Security 2020.
I want to totally disable Windows Defender and Windows Defender Firewall. I’ve already made a current Macrium Backup and am ready to take the plunge. I already tried the registry method… it may have shut off the AV, but it hasn’t shut down the Windows Defender firewall
Source: tenforums.com
When you install them, then Microsoft Defender gets automatically disabled. It is the performance protection that Microsoft provides to prevent two or more antivirus programs from running simultaneously.
It would be best if you made sure that only one antivirus is running on a single machine. Otherwise, speed issues and other bottlenecks slow down your system, which can lead to decreased performance and potential security vulnerabilities.
In another case, you won’t install software or apps that are conflicting with Microsoft’s built-in antivirus solution. Then you can temporarily disable the AV and install the required software. Turn on the AV back to normal once your work is complete.
In other cases, users complained that Microsoft Defender was slowing down the computer. It took more resources in terms of CPU and RAM. It was present in earlier versions from 1809 or 1803. But now, it doesn’t take that much, and I am using it with ease on the 20H2 version.
In this tutorial, we are going to see three ways to disable Windows Defender in Windows 10.
Initial Steps to Disable Microsoft Defender
You need to turn off the tamper protection to make methods 1 and 2 work in 20H2. In previous editions, this option was not available. But to protect your computer from third-party and outside interference, Microsoft made sure that Windows Security settings are not turned off automatically.
To disable Microsoft Defender in Windows 10, first, turn off the tamper protection.
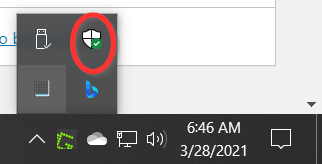
1 – Click on the “shield” icon in the Notification area.
2 – Click on Virus & threat protection.
3 – On the right-hand side, click on Manage Settings under Virus & threat protection settings.
4 – Scroll down on the next screen till you see Tamper Protection. It is enabled and blue by default.
5 – Move the slider to the left-hand side to turn it off.

These steps are to be applied for both of the below two methods for lasting immobilization of Windows Defender. If you feel that you want it enabled, you can turn it in again.

Warning—Removing the tamper protection for a long time is not a good idea. It will make it prone to different virus and spyware attacks. The system will always be under threat. Better install a third-party antivirus and reinstate tamper protection.
How to Permanently Disable Microsoft Defender using Group Policy Editor
- Type “group policy editor” in the Windows 10 search box.
- Click on the Edit Group Policy Control Panel item. (Note: Press the Win and R keys together and open the Run dialog box. Type the search command “gpedit.msc” to open it. Otherwise, you can use the traditional Control Panel.
- Go to this path:
Computer Configuration > Administrative Templates > Windows Components > Microsoft Defender Antivirus

- Double-click the option that says Turn off Microsoft Defender Antivirus policy.
- Click the Enabled option. Then, apply and OK.

- Restart your computer.
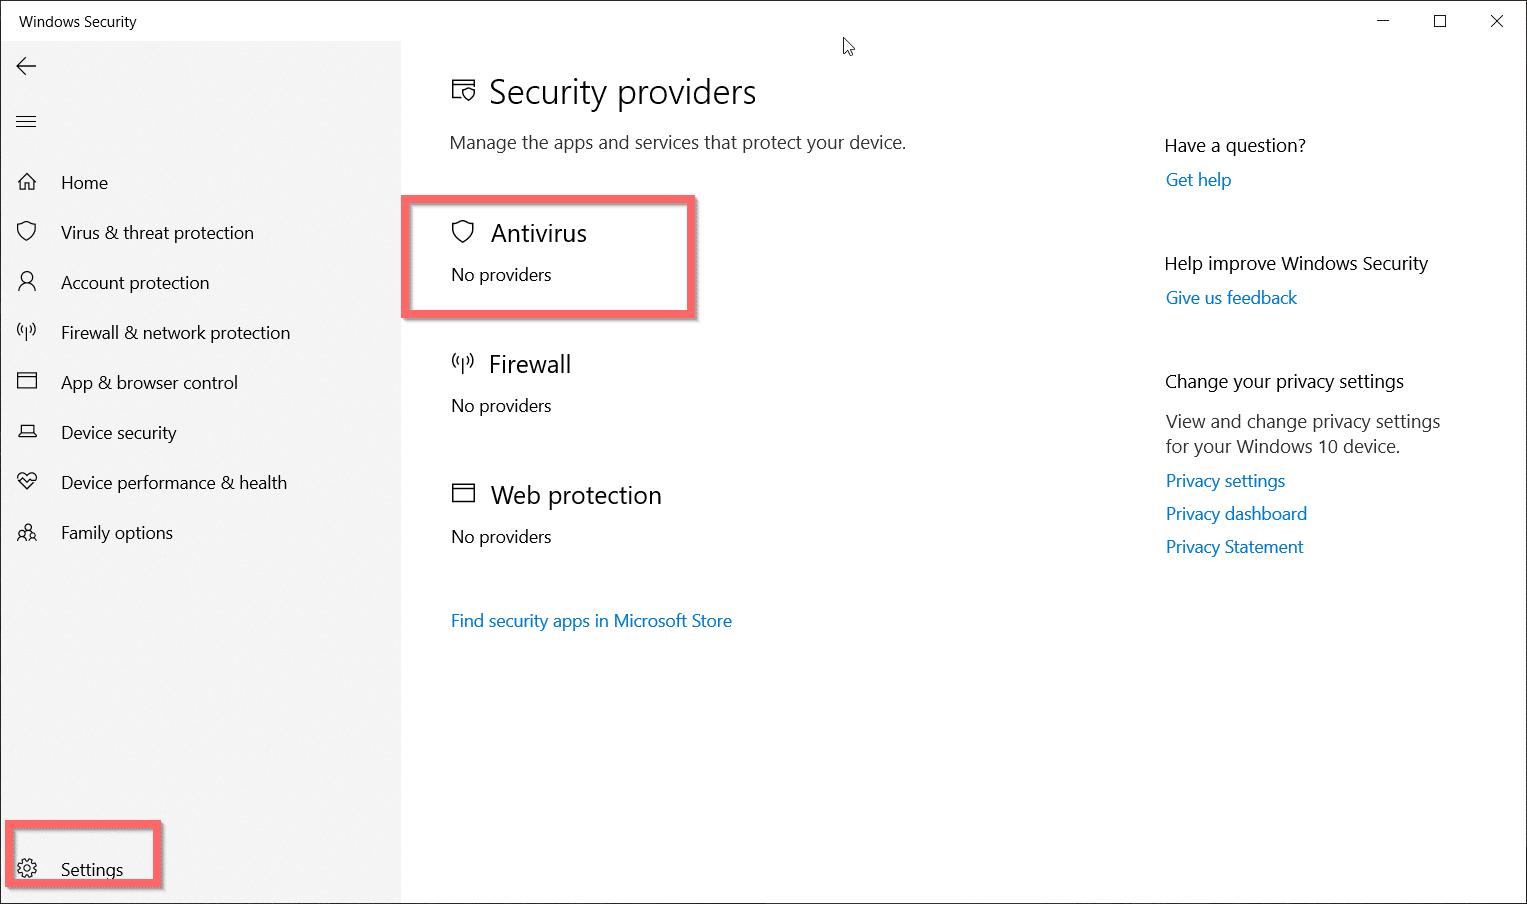
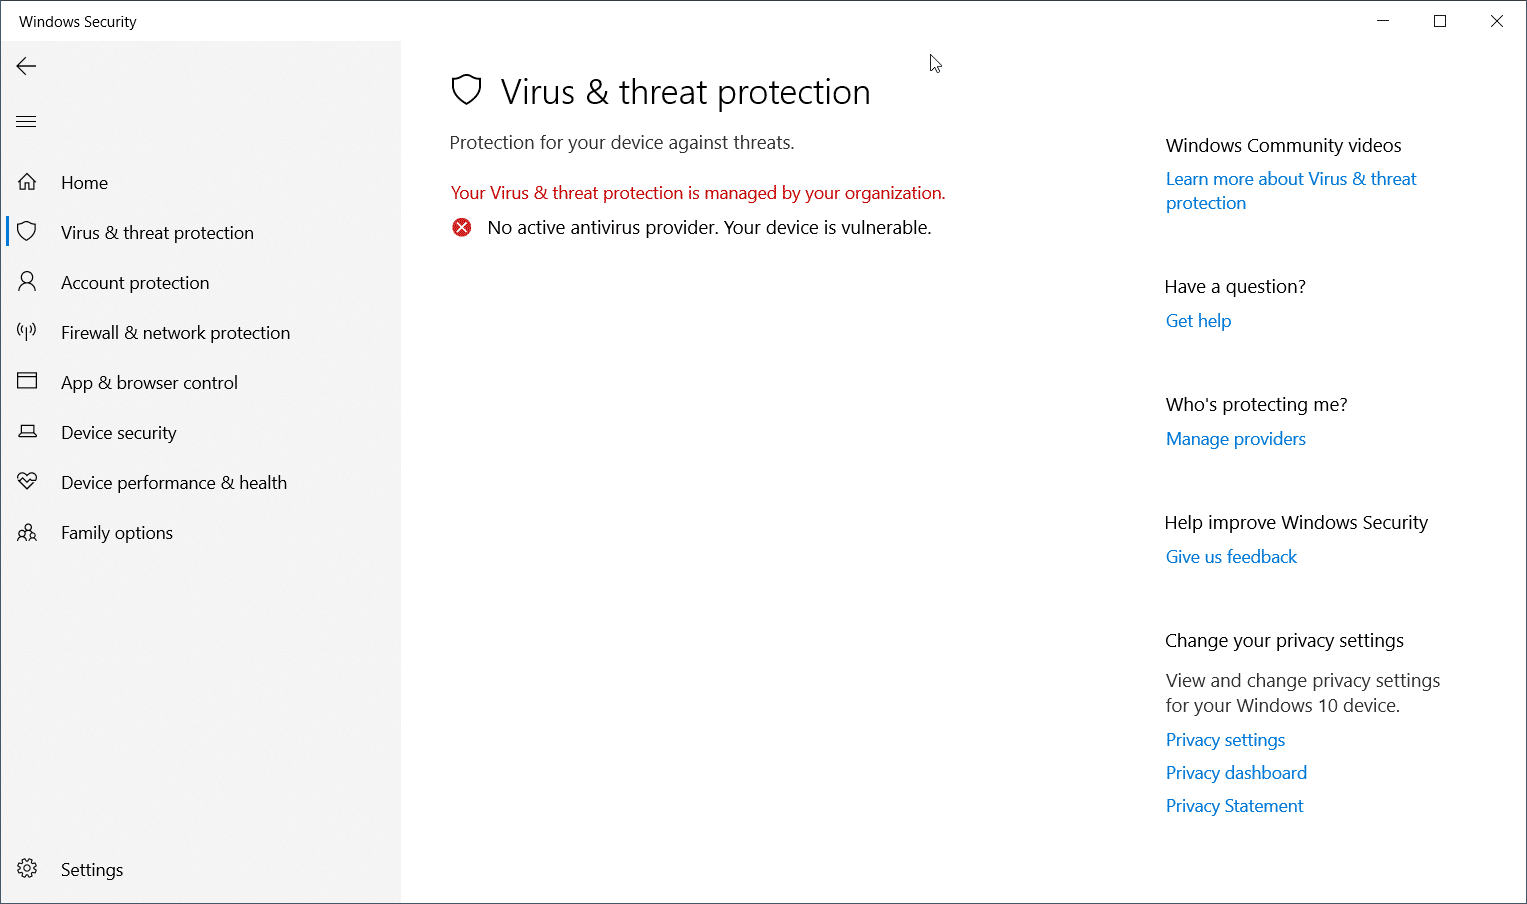
It should disable Microsoft Defender permanently. You can also check in the Windows Security settings to see if it’s turned on.
The display message that Microsoft Defender is turned on will not be visible.

Check for Microsoft Defender is Enabled or disabled.
You can also try the PowerShell method to know whether the default antivirus is working or not. Open it as an administrator.
- Type “PowerShell” in the search box and click on the Windows PowerShell app.
- Enter the following command.
Get-Service WinDefend
- You should see the status is stopped.
- Enter the following command also.
Get-preference
- In the set of entries, it should show DisableRealtimeMonitoring as True.
- It confirms that real-time protection is disabled, which is another way of saying that AV is not enabled.
It means Microsoft Defender is not working anymore.
How to Disable Microsoft Defender Permanently using Registry Settings
It also worked for me when I tried it on my Windows 10 64-bit computer, 20H2 version.
- Type “regedit” in the Run dialog box. Press the Win and R keys together to open it.
- Navigate to the following path:
HKEY_LOCAL_MACHINE\SOFTWARE\ Policies\Microsoft\Windows Defender
- Right-click on Windows Defender and create a new DWORD (32-bit) value key.
- Name the entry as DisableAntiSpyware.

- The initial value will be 0. Double-click it and enter 1.
- Restart your computer.
Microsoft Defender turned off. Otherwise, the turned-on message will not appear. You can check in Windows Security.
If you want to enable the AV again, delete the above entry or enter 0.
How to Temporarily Disable Microsoft Defender in Windows 10
It is the best use case when you want to install any third-party software. As a network administrator, if you are installing any apps also, this works out temporarily.
After a restart, it will come back to normalcy.
- Type “Windows Security” in the search box and click on the app.
- Click on Virus & threat protection on the left-hand side.
- Click on Manage Settings under the Virus & threat protection item.

- Scroll down to see real-time protection.
- Initially, it will be blue and turned on.
- Move the slider to the left to toggle the switch to OFF.
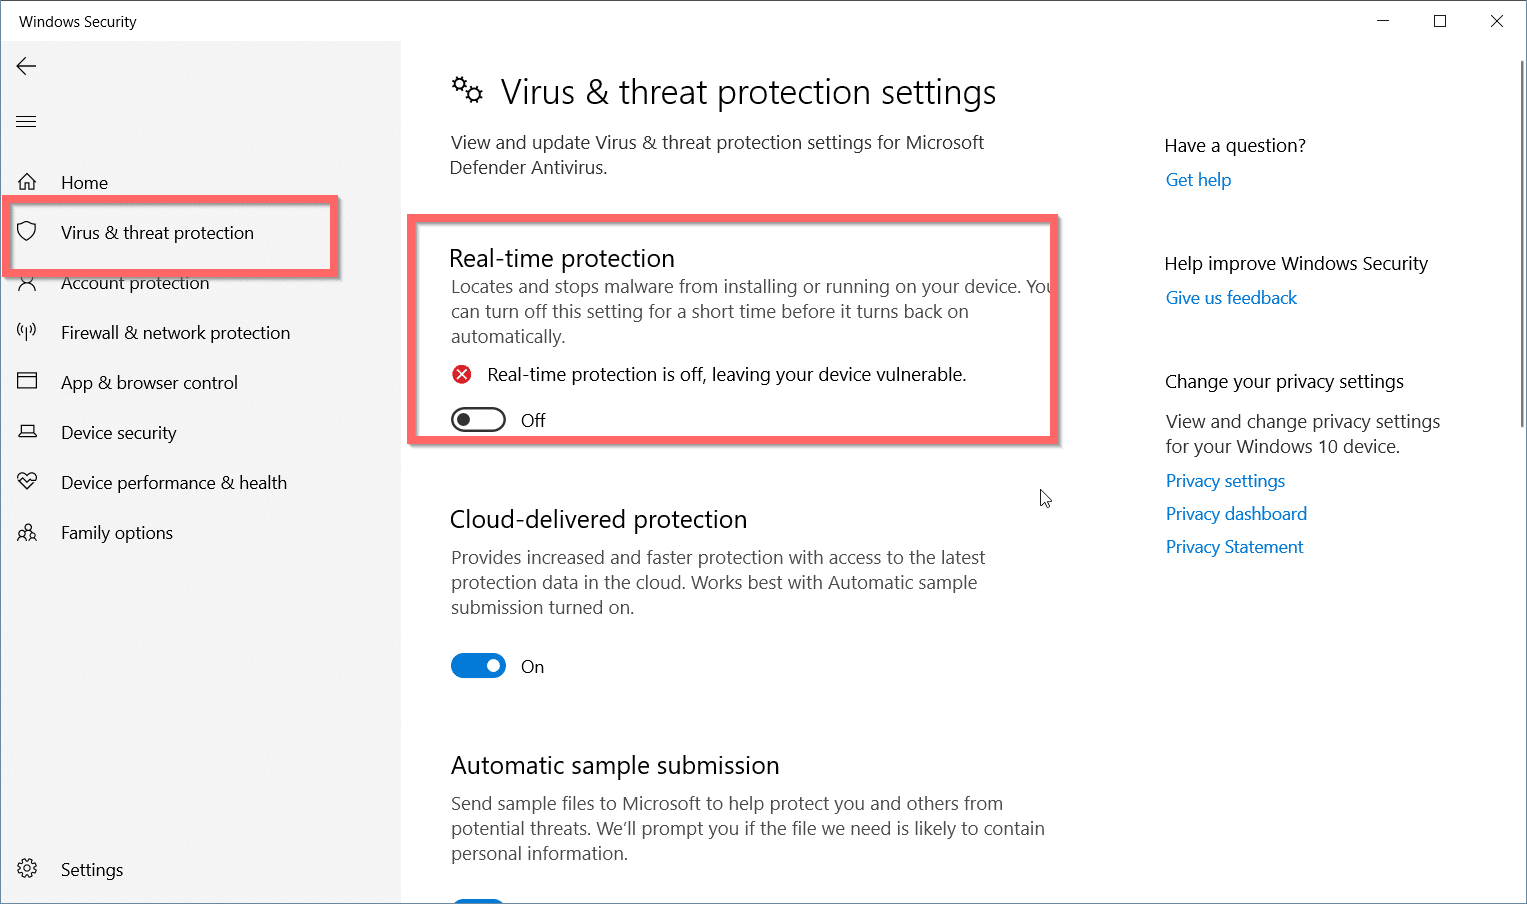
It will disable Microsoft Defender temporarily. Enable it again, if required. Turn on the switch to ON. Normalcy restored.
Using Autoruns method
This method may work in 1909 and previous versions. It may work in the recent Windows 10 upgrades also. But personally, it did not work for me on 20H2.
Download the latest version of Autoruns.
- Turn off the Tamper and Real-time protection as mentioned above.
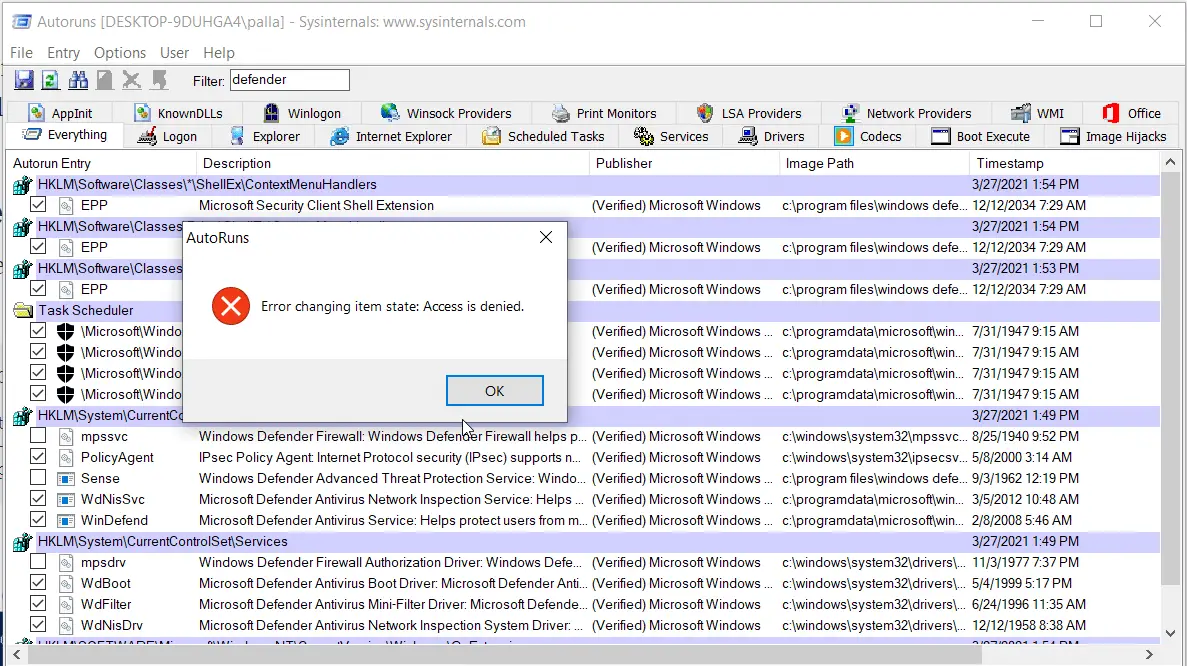
- Now unzip the file to see the Autoruns folder.
- Inside it, click the appropriate executable file. For example, run Autoruns64 on your 64-bit computer. If you use other exes, you can get an error message.
- It will take some time to load all the entries. It will enable Options at the top.
- Uncheck all items in the Options tab except Hide Empty Locations.
- Filter the contents of entries using the keyword Windows Defender.
- Uncheck all items except Policy Agent in the following locations.
HKLM\System\CurrentControlSet\Services
Task Scheduler
- The entries will be a little different for each Windows 10 update and version. Based on your system also, it can vary.
- Finally, reboot to see if it’s working.
Using PowerShell
Enter the following commands in the Windows PowerShell app. You can open it as mentioned earlier.
Set-preference -DisableAutoExclusions $true

Get-Service WinDefend | Stop-Service –Force
It may work in the 1709 or 1803 versions. But it did not work in the latest version of 2004 or 20H2.

Unsuccessful attempts to Disable Microsoft Defender in Windows 10
I tried to disable them using other methods, but it did not work. I think it will not work for anyone. But it is a piece of valuable information.
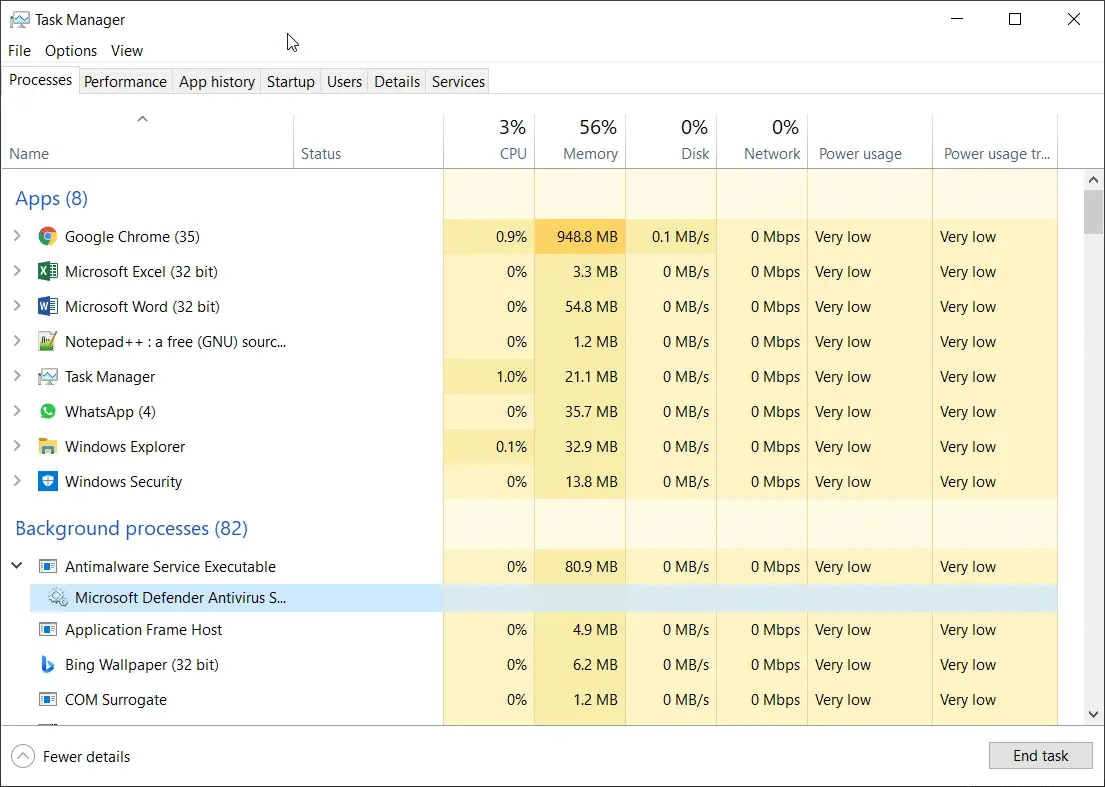
- Press Ctrl + Alt + Delete and click on Task Manager.
- Under background processes, you can see Antimalware Service Executable. Click it to see Microsoft Defender Antivirus Service.

- Right-click and stop. But it will throw an error message.
- On the same app, go to the Services tab and check the WinDefend item.
- It is the Microsoft Defender Antivirus service. Try to stop it. But it won’t. It shows as running. If you are successful, it shows as Stopped.
- In the Details app, you can see MsMpEng.exe. This process is also related to Microsoft Defender. If it’s enabled, you can see it running.

My Personal Experience
I would not suggest that you turn off Microsoft Defender permanently. You may temporarily disable the real-time protection in Windows Security for any of your necessities.
In most cases, this is sufficient to install any third-party software or app that is prevented by Microsoft’s built-in antivirus from running.
Another best way is to install a third-party AV solution like Kaspersky or Norton to fulfill your needs. This way, you can disable Microsoft Defender and also protect your computer from threats.
Don’t try any other third-party software solutions to fulfill your needs. Your system is vulnerable without Microsoft Defender, and unwanted people can create viruses in your system.
Hope you will be successful in your attempts to disable Microsoft Defender without much fuss.