Last Updated:
One of the major issues is the lack of a brightness slider in Windows 10. Suffocation to the eyes. The screen displays either too high or too low brightness.
There are hardware and software controls to make the recommended adjustments.
But in recent times, after a few updates, the screen brightness change refuses to work.
To have the optimal level of light display on your screen, you have to adjust the brightness and contrast.
Can’t adjust the brightness in the Windows 10 desktop?
Why do you need to change the brightness in Windows 10?
In laptops the amount of battery life depends on various factors. Brightness control is one of the items. If you are using too much brightness, then your battery too will drain off quickly.
Eyes get worn out if brightness is too heavy in the dark. After dusk, eyes suited for dim light.
For both of these reasons, you need to adjust brightness in Windows 10 from time to time.
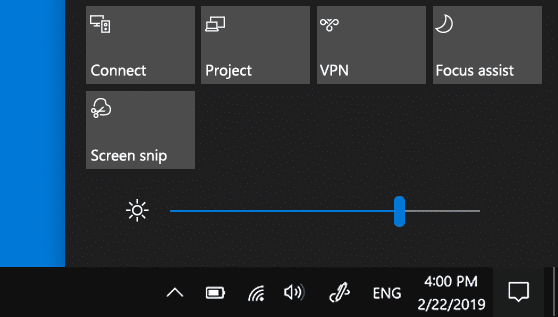
Image Source: support.microsoft.com
Greg Author reports this particular problem on the Windows Support forum—
I am experiencing the same issue with a brand new Lenovo. It worked initially, but I’m guessing after an update the brightness no longer works. I’ve looked for an automatic brightness button. It’s not there. I’ve located the slider, and it doesn’t change anything. In System, the brightness slider doesn’t change anything. And the F%/F^ buttons also don’t do anything.
Please tell me how to get it up and running. The screen is dim all the time.
In other cases, hue and saturation are also required to be changed for minute adjustments.
The following solutions will help you to resolve screen brightness not working in Windows 10.
- Adjust the Brightness Slider
- Adjust the Hardware Controls
- Download Display Drivers.
- Use the Graphic Driver Panel
- Update the Display Adapter
- Change Screen Resolution
- Night-light Option
Adjust the Brightness Slider
In the latest laptops, you can see a brightness slider control in the Action Center. Also, in recent years, all-in-one and compact computers have taken precedence. In this type of system, the monitors are connected to the computer CPU.
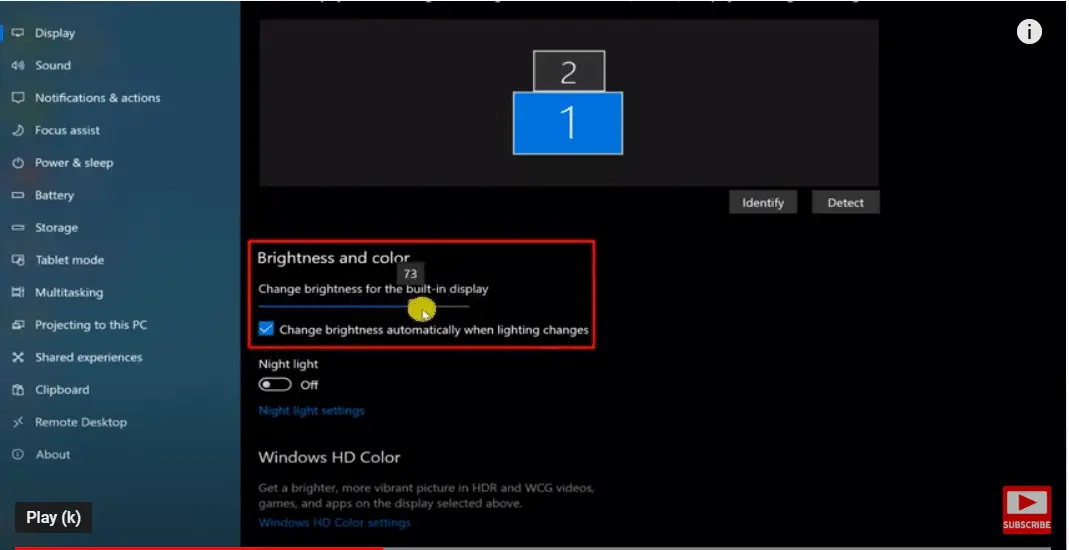
Go to Settings > System > Display. On the right-hand side, there is a check box that says, “Change brightness automatically when lighting changes.” Tick it. This will automatically change the screen brightness based upon the surrounding light and ambience. If you are not satisfied with this level, then you can move the slider above to fine-tune the brightness.
Generally, this kind of setting does not appear for external monitors and is available after the 1903 update. For traditional monitors, you can follow the solution below.
2. Use the Hardware Controls of the Computer Monitor
In many cases, the monitor hardware comes with software controls to change the brightness. For example, my LG IPS FULLHD (1920×1080@60Hz) monitor is a plug-n-play type of device, meaning it can be connected to a computer and used immediately without needing additional software installation. It has a switch at the center.
When I press it, there are several options. When I click the “Menu,” I can see further options. I turned on the Picture Mode to “Custom.” Then I went back to “Quick Settings.”
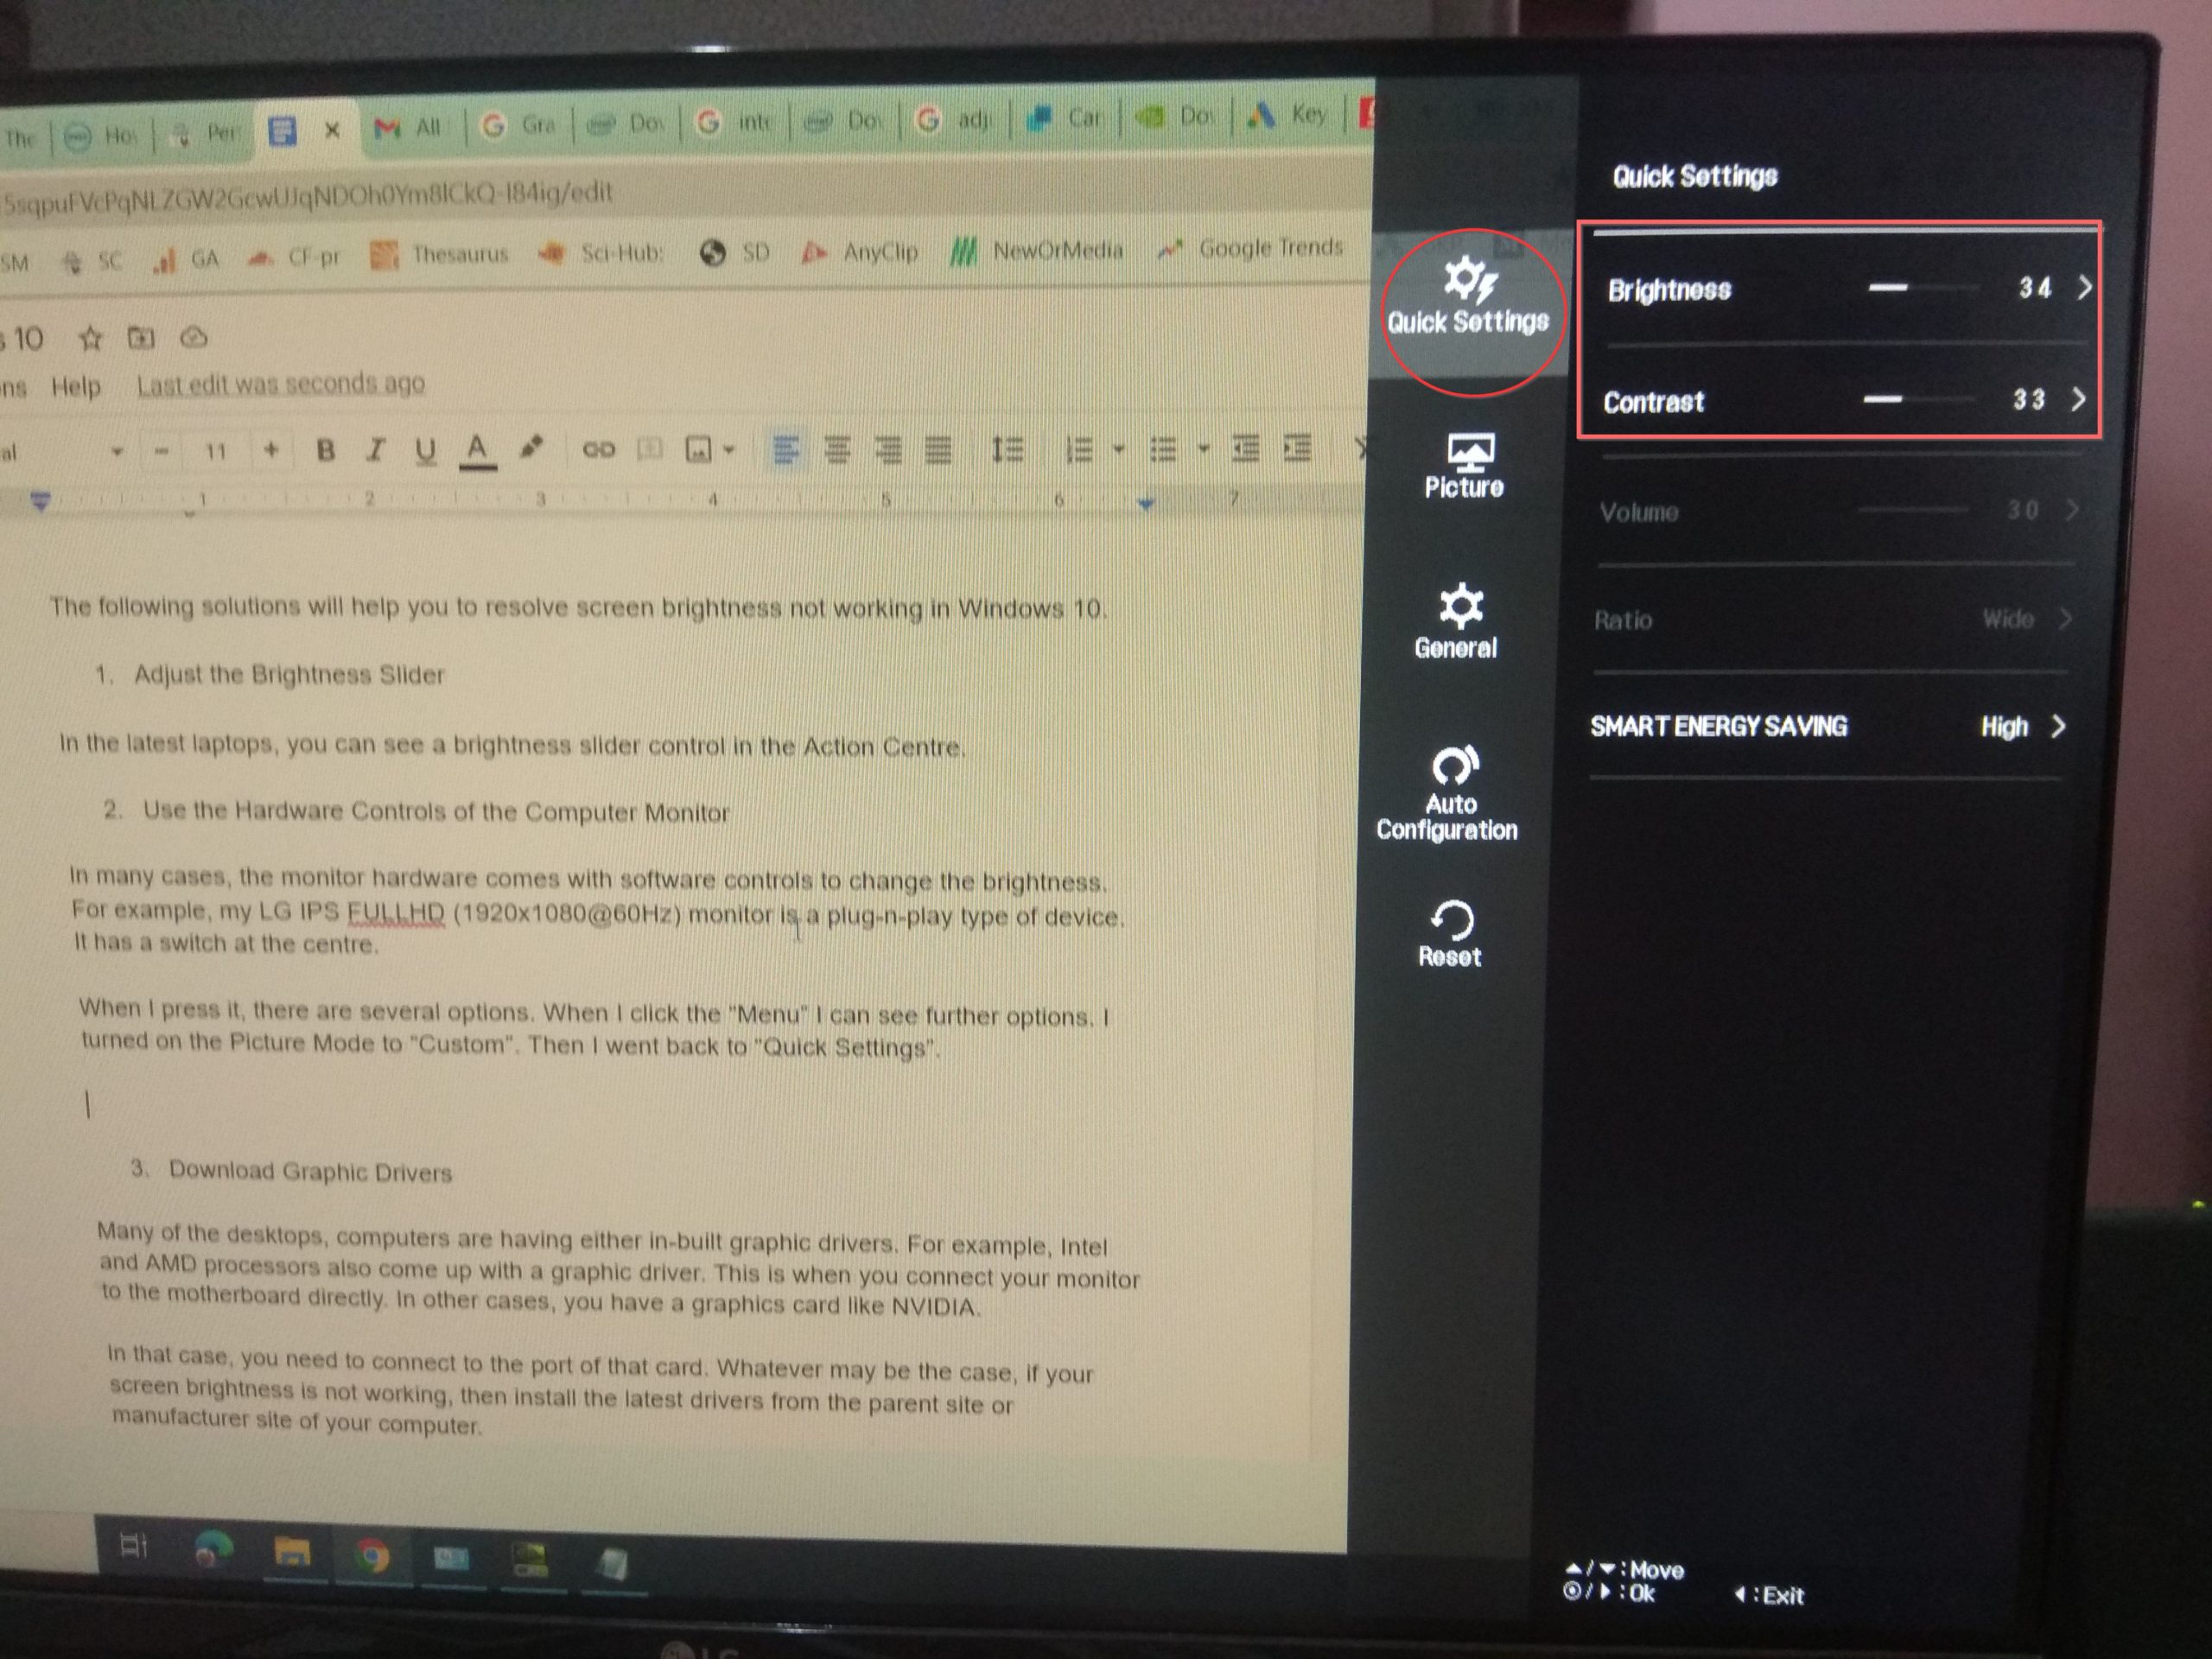
In that option, I can move the brightness and contrast sliders to adjust my monitor settings. I normally set them to 35 for a cool eye effect.
In case you want to use any software for better reading and less stress on your eyes.
3. Download Graphic or Display Drivers
Many of the desktops and computers have built-in graphic drivers. For example, Intel and AMD processors also come with a graphic driver. This method is when you connect your monitor to the motherboard directly. In other cases, you have a graphics card like NVIDIA.
You must then connect to the card’s port in that scenario. Regardless of the situation, if your screen brightness is not functioning, install the latest drivers from your computer’s parent or manufacturer site.
- Download Intel Graphic Drivers—https://downloadcenter.intel.com/product/80939/https://downloadcenter.intel.com/product/80939/Graphics
- AMD Graphic Drivers – https://www.amd.com/en/support
- Download NVIDIA Graphic Drivers—https://www.nvidia.com/ https://www.nvidia.com/Download/index.aspx
For detailed instruction on how to download the NVIDIA drivers, you can follow this tutorial.
Change Settings in Graphics Driver Panel
If you are unable to change the hardware brightness controls or move the slider in Windows 10, then this option can become handy if you have a graphics card. For example, I have an old NVIDIA GeForce 210 graphics card installed.
I connect my monitor to this graphics card port. When I installed this hardware, a control panel also got installed. The utility can be opened from the Notification Area or from the Control Panel.
- In Windows 10, type a few letters of “Control Panel” in the search box.
- Click the Control Panel app from the list of items.
- View by Small Icons of the Control Panel window, where you can adjust your computer’s settings.
- Typically you see an item called “NVIDIA Control Panel.”
- On the left-hand side, you can see the option “Adjust desktop color settings.”
- On the right-hand side, you can see “Choose how color is set.”
- Make sure the option “Use NVIDIA settings” is selected if you are using your monitor through the graphics card’s port.
- There you can move the sliders related to brightness, contrast, and gamma.
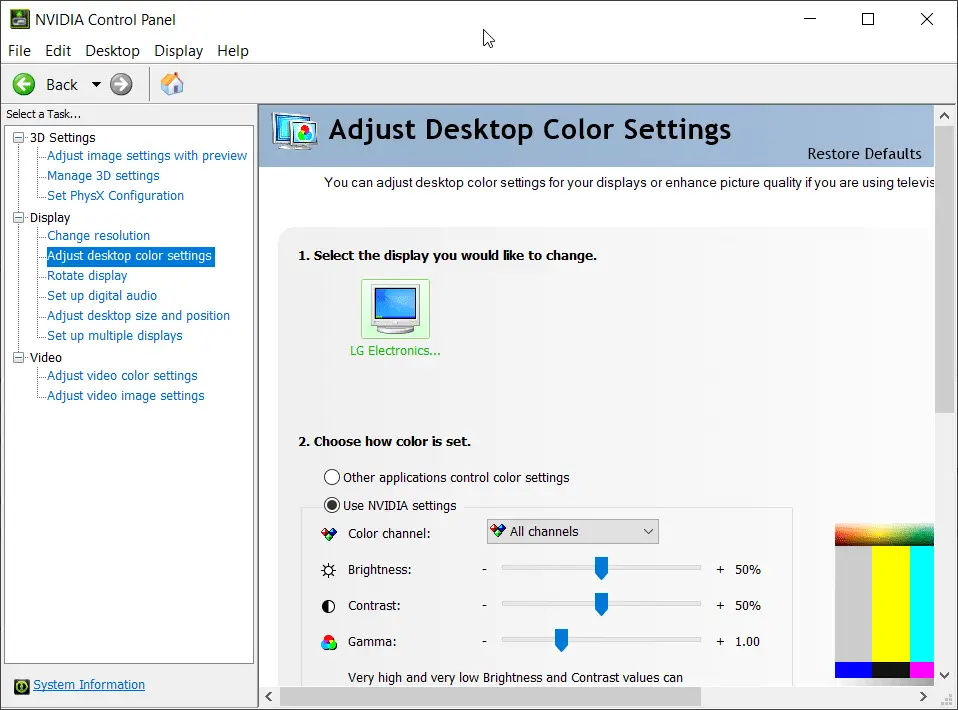
This way you can adjust the brightness on your Windows 10 desktop.
Update the Display Adapter in the Device Manager
Sometimes, old display adapters may prevent the brightness from working correctly after a Windows Update like 2004 or 20H2. In such cases, you can use the basic Microsoft Display Adapter that comes with the OS.
Otherwise, you can try to update the brightness drivers using the Device Manager.
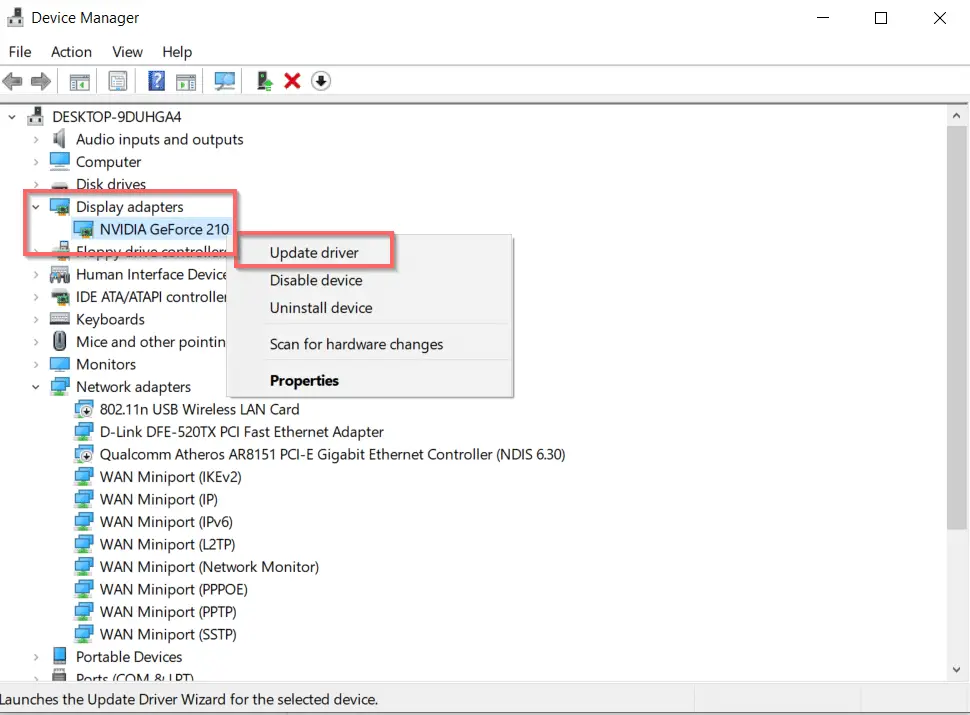
- Type the few letters of the device manager in the search box and open it.
- Under Display Adapters, you can see the graphics card or your motherboard display driver.
- Right-click it and click on “Update driver.”
- Search automatically for drivers to let Windows 10 find them.
- If that doesn’t work, you can manually download the drivers from the manufacturer site as mentioned above. Then update them using the second option.
6. Change the Screen Resolution using Windows 10 Settings
Another major hurdle in screen brightness not working is the screen resolution not being rightly set. In Windows 10, it automatically suggests the recommended screen resolution settings. If you opt for that, then the screen slider control also works the way it is intended to.
You also need to set the right frequency for your monitor based upon its design, like 60 Hz.
These can be reached from “System > Display” in the Settings window. For further clarification you can read about this article.
7. Adjust the Night Light Settings in Windows 10
After the recent updates, Windows 10 has provided a better reading mode to the user. This will cause less strain to the eyes and is useful at night.
If you think the screen brightness is too heavy and can’t change the contrast or brightness values, then you can use this option on the day also.
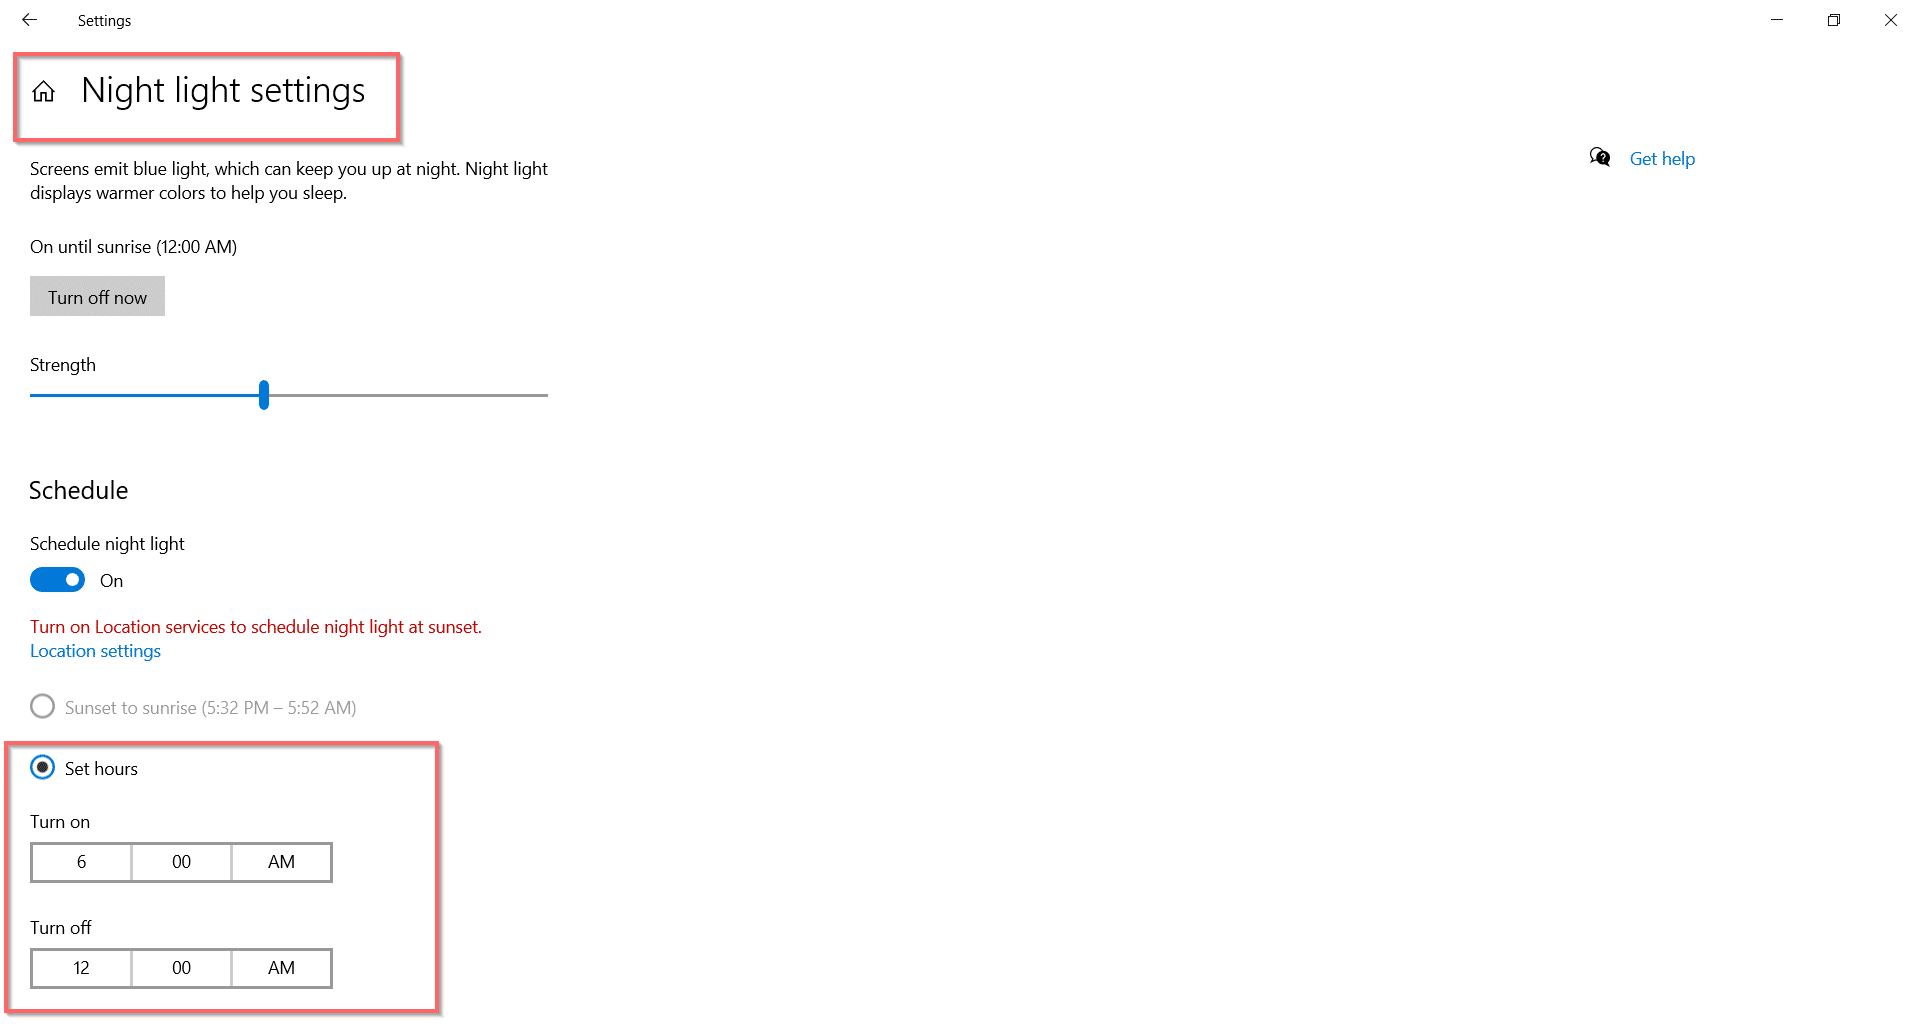
This is also available in the “Settings” window. You can go to System > Display > Night light settings.
You need to turn on the option for “Night light” under Color. In the Night Light settings, you can set the timings for this option to turn on and off.
I normally set it to turn on at 6AM and turn off at 12AM. This way the computer monitor artificially looks cooler, though the screen brightness controls don’t work.
8 – Using ATI Video Card Control Panel
This is a similar way of using a graphics card. But here you are using the Video Card Control Panel. If you are using ATI video cards, you can use this feature.
- Launch the ATI control panel in the Control Panel and click “Catalyst™ Control Center” at the top of the context menu. A pop-up window with three sliders will appear.
- Adjust the “Brightness” setting, which is the second control in the window, by moving the slider left or right.
- Click the “Apply” button.
9. Using Function Keys (F1 & F2) on Laptop
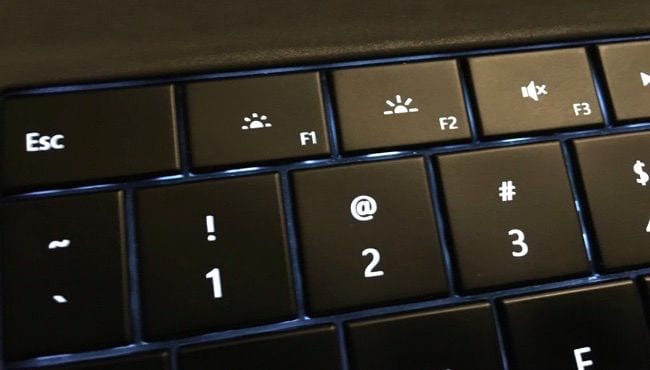
If you are using a laptop, there are certain keys on your keyboard using which you can increase or decrease the level of brightness. Generally, these are available as part of the F-keys. You see a symbol, something like a sun icon. Most probably these are the F1 and F2 keys.
All you have to do is press the Fn key on your laptop keyboard and the above keys. One is used for dimming the light and the other to augment it.
These settings are not available on your desktop.
10. Adjust Monitor Brightness in Windows Desktop
In the previous versions of Windows, you don’t have a Settings app.
But you could do brightness control in Windows 7 or 8 or 8.1 using the Power Options setting in Control Panel.
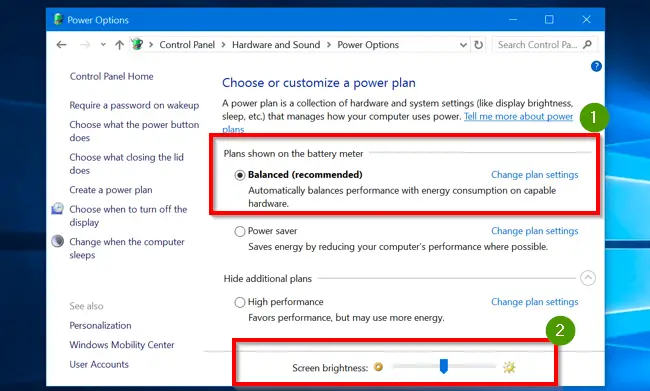
Navigate through Control Panel > Hardware and Sound > Power Options.
On the right-hand side, you will see a slider that says “Screen brightness” at the bottom. You may have to scroll a bit to see that option. Otherwise, it may not be visible.
11. Adjust Brightness Level of Laptop on Battery and Plugged In
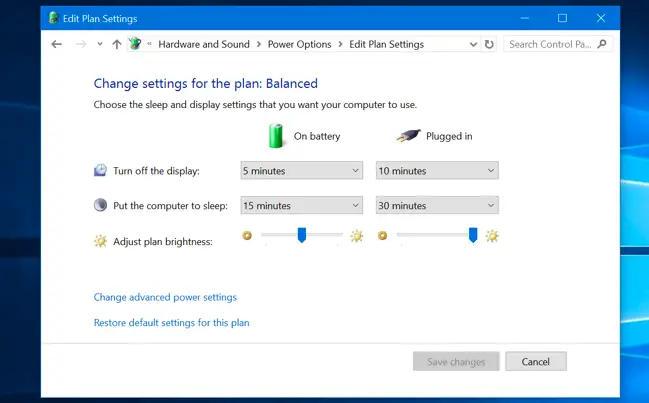
Select Control Panel > Hardware and Sound > Power Options > Change Plan Settings. Then select your power plan, e.g., Balanced.
There are two settings here—1. On battery and 2. Plugged in.
Below each setting, there is a slider that says “Adjust plan brightness.”
So, if you are on battery, you can dim the screen, and when you are connected to electricity, you can increase the percentage of brightness level.