Blogging is a multi-faceted endeavor, with images playing an important role. Taking screenshots to illustrate your tutorials is often necessary. Standard screenshots can be taken using the Windows Snipping Tool or any third-party tool.
However, you may want to take a screenshot of a drop-down menu for a how-to guide or to simply annotate a part of the feature. When you press a print screen shortcut, a rectangular or freeform region is usually captured. However, by the time you press the keys, the drop-down menu may have disappeared, which can be frustrating.
The easiest way is to use the Snipping Tool, which is a built-in Windows 11 app. To use the Snipping Tool, open it and select the “Delay” option. Then, select the amount of time you want to wait before the screenshot is taken. Once you’ve selected the delay, click the “New” button to take the screenshot.
The solution to this problem is to use delayed screenshots in Windows 11. When you take a screenshot after 2 or 3 seconds, the drop-down menu will remain intact, so you can capture it and then edit it as needed.
In this tutorial, we will show you three ways to take a screenshot of a drop-down menu in Windows 10 and 11.
ShareX – How to take a Screenshot of a Drop-Down Menu Windows 10 or Windows 11?
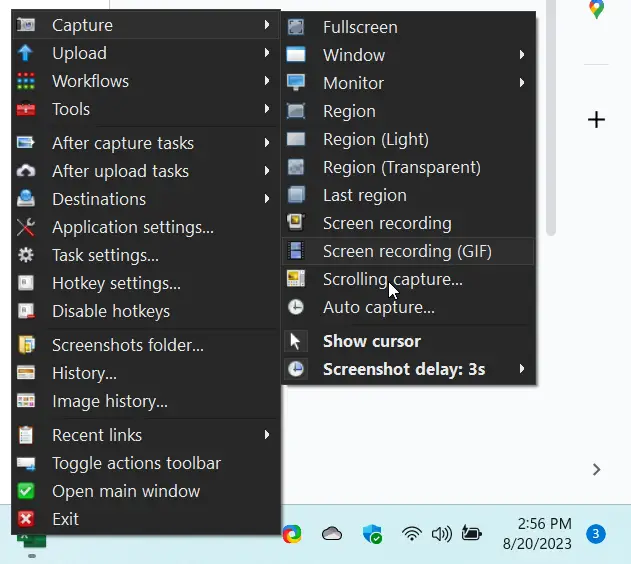
If you are a social media influencer you might have used several screenshot tools. ShareX is one of them. Just install it from its official download page. Then the icon sits in the system tray.
- Right-click the ShareX icon and click on Capture.
- At the bottom you can see Screenshot delay.
- Hover over and you can set a timer between 1 and 5 seconds.
- After your work is over, you can set it to None again.
Typical example of the drop-down menu can be seen here.
PicPick – Another great tool to take Drop Down menu screenshot in Windows 11
It is one of the long-standing screenshot tools used by many creative workers. It is simple to use and can capture regions.
Once you install the portable or standard version, you can see the home screen.
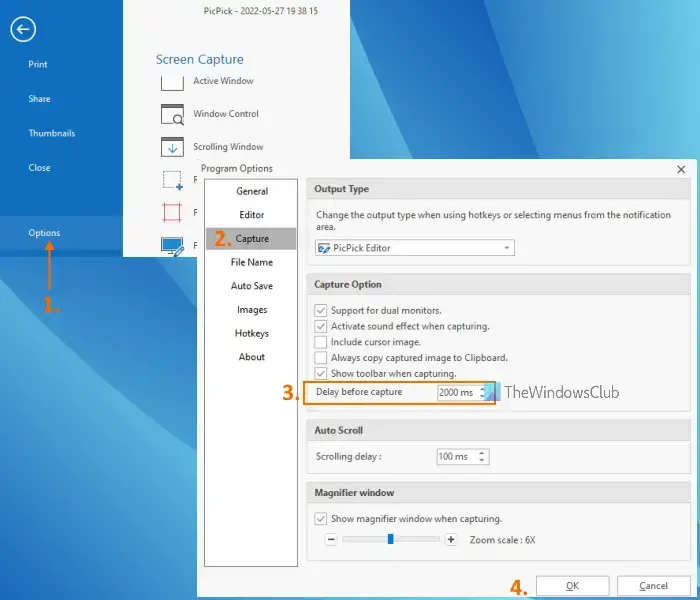
- Click on Options on the left-hand side. Program options pop-up will open.
- Click on Capture on the left side.
- Under the Capture option label there is a setting called “Delay before capture”.
- Set delay between 0 to 10s.
- Now click the short-cut keys to capture the region.
- Select the drop-down menu. Select the region to capture.
- Now the delayed screenshot is taken.
In most cases the menus disappear when you press the keyboard keys or shortcut keys. Therefore, using the delayed screenshot can help take the capture of region with drop-down menus.
Windows 10 or 11 in-house tool – Snipping Tool.
The aforementioned tools can be used to capture screenshots, edit, and annotate the captured region. However, if you are looking for a simple tool to take a delayed screenshot of a menu after a few seconds, the Snipping Tool is sufficient.
To take a delayed snip in Windows 11, follow these steps:
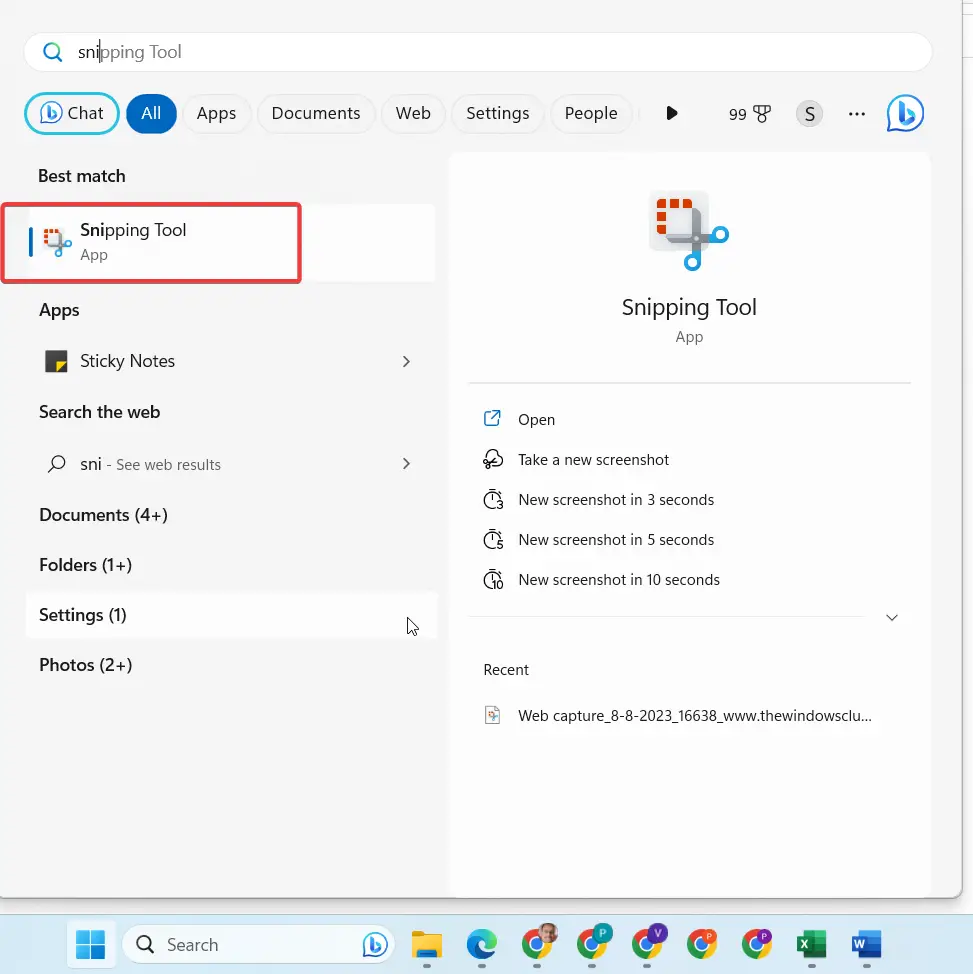
- Open the Snipping Tool by searching for it in the Windows 11 search bar.
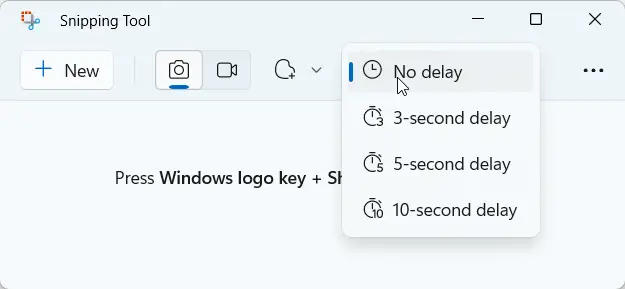
- Click the drop-down menu next to the clock or timer symbol.
- Select the delay you want to use (3, 5, or 10 seconds).
- Press Win + Shift + S to take a snip.
- After the set delay, you can select the area you want to snip.
The funny thing about the Snipping tool is that it makes the screenshot very smooth and instantaneous. Also it stores in the default download location. A notification is also displayed when the screenshot is taken.
Conclusion
In conclusion, there are a few different ways to take delayed screenshots in Windows 11.
Another way to take delayed screenshots is to use a third-party app like Greenshot or ShareX. These apps offer more features than the Snipping Tool, such as the ability to record videos or take screenshots of specific windows or areas of your screen.
No matter which method you choose, taking delayed screenshots in Windows 11 is a simple process that can be helpful for capturing specific moments on your screen.
Thanks for reading! I hope this article was helpful. If you have any questions or comments, please feel free to leave them below.