Last Updated:
Windows 11: Can you hear your HDMI device? It’s a common issue caused by outdated drivers, wrong settings, or incompatible software.
Windows 11 is the latest operating system from Microsoft, offering many new and exciting features for its users.
However, despite its advanced technology, users may still encounter issues such as Windows 11 HDMI audio not working. This issue can be frustrating for those who use external monitors or TVs as part of their computing setup.
In this article, we will provide you with a detailed guide on how to fix the HDMI audio issue on Windows 11.
We will cover all the necessary steps, including checking for basic issues, updating audio drivers, disabling audio enhancements, setting HDMI as the default playback device, and restarting the Windows Audio Service.
Check the Basic Settings
Before you start more advanced troubleshooting, make sure your HDMI device is turned on and properly connected to your Windows 11 computer.
Check for basic issues such as ensuring your HDMI cable is properly connected and your TV or external monitor is set to the correct input. Additionally, ensure that the volume is not muted and is turned up.
Afterward, take these actions:
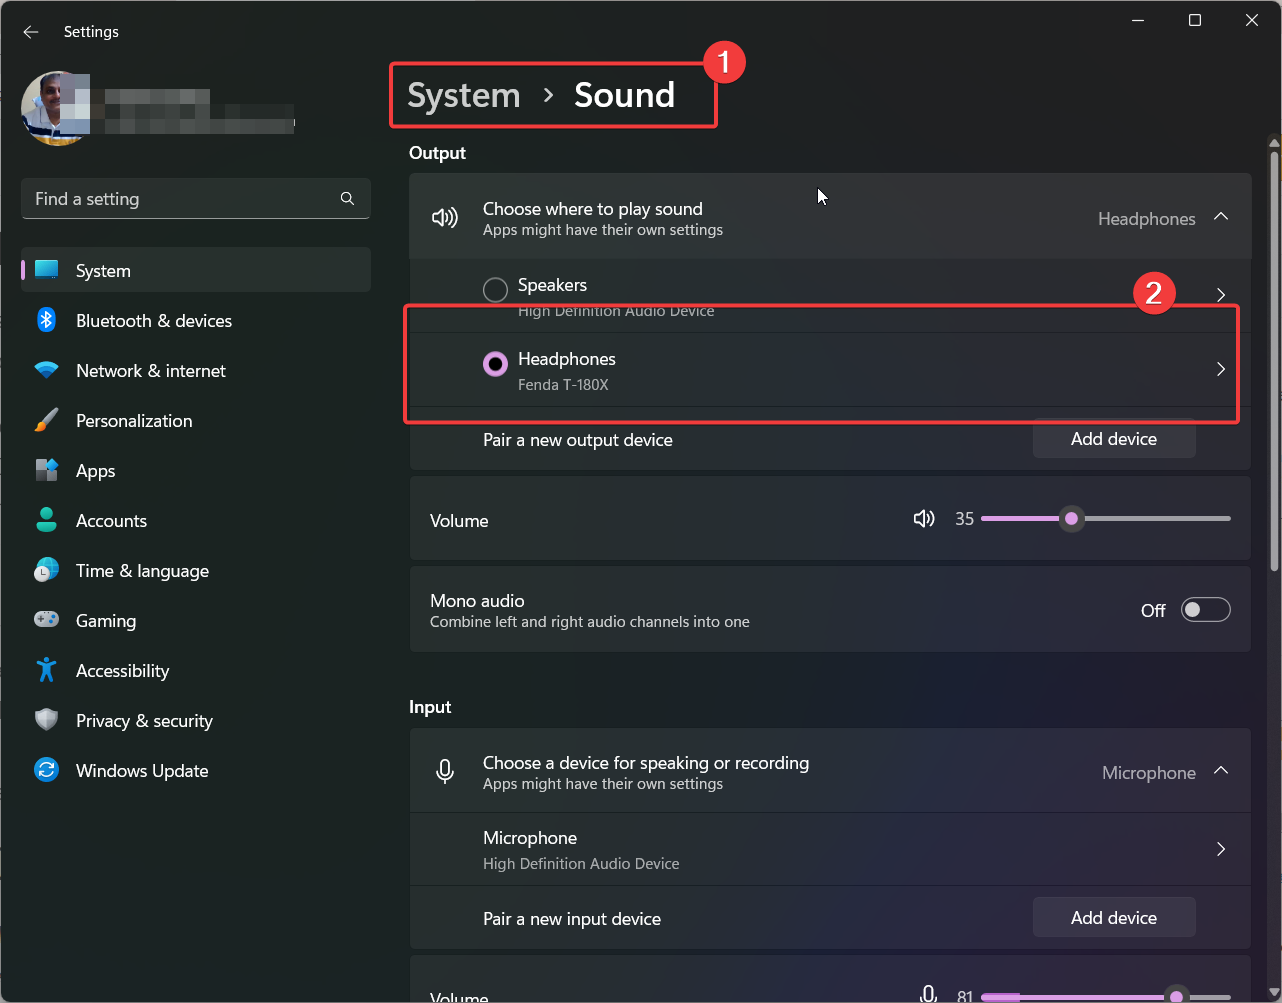
- Right-click the speaker icon in the taskbar and select “Sound Settings.”
- Under System > Sound > Output, you should choose the HDMI device you want to use for sound output.
- Add more audio devices like headphones, Bluetooth speakers, etc. by pairing a new output device. Click on Add device.
- Select the right device to play the audio. Click on that device for additional properties.
- Choose 16 bit, 44100 Hz (CD Quality) or 24 bit, 48000 Hz (Studio Quality) under the Output settings if those are the highest quality and bit depth your HDMI device supports.

Install the most recent audio driver.
When HDMI audio doesn’t work in Windows 11, sometimes it’s because the audio driver is old or broken. Do the following to update the driver:
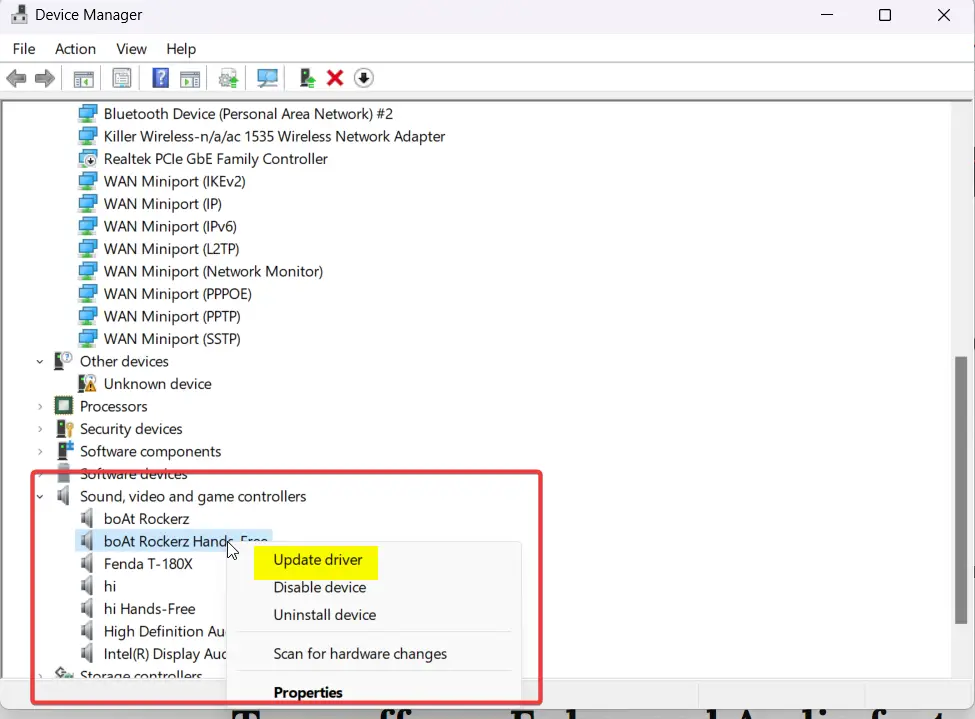
- Press Windows + X, and then from the menu, choose Device Manager.
- Under the category of sound, video, and game controllers, find your current playback device.
- Select Update driver when you right-click on the HDMI audio device.
- Choose “Look for updated driver software automatically,” and then wait for the process to finish.
- Install the new driver and then restart your computer if there is one.
Turn off any Enhanced Audio features
Due to the audio enhancements that are turned on by default, Windows 11 may cause problems when an HDMI audio output is used, such as distorted sound or loss of audio signal. Follow these instructions to turn them off:
- Your computer’s audio settings can be modified with a right-click on the speaker icon in the taskbar.
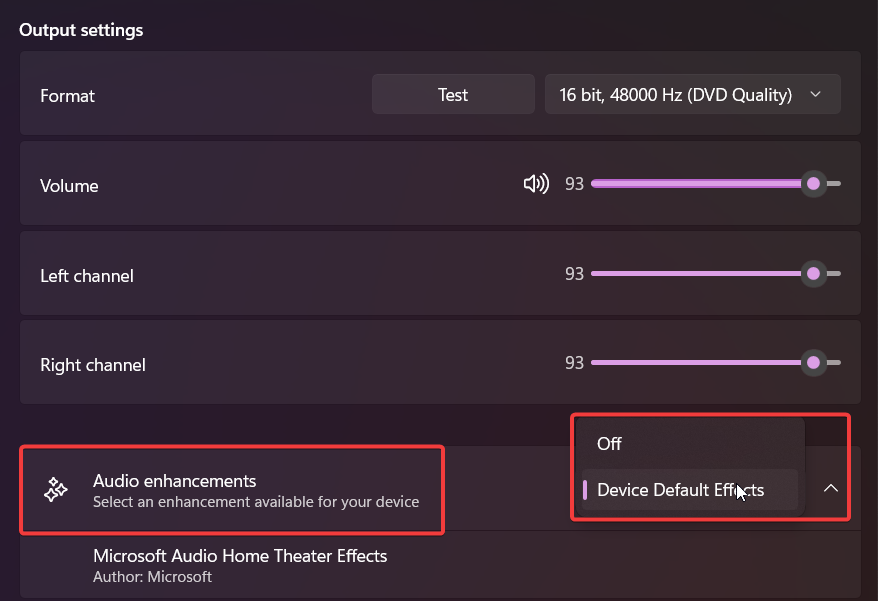
- In the section labeled System > Sound > Properties of the HDMI device you want to use as an audio output.
- Under Audio enhancements, choose to select “Off” from the drop-down menu.
Get Rid of Compatibility Problems—Windows 11 HDMI Audio Not Working
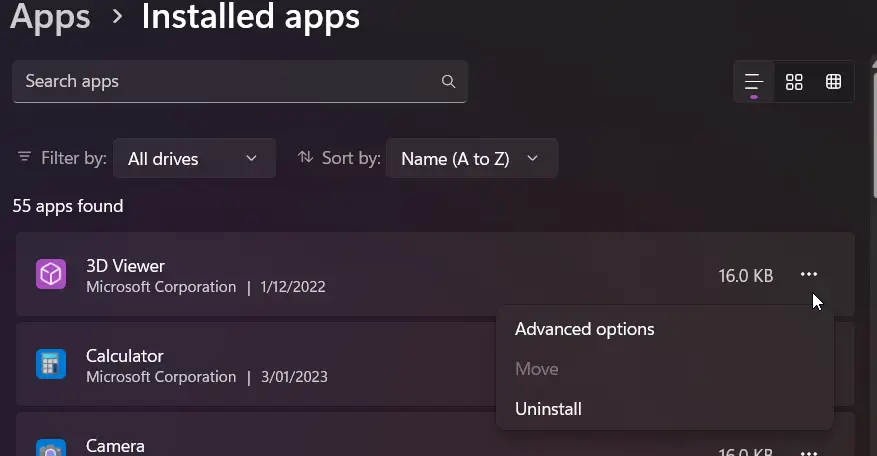
Any audio or video editing software that might interfere with Windows 11’s HDMI audio output should be removed. What you need to do to delete a program is:
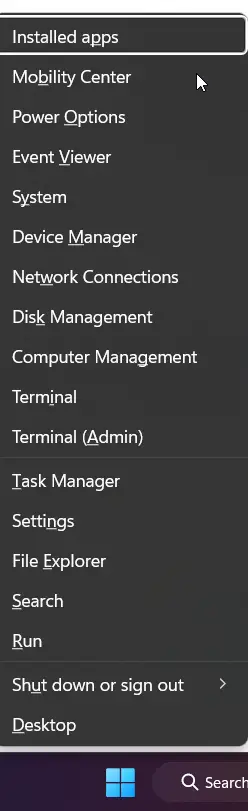
- The shortcut Windows + X brings up the Installed Programs menu.
- Locate the program you want to uninstall and click on it.
- To delete the application, click the Uninstall button and follow the on-screen instructions.
Make use of a diagnostics tool.
Common problems, like a broken HDMI audio connection, can be fixed automatically by the Windows 11 operating system. To use a troubleshooter, do the following:
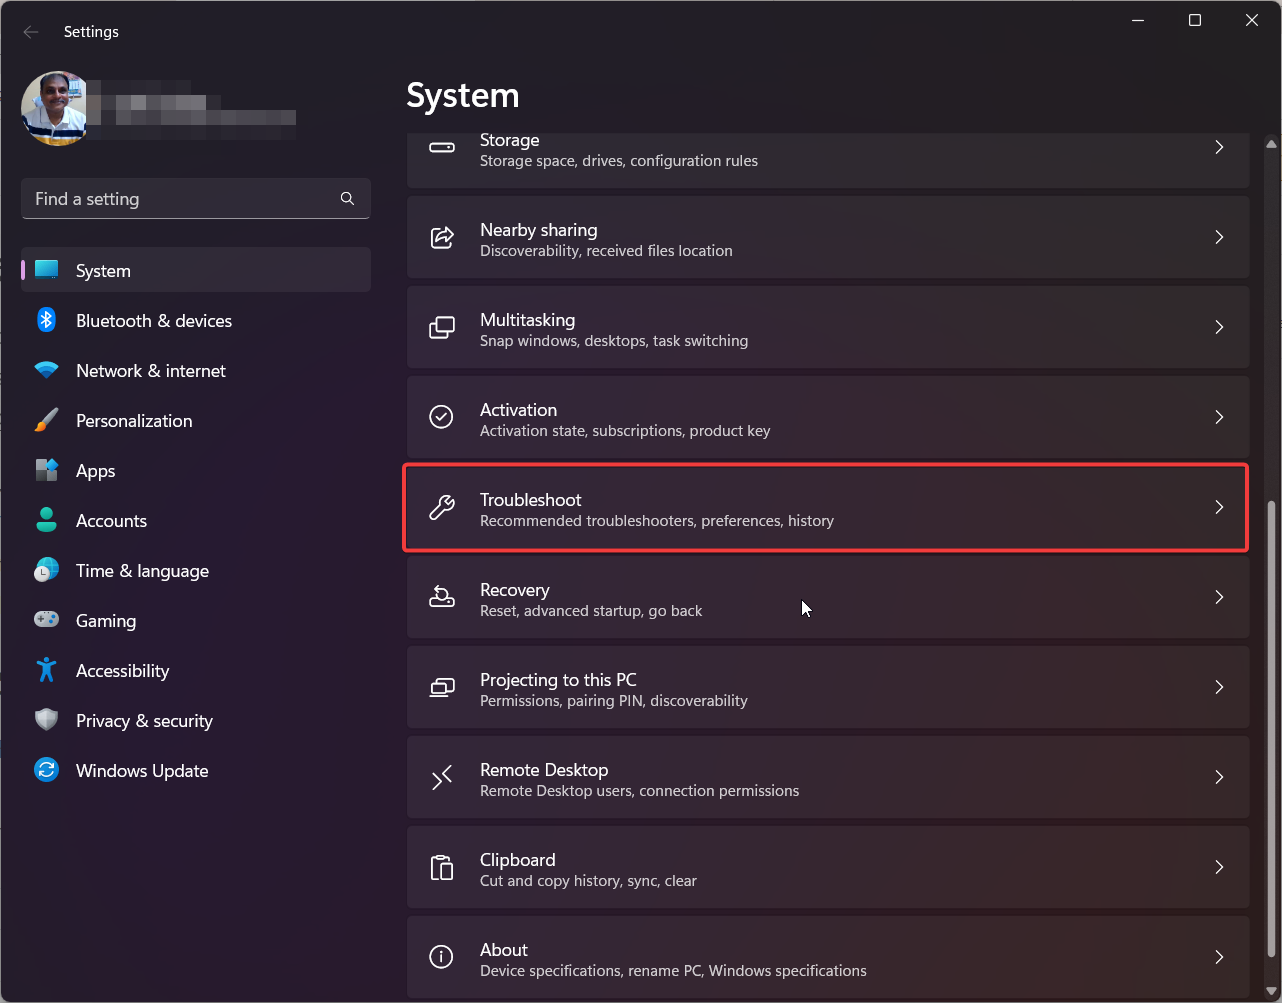
- To access the Settings menu, press Windows + I.
- The Troubleshoot option can be accessed by selecting System.
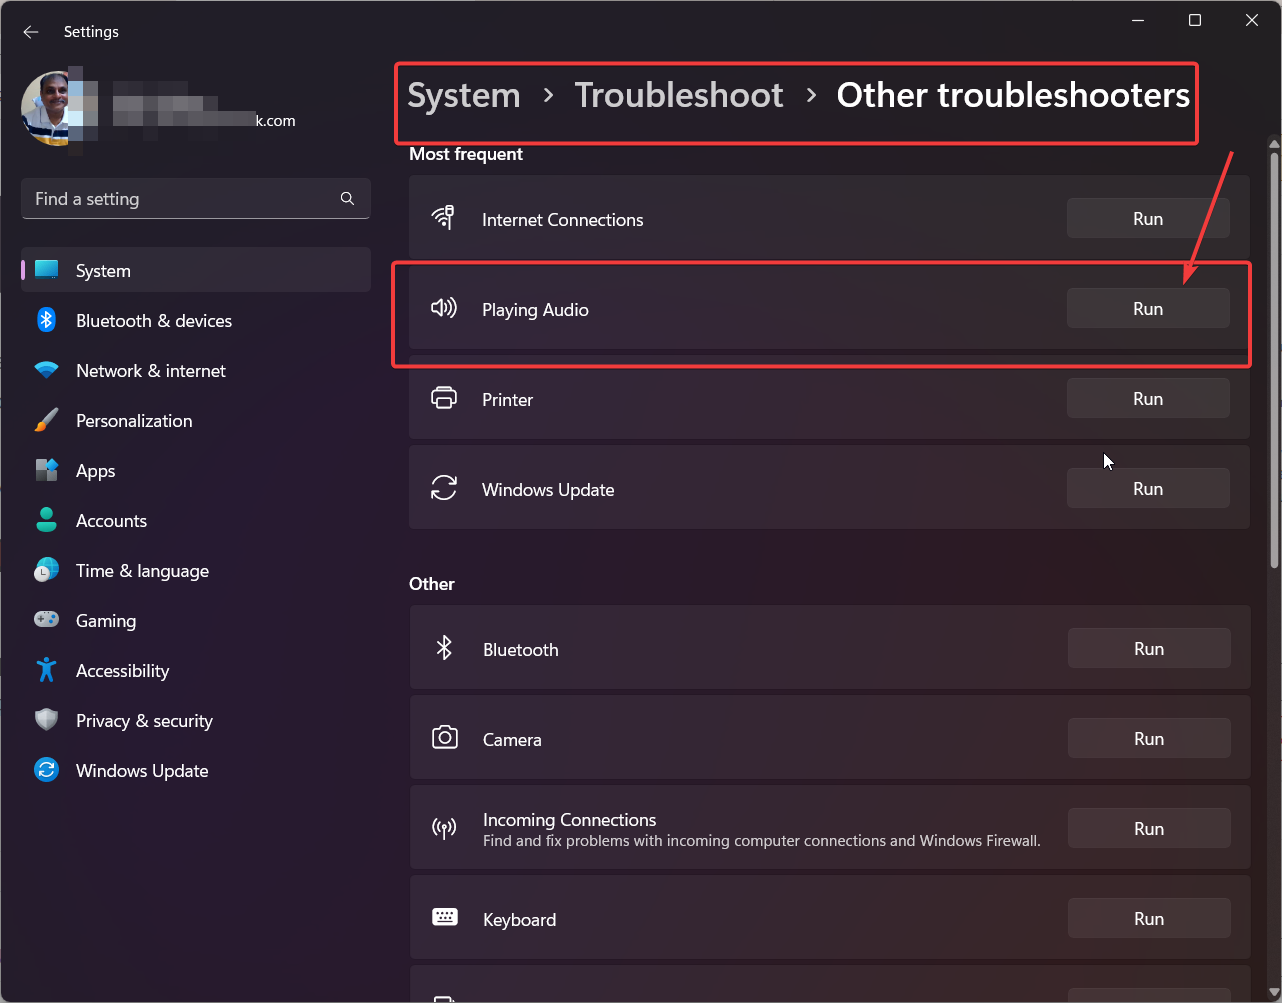
- Select Playing audio under the Get started heading.
- Simply use the troubleshooter as directed and implement any changes it suggests.
Restart Windows Audio Service.
Restarting the Windows Audio Service can also help fix HDMI audio issues. To do this, follow these steps:
- Press Windows key + R and type “services.msc” in the Run dialog box
- Locate the “Windows Audio” service and right-click on it
- Select “Restart.”
Conclusion
We hope this guide has helped you fix the problem where the audio from the HDMI port doesn’t work in Windows 11. If you do these things, you should be able to get good sound out of your PC.