Last Updated:
Based on the connector, SSDs are divided into SATA, NVMe, M.2, and PCIe. Non-volatile Memory Express (NVMe) SSD is one of the fastest read and write speed disks. Though it is not supported by legacy motherboards, the latest ones give the required operational speed, allowing users to take full advantage of NVMe’s superior performance compared to SATA SSDs.
The majority of users install two different kinds of SSDs in the most recent version of Windows, 10/11. One may be SATA and the other NVMe. Recently, users have faced the issue that the NVMe SSD is detected in BIOS but not Windows.
When you cannot see your NVMe SSD in your File Explorer, you will not be able to explore its files, documents, images, videos, and other contents. It will be useless, even though it’s connected to the computer.
In this solution guide, we are going to see steps on how to solve the NVMe SSD detected in BIOS but not in Windows problem.
Solution
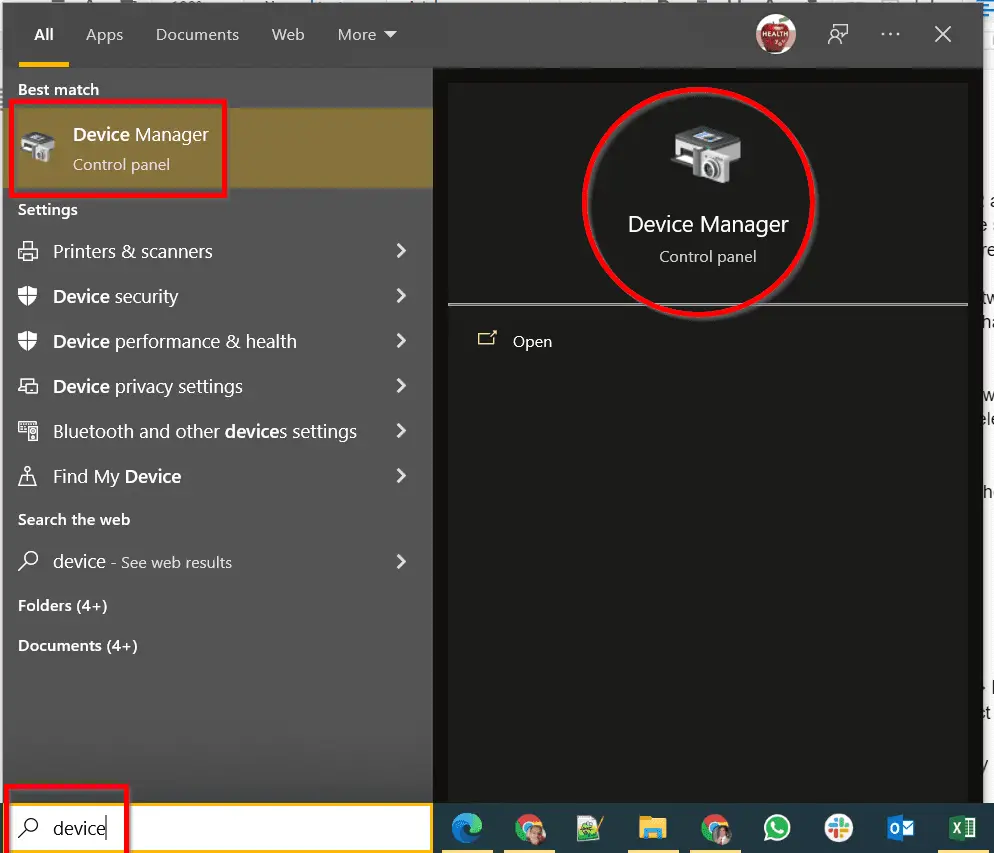
- Enter “Device” in the Windows 10 Search Box. Open the Device Manager Control Panel item.
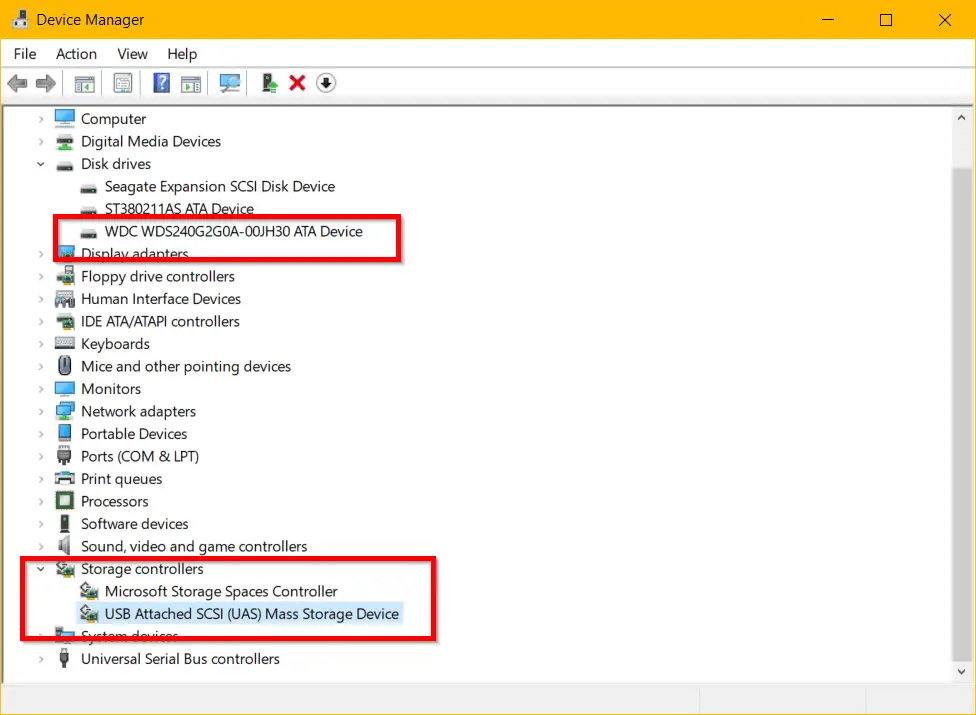
- Go to Storage Controllers and expand.
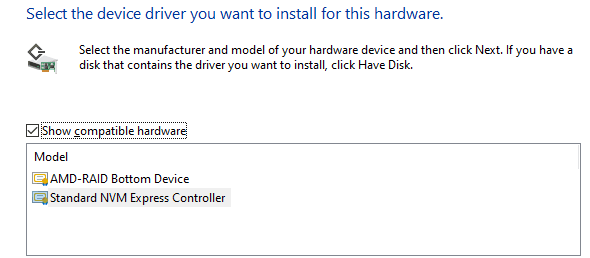
- Find AMD Raid Bottom Device and right-click. Update Driver.
- Browse From My Computer -> Let me pick from a list -> Select Standard NVM Express Controller -> Next
- The latest NVMe controller is installed.
You should see your NVMe SSD in your Windows File Explorer and should be able to scroll through the contents.
This major issue is with AMD CPUs and NVMe SSDs. There is an incompatibility between these two controllers. Once you update the AMD chipset driver, its default RAID controller device is installed. Then if NVMe drivers are not installed, you can install them. You can then see its controller device. You can make it the default.
Boom! You should see the SSD (solid-state drive) working.