Windows 11 has brought exciting features and improved performance compared to its predecessors. However, many users have noticed that it comes with pre-installed apps and bloatware that consume system resources and slow down the overall performance of their devices.
This has led to the rise of debloating Windows 11, a practice that involves removing or disabling unnecessary features and apps to enhance the system’s speed and efficiency.
A popular way to debloat Windows 11 is by using the PowerShell debloat Windows 11 command, which allows advanced users to remove unwanted apps with simple commands.
In this article, we will explore how to effectively debloat Windows 11, covering various methods, including the use of the Windows 11 debloat tool, PowerShell scripts, and third-party Windows debloater utilities.
These methods can significantly improve system performance and reduce the load of unnecessary processes that consume memory and storage. Whether you are looking for a simple way to debloat Win 11 or want to fully optimize your system, this guide provides a comprehensive solution.
Windows debloating can also help improve privacy and security by removing apps and services that may collect data or cause vulnerabilities.
Debloated Windows 11 offers users a more streamlined, faster, and secure operating system experience. By utilizing the best Windows 11 debloater tool, you can easily remove built-in apps like Cortana, Xbox Game Bar, and others that are not essential for your workflow.
For those seeking more granular control, the Win11debloat script offers an advanced way to customize which features and apps to keep or remove.
This script can be used as a Windows 11 debloater tool, giving users a chance to fine-tune the system. Additionally, users can also try other third-party debloaters for Windows 11 that provide a one-click solution for debloating without requiring any command line expertise.
Whether you are using the built-in Windows 11 debloat tool or prefer using PowerShell debloat Windows 11 commands, each method has its advantages.
In the following sections, we will walk you through the steps to achieve a faster and unbloated Windows 11 system, making it easier to focus on your tasks without the burden of unwanted software. If you’re ready to get started, let’s dive into the top tools and methods for debloating Windows 11 effectively!

How to Debloat Windows 11
Debloating Windows 11 involves removing or disabling unnecessary apps and features that you don’t need. This not only frees up disk space but also improves the overall system performance. In this section, we will cover the different ways to remove bloatware from your system.
Debloat Windows 11 Using Third-Party Tools
Third-party tools are some of the most efficient ways to debloat your Windows 11 system. These tools can automate the process and help you safely remove unwanted apps and services.
Using ThisIsWin11 to Debloat Windows 11
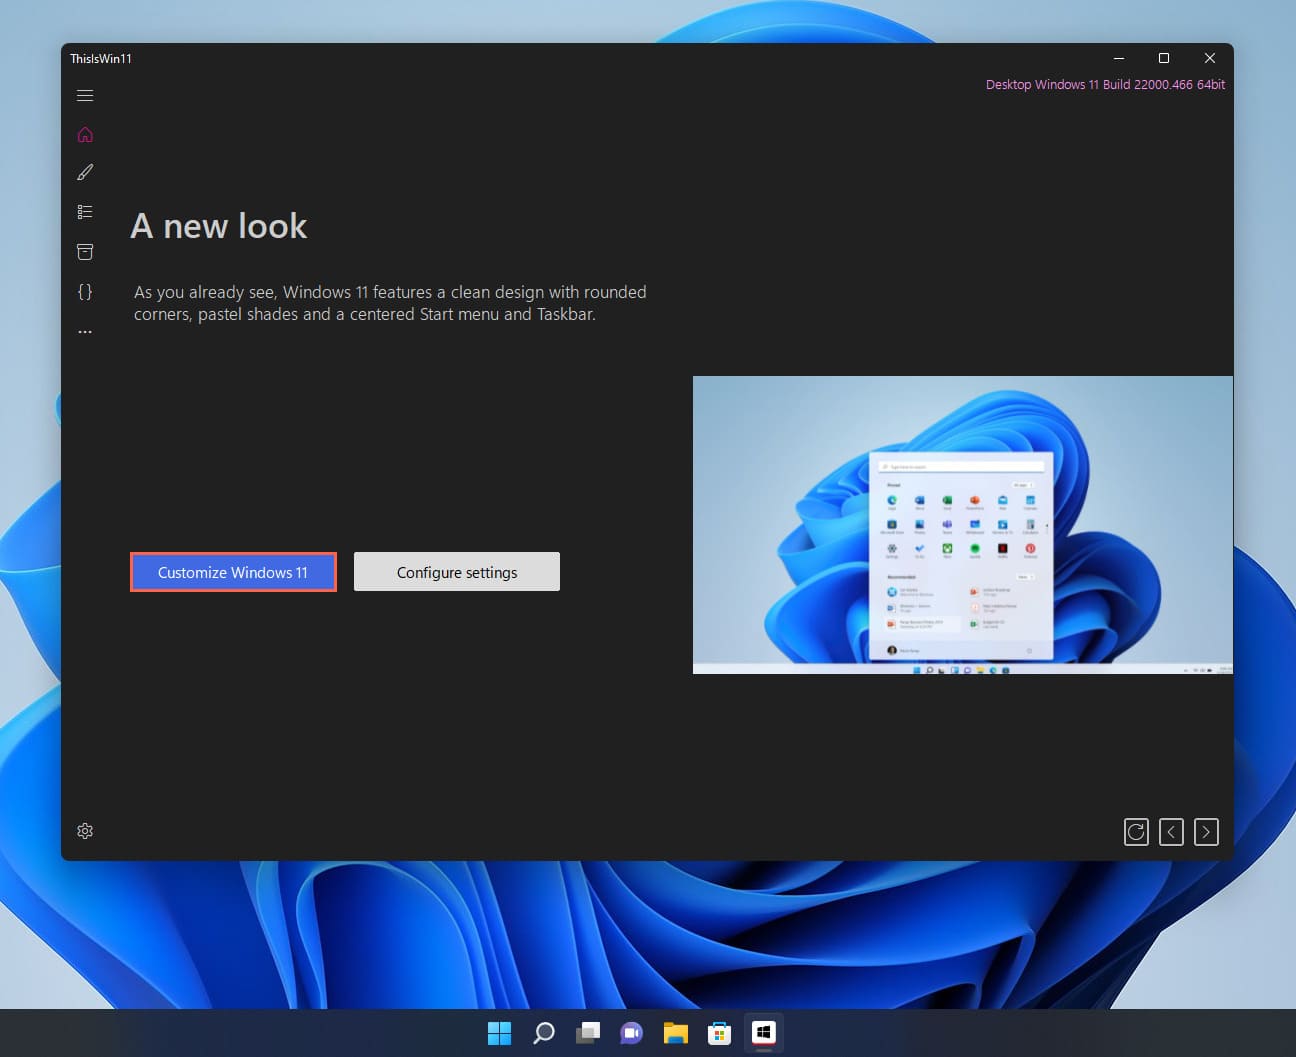
ThisIsWin11 is one of the best and most widely recommended third-party tools for debloating Windows 11. This tool allows users to remove a variety of bloatware, adjust privacy settings, and optimize system performance.
To use ThisIsWin11, follow these steps:
- Download the latest version of the ThisIsWin11 tool from a trusted source.
- Launch the tool and select the features you want to debloat or adjust.
- Click the “Debloat” button to remove the selected bloatware.
Automating the Debloat Process with ThisIsWin11
For those who want to automate the process, ThisIsWin11 also provides an automated mode. This mode allows you to debloat Windows 11 with a single click, making it a perfect solution for users who want a hassle-free experience.
- Open ThisIsWin11 and navigate to the automation section.
- Select “Automatic Debloat” to let the tool scan and remove unnecessary apps.
- Allow the tool to make changes and reboot your system.

Using Windows10Debloater Script to Remove Bloatware
Another powerful script is the Windows10Debloater script, which is specifically designed to remove bloatware from both Windows 10 and Windows 11. It’s open-source and can be run through PowerShell or Windows Terminal.
To use the Windows10Debloater script:
- Download the script from a trusted repository like GitHub.
- Open Windows PowerShell as Administrator.
- Navigate to the script’s directory and execute the script.
Remove Bloatware Using PowerShell Commands
PowerShell is a powerful tool in Windows 11 that allows users to remove apps and features directly from the command line. It’s an excellent option for advanced users who want more control over the debloating process.
Using Remove-AppxPackage Command
The Remove-AppxPackage command is one of the most commonly used PowerShell commands to uninstall preinstalled apps in Windows 11. Here’s how you can use it:
- Open Windows PowerShell as Administrator.
- Type
Get-AppxPackage *appname* | Remove-AppxPackageand press Enter to remove specific apps. Replace “appname” with the name of the app you want to remove.
Removing Provisioned Apps with DISM
Another method to remove bloatware is by using the DISM (Deployment Imaging Service and Management Tool) command. This tool allows you to remove provisioned apps, which are apps installed for all users on the system.
- Open Command Prompt as Administrator.
- Type
dism /online /remove-provisioned-appx-package /packagename:appnameto remove specific provisioned apps.
Remove Bloatware Using Traditional Uninstall
If you’re not comfortable with using third-party tools or PowerShell, you can always remove bloatware using the traditional method through the Settings app.
- Open the Settings app.
- Navigate to Apps > Installed Apps.
- Find the app you want to remove, click on it, and select Uninstall.
While this method is simple, it’s important to note that it may not remove all bloatware, especially system apps or background services.
Prepare Your System Before Debloating
Before you begin debloating, it’s essential to prepare your system to ensure the process goes smoothly and to safeguard against potential issues.
Install the Latest Windows Updates
Before removing any bloatware, ensure that your Windows 11 system is up to date. Installing the latest updates will ensure your system is stable and secure, and it can also help prevent compatibility issues with certain tools.
- Go to Settings > Update & Security.
- Check for updates and install any available updates.
Create a System Restore Point
It’s always a good idea to create a system restore point before making significant changes to your system. This way, if something goes wrong, you can easily restore your system to its previous state.
- Open Control Panel.
- Navigate to System > System Protection.
- Click Create to make a restore point.
Win11Debloat
If you want a tool that focuses solely on Windows 11 debloating, the Win11Debloat tool is an excellent choice. This tool is designed to remove bloatware and optimize your system with minimal effort.
Features of Win11Debloat
Here are some of the features of Win11Debloat:
App Removal
Win11Debloat allows you to remove preinstalled apps that you don’t use, such as Microsoft OneDrive, Xbox, Cortana, and more.
Telemetry, Tracking & Suggested Content
Win11Debloat can disable telemetry and tracking features that send data to Microsoft. It also removes suggested content in the Start menu, making it cleaner and more user-focused.
Bing Web Search, Copilot & More
With Win11Debloat, you can remove Bing integration and disable Windows Copilot. This gives you more control over how you interact with your system and reduces distractions.
File Explorer
You can also clean up File Explorer by disabling certain features like Quick Access and removing unnecessary context menus.
Taskbar
Win11Debloat lets you customize the taskbar, removing unwanted features such as the Microsoft Store icon or widgets.
Context Menu
It also allows you to streamline the context menu in Windows 11, removing unnecessary options for a cleaner interface.
Other Features
Other features include optimizing Windows 11’s privacy settings, disabling startup apps, and more.
Default Settings
The tool also offers a set of default settings that you can choose to apply, making it easy for beginners to get started with the debloating process.
Windows 11 Debloater Tool | Debloat GUI (Updated Feb 22, 2025! V2.0.6)
If you prefer a graphical interface over a command-line tool, the Windows 11 Debloater Tool | Debloat GUI is a great choice. The GUI simplifies the debloating process, allowing users to click through the options.
How to Use the Windows 11 Debloater Tool
Installation
To install the Windows 11 Debloater Tool, follow these steps:
- Download the latest version from a trusted source.
- Install the tool and launch it.
Basic Usage
Once installed, you can start debloating your system by selecting the features you want to remove.
- EZ Debloater: For beginners who just want to remove the most common bloatware.
- Advanced Debloater: For users who want more control over which apps and features are removed.
- Fine-Tuning Debloater: For advanced users who want to manually select every feature they wish to disable or remove.
Bloatware Slows Down Your Windows 11 PC
Bloatware can significantly slow down your system by taking up valuable disk space and running unnecessary processes in the background. Removing bloatware not only frees up storage but also helps your system run faster.
Why Not Use Automated Tools to Debloat?
While manual debloating methods such as PowerShell or the Settings app work, they require a certain level of technical knowledge. Automated tools, on the other hand, handle everything for you, making the process easier and less time-consuming.
Uninstalling Bloatware from the Settings App
If you prefer the manual method, you can always uninstall apps directly from the Settings app. However, keep in mind that not all bloatware can be removed this way, especially system apps.
Disabling Startup Apps
Many apps are set to launch automatically when your computer starts. These startup apps consume system resources, making your PC slower. To disable them:
- Open Task Manager (Ctrl + Shift + Esc).
- Go to the Startup tab.
- Disable any apps you don’t need at startup.
Disabling Optional Windows Features
Windows 11 includes several optional features that may not be useful for everyone. To disable them:
- Go to Control Panel > Programs > Turn Windows features on or off.
- Uncheck any features you don’t need.
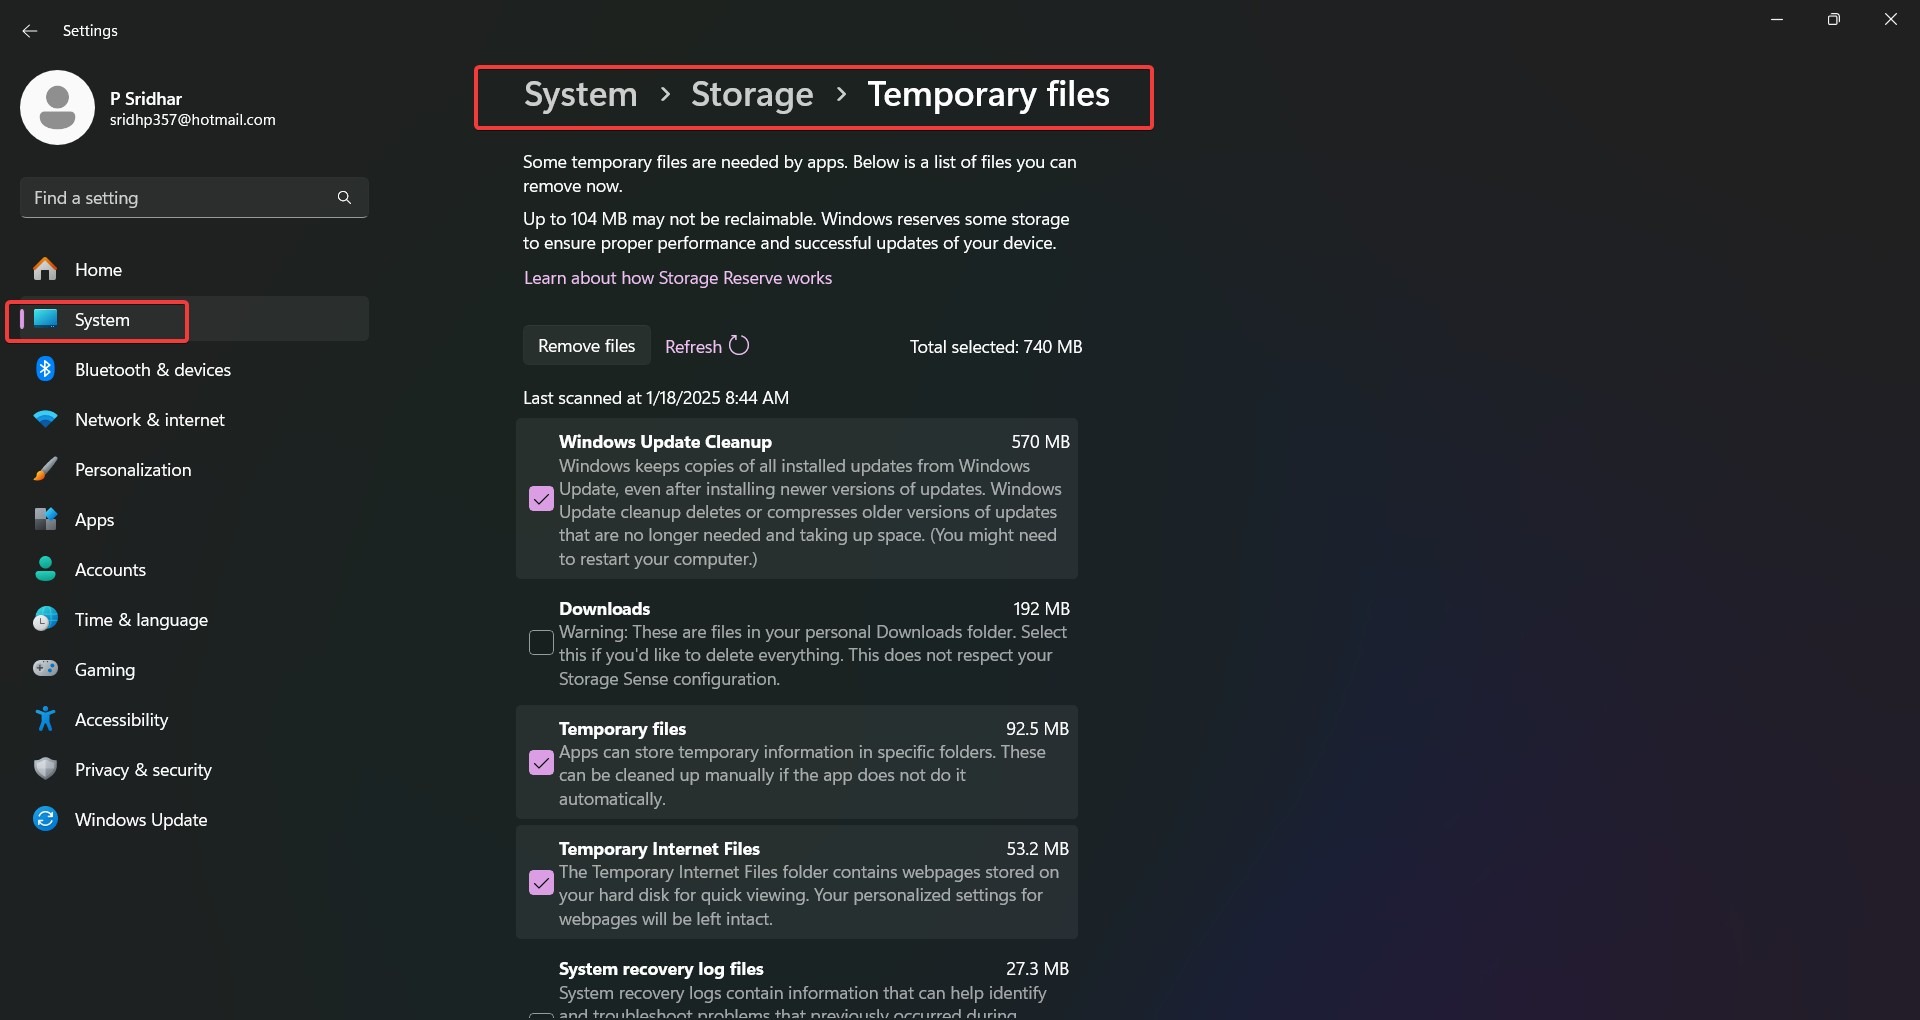
Clearing Out Temporary Files
Temporary files, cache, and system logs can pile up over time and take up unnecessary space on your drive. To clear them:
- Open Settings > System > Storage.
- Click on Temporary files and remove any unnecessary data.

What About Removing Preinstalled Antivirus Software?
Windows 11 comes with Microsoft Defender, but if you have installed third-party antivirus software, you may want to remove it. To uninstall third-party antivirus software:
- Open Settings > Apps.
- Find the antivirus software and click Uninstall.
How to Optimize Your Windows PC for Different Tasks
After debloating, you may want to optimize your system based on your usage. Whether you’re gaming, working, or using your PC for entertainment, here are some tips:
- For Gaming: Disable unnecessary background processes and optimize your power settings for performance.
- For Work: Keep your system lean and ensure that essential work apps are running efficiently.
- For General Use: Optimize your storage and power settings to maximize battery life.
FAQ
What is Windows 11 Debloater?
Windows 11 Debloater is a set of tools and methods used to remove unnecessary preinstalled apps, services, and features (often referred to as bloatware) that come with Windows 11. By debloating your system, you can improve overall performance, free up storage space, and reduce system resource consumption. Tools like ThisIsWin11, Windows10Debloater, and PowerShell commands are commonly used for debloating.
How do I use third-party tools like ThisIsWin11 for debloating?
To use ThisIsWin11, simply download the tool from a trusted source and run it on your Windows 11 PC. The tool offers an easy-to-use interface that allows you to select the specific apps and features you want to remove. You can either automate the debloating process or manually choose which elements to disable, such as Cortana, OneDrive, or telemetry settings.
Is it safe to use PowerShell for debloating Windows 11?
Yes, using PowerShell for debloating is safe if you follow the correct commands. PowerShell allows you to remove bloatware, disable telemetry, and manage apps directly via command lines. However, it’s important to be cautious and ensure you only remove unnecessary apps or services. Always create a system restore point before making changes to avoid issues.
Can I debloat Windows 11 without third-party software?
Yes, you can debloat Windows 11 without third-party tools by using built-in methods such as the Settings app, PowerShell, or DISM (Deployment Imaging Service and Management Tool) commands. You can uninstall apps manually from the Settings menu, use PowerShell to remove provisioned apps, and clear temporary files to free up space and improve performance.
What are the benefits of debloating Windows 11?
Debloating Windows 11 offers several benefits, including:
- Improved Performance: By removing unnecessary apps and services, your PC will run faster and smoother.
- More Storage Space: Bloatware can take up valuable disk space, which can be reclaimed after debloating.
- Enhanced Privacy: Disabling telemetry and tracking features reduces the data sent to Microsoft.
- Cleaner Interface: Debloating also helps you declutter your system, making it more user-friendly and personalized.
These FAQs address key user concerns, increase article relevance, and are optimized for search engines to help rank your article higher on platforms like Google and Bing.
How to Debloat Windows 11 Using Free Debloater Tool
For a more hands-on approach, the Free Debloater Tool is an excellent solution.
Step 1: Create a System Restore Point
Before you start, always create a restore point to ensure you can roll back if something goes wrong.
Step 2—Debloat Windows 11 Using the Debloater Tool
- Download and install the Debloater Tool.
- Run the tool and choose the apps or features you want to remove.
- Click Debloat to start the process.
By following these methods, you can effectively debloat your Windows 11 system, remove unwanted apps, and improve your PC’s performance. Whether you use third-party tools, PowerShell commands, or manual methods, debloating Windows 11 can make your system run faster and more efficiently.


