The Power Options menu in Windows 11 allows you to manage power plans and set basic options like sleep and display timeouts.
However, for more granular control over specific hardware components, you need to access the Advanced Power Settings.
Windows 11 allows users to customize power settings to control how devices use power in different scenarios.
While basic options like sleep timeouts and screen brightness can be configured directly in the Power Options control panel, Windows also provides more advanced power settings for fine-tuning specific hardware components.
These advanced options give users granular control over power consumption and performance. By tweaking these hidden settings, you can optimize your Windows 11 device’s battery life, heat levels, and speed to suit your exact needs.
Key Notes
The advanced power options cover various categories like processor throttling and boost states, hard drive sleep and spin down behaviors, PCI Express link power states, USB selective suspend policies, and graphics card performance and frame buffer compression.
Savvy users can dig into these categories and alter power-saving features, performance tradeoffs, and timeouts to achieve the right balance for their workflow. Many more obscure power settings can also be unlocked and exposed through a simple registry tweak.
Testing and iterative tuning while checking metrics like battery runtime and thermals is key to finding your PC’s optimal power configuration.
Custom power plans can be created to save groups of advanced settings for easy switching between modes.
With some learning and experimentation, the advanced options offer a powerful way of maximizing your Windows 11 computer’s capabilities and battery efficiency.
This guide will cover accessing, understanding, modifying, and applying Windows 11’s advanced power settings with step-by-step instructions to help you customize performance, fan usage, and battery lifespan.
Accessing Advanced Power Settings
Here are the steps to get to the advanced options:

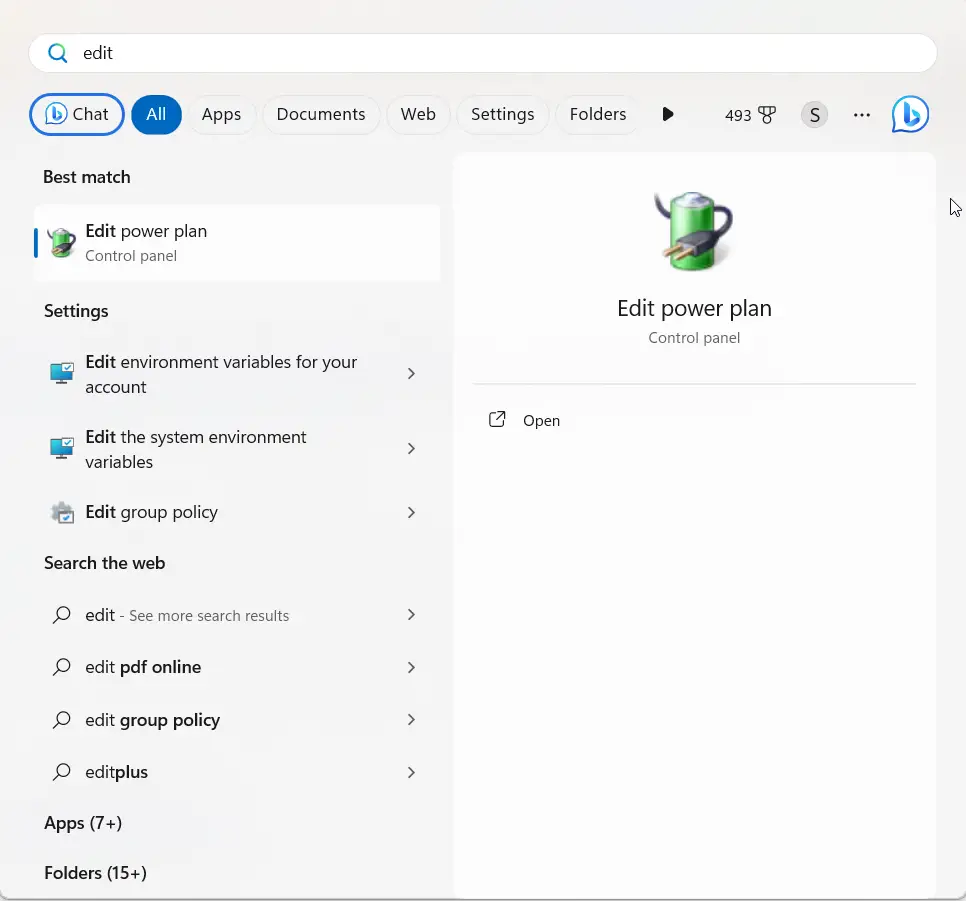
- Open the Start menu and search for “Edit Power Plan“
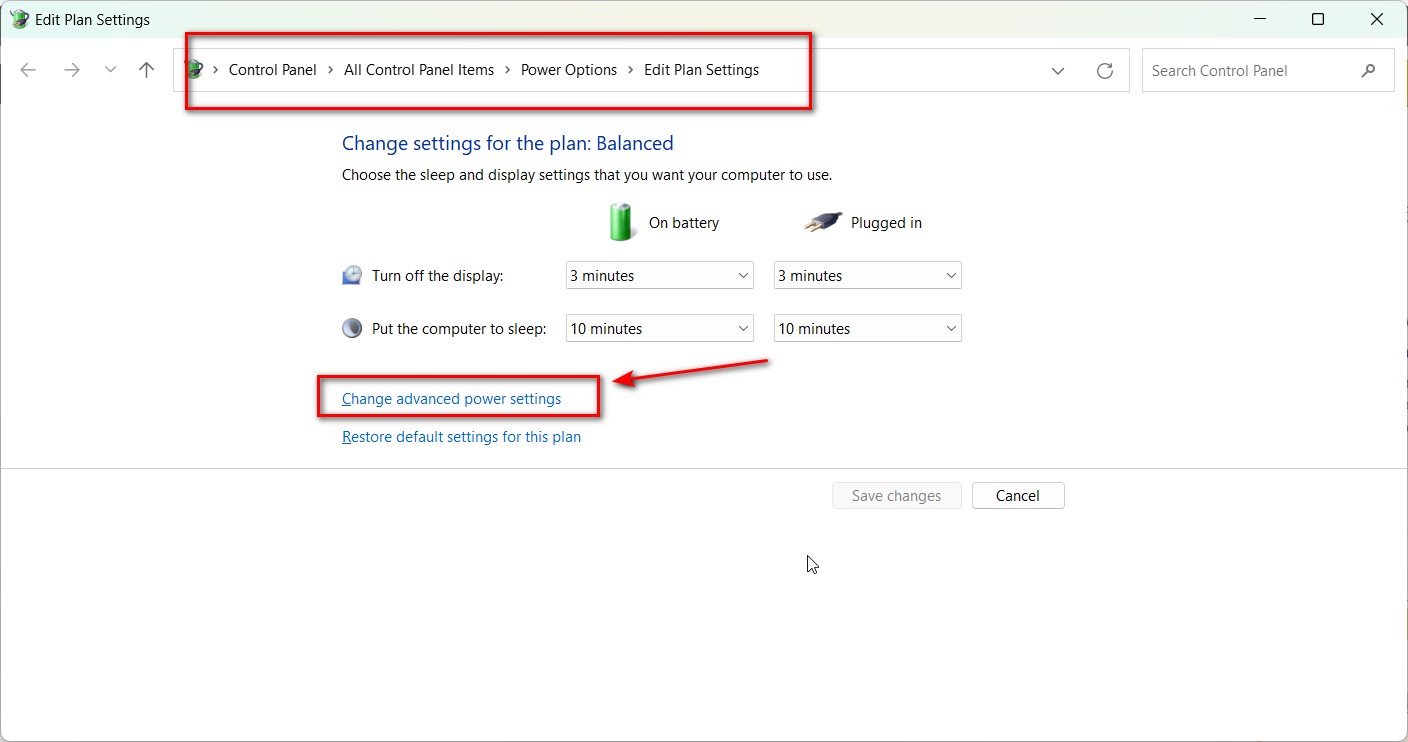
- Click on the top result to open the Power Options control panel
- On the right side, click “Change advanced power settings“

This will open up the Advanced settings window with a long list of expandable categories.
Key Categories
Some important categories to understand:
- Processor power management: Control CPU throttling, performance boosting, and power saving features.
- Hard disk: Configure spin down timeouts and sleep states for HDDs.
- USB settings: Manage selective suspend and autonomous suspend for USB devices.
- PCI Express: Change link state power management policy for PCIe devices.
- Graphics settings: Configure frame buffer compression, GPU performance states, and more.
Expand each category to see the available advanced options.
Modifying Settings
To change a setting, expand its parent category and click the plus (+) icon to expand the option:
- Locate the setting you want to configure
- Click directly on its row to expose a dropdown menu
- Select your desired value from the available choices
For example, to enable PCI Express power savings:
- Expand “PCI Express”
- Locate and expand “Link State Power Management”
- Click on the setting and choose “Moderate power savings” or “Maximum power savings” from the menu
Some settings have a text field instead of a dropdown menu. Enter your desired value manually, like changing GPU frame buffer compression from 0% to 30%.
Link State Power Management is an advanced power setting that allows PCI Express devices like graphics cards, Wi-Fi cards, SSDs, etc. to enter very low power states when not in use. This saves electricity and reduces heat generation.
Essentially, it allows these components to temporarily power down or “sleep” when idle. They then automatically switch back to an active, working power state when needed.
Enabling Link State Management lets PCIe devices conserve more power but at the cost of slightly higher latency when waking back up from the low power state.
So in summary, Link State Power Management gives users control over whether or not PCI Express devices in their system can dynamically power down to save energy when inactive or idle. It’s one of the many advanced configuration options helping optimize between power efficiency and active performance.
Key Settings to Adjust
Here are some important advanced power settings you may want to customize:
- Processor > Maximum processor state: Limit CPU speed to save power on laptops
- Display > Turn off after: Higher value to delay display shutdown
- Sleep > Hibernate after: Lower time to hibernate instead of sleep
- Hard disk > Turn off hard disk after: Faster spindown for power savings
- PCI Express > Link State Power Management: Enable power savings for devices
- Graphics settings > Frame buffer compression: Boost battery life with compression
Finding More Options
Many advanced settings are hidden by default. To unhide them:
- From the Power Options control panel, click “Choose what the power buttons do“
- Click “Change settings that are currently unavailable“
- New settings will now appear in the advanced menu!
Now you can access the full range of advanced configuration options.
Testing and Tuning
Make small changes at a time and test their impact:
- Check if performance is still satisfactory
- Log battery runtimes to gauge power efficiency
- Monitor heat output to prevent thermal throttling
Reverse any settings that cause instability, overheating, or drastic battery drain. With trial and error, you’ll settle on the optimal combination of power and performance.
Final Tips
- Create custom power plans to save groups of settings
- Toggle Rapid Start or USB selective suspend for fast wakeups
- Revert problematic changes by loading the default balanced plan
You now have in-depth knowledge to unleash the full potential of Windows 11’s advanced power settings and customize them for your usage needs!


