Category: Drivers

  • 6 Solutions to Realtek Audio Driver Problems in Windows 10 and 7

    6 Solutions to Realtek Audio Driver Problems in Windows 10 and 7

    If you are a user of Windows 10, quite likely you may have Realtek as your Audio driver.

    It’s the one most commonly equipped audio card used by the manufacturers for any integrated computer system.
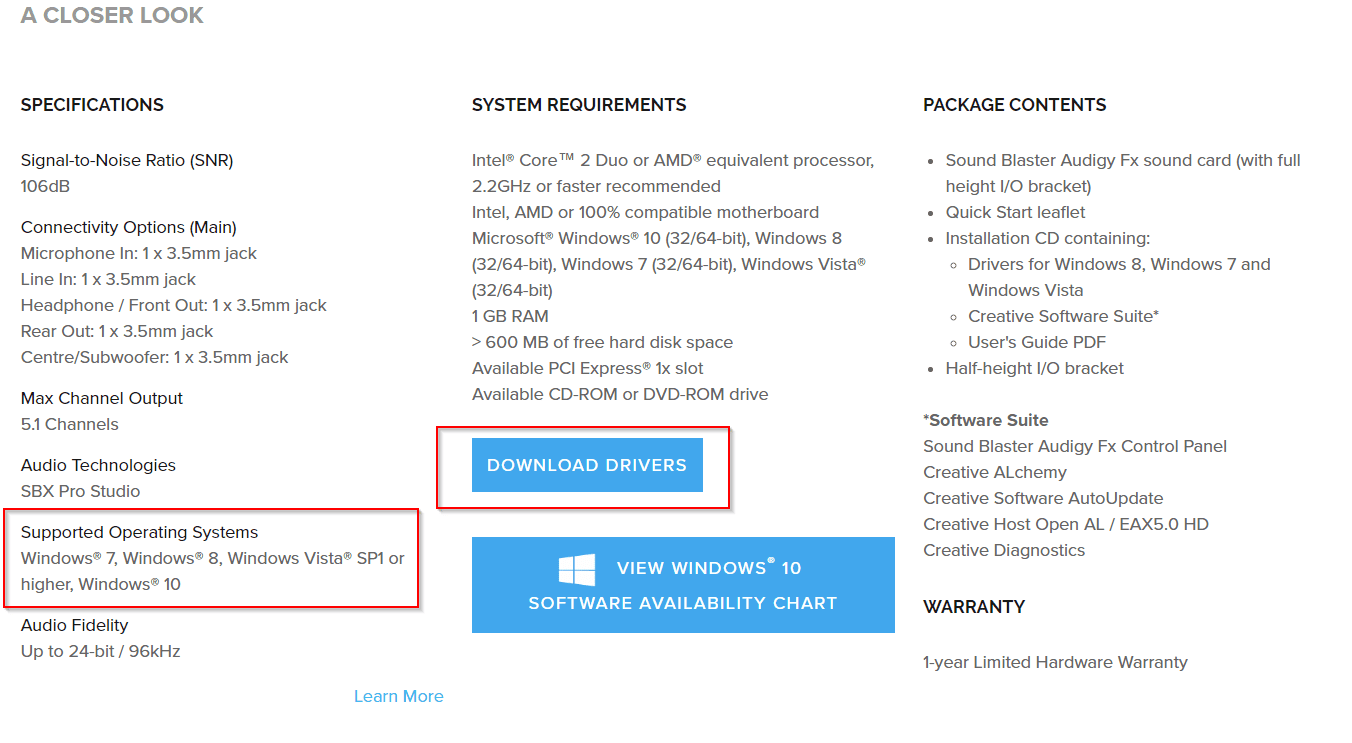
    Related –

    You can have ordinary problems with audio driver, especially if it’s a Realtek driver.

    But if you want to have better sound effects than you can install the related driver. You can get one from the motherboard manufacturer page or Realtek website.

    In most cases the default High Definition Audio Device driver that comes from Microsoft solves the Realtek audio driver problem in Windows 10. To make it as default, you can do the following.

    1. Type “Device…” in your Windows 10 search box. Click on Device Manager item.
    2. Go to <Computer Name>  >> Sound, video and game Controllers.
    3. A yellow warning symbol on your Realtek Audio driver, indicates a problem.
    4. Right-click it and click on Update Driver.
    5. From the list of device drivers on your computer, select Install High Definition Audio Device.
    6. Now your device driver name will look “High Definition Audio Device”.
    7. Install the Realtek driver from CD or manufacturer or its own site.
    8. Now repeat steps 1-4.
    9. But this time, select your Realtek driver.

    Your Realtek Audio problem should vanish in Windows 10.

    But there is a catch!

    Realtek Audio Driver Issues

    You cannot install the Realtek driver for all PCs, laptops, All-in-One desktops. There are different cases –

    Case 1: If your motherboard is a typical legacy one like Gigabyte G41MT-s2P, then you are out of luck. This supports only VIA audio codec. So even though you install Realtek audio driver, you will not benefit from it.

    Case 2: You have an old Nvidia graphics card like GeForce 210. When you install its drivers, it installs its own Nvidia High Definition Audio drivers which work only with HDMI device. No analog speakers will work with it. So even though you install Realtek drivers, they don’t work.

    Basic course of Action

    To find a solution first there is a need to recognize the problem. Isn’t?

    But before anything, try to do this just like a good sleep to most diseases. May  this work out and your panic seems to fall out. Common follow the steps:

    • Open the Device Manager from the start menu and type DEVMGMT and hit enter.
    • Your device manager window will open, and on scrolling up, you will notice all the audio inputs and outputs, wherein the faulty part can be easily caught.
    • At the next step, you will find which audio device particularly needs a check on driver.
    • To find, which driver is making fussiness, hit Update Driver, which will then give a good search to the Microsoft Database for the matching requirements.
    • If it pops, “That you have the most updated one right now”, but your system does have an old driver, this might fix the same.
    • And if it doesn’t, then,
    • Uninstall the driver without updating,
    • Then, manually bring it on board.
    • Options 1: Typically go to the Realtek website and find it, but that doesn’t guarantee the solution. Be careful to not run into any malware or viruses instead of a driver.
    • Option 2: A CD must have come along to install the driver, but chances are it must have already expired.
    • Option 3: This is much safer, and will prevent you from failing every time, i.e. to use Driver Support, which is an automatic software that checks for out-of-date drivers or any missing drivers, for each device whatsoever for your desktop computer. It will make all your devices ready and optimized within a few seconds of the click. 

    So that was the basic course to look into and fix into your Realtek driver problems.

    But for some serious occasions let’s dig deeper for some specific error encounters.

    Error Code 1: 0x000000FF HD Audio Driver Failure

    The malfunctioning of the audio driver is a common scene, besides the general mp3 and mp4 disturbances. If you surface the above code, no need to rush, this problem has the same solution as its nature.

    • Reinstall the audio Driver in your present operating system version will solve the headache. See, we got you such a quick fix.
    • But before acting, check first ensures it’s a driver problem.
    • And second, Upgrade your Audio Driver.
    • The steps to which has already being elaborated under the Basic course of Action.

    Error 2: The issue –“No Audio Output Device is installed” error in Windows 10- FIX 2020

    Sometimes, you can see a warning symbol on the sound icon present at the bottom right of your desktop screen.

    There will be a window displayed under the name Playing Audio that will run a check through to DETECT PROBLEMS and then Scan for Hardware Changes. After taking a couple of minutes, it might say, Troubleshooting couldn’t identify the problems.

    The Solution:

    • Open the Run dialogue box by using a key combination Windows + R.
    • Type devmgmt.msc over the blank space provided and you will land onto the Device Manager Window.
    • Then click on Action Tab in the menu bar < Add Legacy Drivers.
    • Click on Next, and select the second option on it, Install the hardware that I manually select from a lot (Advanced) and then
    • Find and expand Sound, Video and Game Controllers.
    • Find a Realtek Device or something with yellow triangle with exclamation mark in the right window opened therein.
    • Click on the device to select the same.
    • Let the installation get completed and after that reboot your system.
    • This will fix the issue.
    • Click on the sound button on the home screen again, to confirm the same.

    Error Code 3: “Realtek HD Audio Install Failure/ Corrupt/ Incompatible Sound Device”-

    While fixing your sound card, you update it after clearing the old files and replace them with the new ones. It may result into no sound. You end up getting the somewhat like the below error.

    The Fix

    While using the regular Windows HD Audio, you might get refrained from recording sounds direct sounds from audio clips from videos or whatsoever, due to the absence of stereo audio mix option.

    • Here you can see that it shows the 64-bit Windows 7 release of the Realtek HD audio Codec for your Realtek Card.
    • As you can see it’s a compressed zip file, with .exe. Use WinRAR and extract its own folder.
    • Entering into which, you will know that the file is full of audio drivers.
    • Go to the Control panel, and go to Device manager.
    • Scroll down to Sound, Video and Game Controllers.
    • Click on Realtek High Definition Audio option displaying there.
    • Go to Driver > Update Driver.
    • Then choose Browse my computer for Driver Software option.
    • It will automatically get directed to the zipped file extracted earlier.
    • Windows will use these drivers to update its requisite driver instead of asking you to choose one.
    • After that, you can restart your computer.
    • Click on the sound icon, to confirm the successful addition of the stereo mix to your sound card.

    Error Code #4: Speakers or DTS Headphone not working on Windows 10

    If you are using latest ASUS gaming laptop, you are more likely to use a headset. It needs audio drivers based upon the model. But if you need better surround sound experience, you need a good gaming headset.

    If this headset uses your Realtek Audio drivers for sound, then sometimes it can give problems. To rectify this follow these steps.

    1. Uninstall DTS Headphone:X 1.1 on Windows 10.
    2. Go To Device Manager > Sound, Video and Game Controllers.
    3. Right click the Realtek Audio and Update driver.
    4. Download the latest DTS driver from ASUS manufacturer page.
    5. Then install the DTS Component driver, based on instructions of downloads page.

    Source: https://answers.microsoft.com/en-us/windows/forum/all/dts-heaphone-not-working-on-windows-10-resolved/5ff3a663-7dd9-4701-87d0-9614c56cbfbe

    Error Code #5: Audio Problem with Troubleshooter not working

    In many cases Intel chipsets also provide audio codecs.

    So even though you are using a Realtek sound card or related drivers, it is not its problem.

    When your speaker output is giving problem, you can try the audio troubleshooter in Windows 10.

    Sometimes it resolves the problem. On the contrary, it can only be a temporary relief and the problem returns back. Windows audio troubleshooter does not suggest the actual reason behind it.

    You can try uninstall the Realtek audio driver and reinstall it.

    But if that doesn’t fix it, then it is the problem with express chipsets of your motherboard.

    For example, you need to reinstall the Intel® High Definition Audio (Intel® HD Audio) codecs or Intel(R) Display Audio which can better solve the problem.

    If you are using a different motherboard chipset, then install the corresponding audio codecs.

    Error Code #6 : Realtek Audio driver problem in Windows 10 1903

    If you are using headphone and speakers, then you can face dynamic switching of Realtek Audio driver between PC Speaker and the headphones. This problem is faced in Windows 10 1903 version.

    You can listen to only one sound device at a single time in Windows 10.

    But if you need to switch multiple audio devices, then you need to plug-in that device. Otherwise, you can change the default playback device.

    Sound plays through PC speakers even though you want to listen through headphones.

    When you unplug headphones and re-plug it, the sound still plays through PC speakers only. Either you need to restart the computer or make headphones the default playback device.

    In Windows 10 1903 version, Realtek audio driver installs a service called “Realtek Audio Universal Service‘  ‘RtkAudUService64.exe’. This can cause the issue regarding dynamic switching between headphones and speakers.

    1. Kill the Process related to it in the Task Manager.
    2. Disable the Startup item called “Realtek HD Audio Universal Service”.
    3. Disable the related service in Computer Management tool.
    4. Open Registry Editor and navigate to the following path. HKEY_LOCAL_MACHINE\SOFTWARE\Microsoft\Windows\CurrentVersion\Run
    5. Then delete the following entry – RtkAudUService

    These steps will solve sound problem when switching between PC speakers and headphones in Windows 10 1903 version only.

    This driver is installed in many DELL and HP laptops.

    It might have been fixed in the newer version of Windows 10 – like 1909 or 2004 versions.

    This problem does not arise if the startup service is called “Realtek HD Audio Manager”. So check your sound driver service name, before you apply this solution.

    Source: https://answers.microsoft.com/en-us/windows/forum/all/realtek-audio-driver-doesnt-dynamically-switch/ec5997da-aa64-4f1d-b695-9236f50979ef

  • NVIDIA High Definition Audio Driver Update for Windows 10, 8.1 or 7

    NVIDIA High Definition Audio Driver Update for Windows 10, 8.1 or 7

    NVIDIA High Definition Audio Driver plays a crucial role in enhancing your audio experience when using NVIDIA graphics cards, particularly for users running Windows 10 and Windows 11.

    This NVIDIA audio driver is designed to support high-quality digital audio output via HDMI and DisplayPort interfaces, offering seamless sound quality for movies, games, and other multimedia applications.

    Whether you’re a gamer, content creator, or casual user, the NVIDIA High Definition Audio driver ensures your audio is perfectly synced and immersive.

    For users running Windows 10, the NVIDIA audio driver for Windows 10 provides compatibility and ensures optimal performance of your system.

    The driver supports NVIDIA High Definition Audio and HDMI audio features, offering crystal-clear sound transmission to external audio systems, such as TVs, soundbars, and home theater setups.

    If you are looking for the latest version, you can simply head over to the NVIDIA High Definition Audio Driver Windows 10 download to get the most up-to-date version, whether it’s a 64-bit or a 32-bit version.

    One of the key advantages of using the NVIDIA High Definition Audio Driver is the ability to get the NVIDIA HD audio driver and HDMI audio working correctly.

    When downloading the NVIDIA High Definition Audio Driver Windows 10 64-bit download, you ensure better compatibility with your system, improving the overall sound output and avoiding common issues such as no sound or distorted audio.

    In case you encounter issues with your current version, such as no sound or malfunctioning audio, updating the NVIDIA audio driver can solve many common problems.

    The latest driver updates address various bugs and improve the overall performance of the NVIDIA HD audio driver. If you are on Windows 11, you can easily download the NVIDIA High Definition Audio Driver for Windows 11 for a smooth and uninterrupted audio experience.

    For those seeking the NVIDIA audio drivers for Windows 10 or Windows 11, downloading the latest driver version is essential to ensure optimal performance.

    The NVIDIA High Definition Audio Driver is compatible with various NVIDIA graphics cards, providing a reliable and high-quality audio output.

    Whether you’re installing the NVIDIA HDMI audio driver for Windows 10 or looking for the latest NVIDIA HD audio driver download, ensuring you have the correct version will help you unlock the full potential of your audio system.

    In summary, having the right NVIDIA High Definition Audio Drivers and keeping them updated will guarantee smooth and high-quality audio performance for your system, whether you’re using Windows 10 or Windows 11.

    What is NVIDIA High Definition Audio Driver

    HD audio drivers are not found easily for many of the NVIDIA products.

    This is because, NVIDIA sells a GPU (graphics processing unit). This includes both the video and sound cards.

    So what you require is NVIDIA GPU drivers.

    The following is an excerpt that emphasizes the same theory.

    In most cases, NVIDIA will install the HD audio driver along with the GPU drivers and other things like GeForce Experience.

    So if you are having problems with audio, just disable the NVIDIA HD audio in the Device Manager.

    Also, some motherboards support only the VIA or Microsoft default HD driver.

    The following are some of the NVIDIA products for which HD audio drivers are needed.

    • nvidia geforce 8600 gt driver
    • nvidia geforce 9400 gt driver
    • nvidia geforce 9600 gt driver
    • nvidia geforce gt 540m driver
    • nvidia geforce 7300 le driver
    • nvidia geforce gt 330m driver
    • nvidia geforce gts 450 driver
    • nvidia geforce gt 520m driver
    • nvidia geforce 9600m gt driver
    • nvidia geforce gtx 570 driver
    • nvidia geforce gtx 580 driver
    • nvidia geforce 7300 gt driver
    • nvidia geforce gtx 560 driver
    • nvidia geforce gt 525m driver
    • nvidia geforce 8400 gs driver
    • nvidia geforce gts 250 driver
    • nvidia geforce gt 240 driver
    • nvidia geforce 8800 gt driver
    • nvidia geforce 8500 gt driver
    • nvidia geforce gtx 460 driver

    1: Download the NVIDIA HDMI Audio Driver
    2: Use Device Manager to update NVIDIA Driver
    3: Download and Install the Driver from NVIDIA website
    4: Use third-party tool like Driver Booster

    The steps and screenshots mentioned below are with reference to Windows 10. Details will be similar in Windows 8.1 or 7.

    Method #1: Download and Install the NVIDIA HDMI Audio Driver

    A direct download link is given to download the HDMI audio driver for NVIDIA products. The latest version is 1.00.00.59. The release date is 2009.10.01. The file size is 5.67 MB.

    1. Visit the following link to download. https://www.nvidia.com/object/hdmi_audio_xp_vista_win7_1.00.00.59.html

    2. Click on the “Download” button.
    3. Run the .exe file, and it will update the NVIDIA drivers.
    4. If the drivers are not there, it will install them.

    This driver will support the following OS.
    Windows Vista, Windows XP 64-bit, Windows 7 64-bit, Windows 7 32-bit, Windows XP, Windows Vista 64-bit

    If you are using Windows 10 or 8.1, you can use the Win 7 drivers in compatibility mode.

    If this driver doesn’t work, then choose the next method.

    Method #2: Update the Audio Driver via Device Manager

    Do the following steps.

    1. Press Win+R and type devmgmt.msc.
    2. (Computer Name) > Sound, video, and game controllers.

    3. Find the name something like “NVIDIA High Definition Audio Device.”
    4. Right-click and click on “Update Driver.”
    5. There are two options

    Search automatically for updated driver software
    Browse my computer for driver software

    6. The first option will automatically check Microsoft servers for the updated version of the NVIDIA audio driver. If the latest driver is already installed, you can check “Windows Update” to get the newest version.


    But this method is slow. It will take a long time to find the driver updates. The second option is much quicker and faster.

    1. Download the NVIDIA drivers from the location mentioned in the next approach. Then unzip it. Browse for the main folder path where these drivers are located. You can tick to include subfolders.

    2. Otherwise, you can use the option that says “Let me pick from a list of available drivers on my computer.”
    3. This will show some compatible audio drivers for your NVIDIA device.


    4. Select the compatible hardware. In most cases, it will be “High Definition Audio Device,” which is from Microsoft. Then click Next and let it complete the process.

    Method #3: Download and Install the Drivers from NVIDIA Manufacturer site

    There are two ways to get the drivers for NVIDIA. You can either go to the laptop or desktop manufacturer’s website page and download the relevant audio drivers.

    But the motherboard or PC has to support the NVIDIA HD audio codecs. Otherwise, if you have a separate NVIDIA GPU card, you can download its drivers from the NVIDIA website page itself.

    Following are the steps.
    1. Visit the following page. https://www.nvidia.com/Download/index.aspx
    2. There are two options.

    1. Manually find drivers for my NVIDIA products.
    2. Automatically find drivers for my NVIDIA products

    3. To download, manually select the first option. You have to provide the following details.

    1. Product Type
    2. Product Series
    3. Product
    4. Operating System
    5. Language
    4. Then click the “Search” button.
    5. On the next page, click the “Download” button.

    Your drivers are downloaded.

    If you are using Internet Explorer, you can automatically search and install the drivers.

    NVIDIA GPU Reader is a Java-based applet that identifies your GPU and finds the latest graphics driver for your GPU. It verifies your system information and uses it to download the right drivers. This is the second option.

    For NVIDIA Virtual GPU customers also, HD audio drivers are provided. For this, you have to log in to the enterprise software download portal. You need to have a software license for it. It includes models like GRID vPC, GRID vApps, or Quadro vDWS.

    There are also high-definition audio drivers for beta and older devices. You can also find Unix Drivers, NVIDIA CUDA Driver for MAC, NVIDIA PhysX System Software, NVIDIA System Tools, Developer Tools and SDKs, Legacy Product Drivers, and Quadro Advance Options (Nview, NVWMI, etc.).

    Method #4: Update to the latest drivers using Driver Booster

    If you use a third-party tool like Driver Booster, you will get rid of the headache of finding the right drivers. Once the software is downloaded and installed, it will scan your computer and update to the latest drivers.

    Follow these steps.

    1. Download Driver Booster 6 and install it.
    2. Enter the license key for the Pro version. Now start the software.
    3. Then click on the “Scan” button.

    4. It will scan your PC for different device drivers.
    5. If your NVIDIA HD audio drivers are outdated, it will show in the list.
    6. Select a particular product(s) and click on the “Update Now” button at the top.
    7. Otherwise, click the drop-down button beside a product and click on “Update.”

    8. You can uninstall, and roll back the installed driver, if it’s causing problems.
    9. In addition, a system restore point is created if anything fails, as a safety check.

    Conclusion

    In conclusion, the NVIDIA High Definition Audio Driver is an essential component for ensuring high-quality sound output when using NVIDIA graphics cards.

    Whether you’re running Windows 10 or Windows 11, having the correct audio driver for NVIDIA Windows 10 is crucial for seamless audio performance, especially when using HDMI or DisplayPort connections.

    NVIDIA High Definition Audio supports a variety of audio features that are necessary for clear and immersive sound, making it an indispensable tool for multimedia tasks like gaming, video streaming, and content creation.

    For Windows 10 users, downloading and installing the NVIDIA High Definition Audio Driver for Windows 10 ensures compatibility with your system and improves the overall audio experience.

    Whether you’re using the NVIDIA HD audio driver for Windows 10 64-bit or the NVIDIA audio driver download, having the latest version will prevent issues like audio lag, no sound, or poor sound quality.

    Similarly, NVIDIA Sound Drivers Windows 10 are vital for maintaining sound clarity and synchronization between your PC and external devices such as speakers, monitors, and TVs.

    In the case of Windows 7, the NVIDIA High Definition Audio Driver Windows 7 can also be installed, ensuring support for older systems while still offering high-quality sound.

    For users who need to update their drivers, learning how to update NVIDIA High Definition Audio is simple and crucial for fixing common issues and improving performance.

    For users running Windows 11, the NVIDIA High Definition Audio Driver Windows 11 and NVIDIA HD Audio Driver Windows 11 are equally important, as they ensure that your system can fully leverage the high-definition sound capabilities provided by NVIDIA graphics.

    In many cases, you may need to download the NVIDIA High Definition Audio Windows 10 or NVIDIA High Definition Audio Driver Windows 11 64-bit download to ensure the most up-to-date driver version.

    Updating your NVIDIA Audio Drivers for Windows 10 or NVIDIA sound drivers regularly can prevent audio-related issues and offer improvements in sound clarity and stability. Whether you’re looking to download the NVIDIA HD audio driver for Windows 10 or the NVIDIA High Definition Audio Driver update, ensuring you have the right driver installed will optimize your overall audio performance.

    In summary, keeping your NVIDIA High Definition Audio Drivers up to date is key to maximizing the audio experience on your system, whether you’re on Windows 10 or Windows 11. With the right drivers installed, you can enjoy clear, high-quality sound and flawless audio synchronization with all your media.

  • How to Update All Drivers in Windows 10/8.1/7 with 1-Click Solution [2019]

    To update the latest sound card, video driver and graphic drivers in Windows 10 or 8.1 or 7, there are many options. One is to go the manufacturer page and download them.

    Another option is to use free driver updater and install them. But what about the motherboard chipset and game-enhancing drivers?

    There are lot of free driver update program that can check drivers and auto detect them. To update device drivers you can also use manual methods, instead of free automatic driver installer.

    During your life-time you must have definitely faced problems related to driver issues in Windows.

    The common reason is that your drivers are not up-to-date. Otherwise, when a new Windows update is released (like the 1903 version) your device may not be compatible with it.

    Yes, I’m talking about the new Windows 10. The driver problems persist even in Windows 8.1 or 7, as they are new OS’es.

    What is the need of PC Driver Update Tool

    Many old model hardware still don’t have reliable device drivers for this OS. If you are still in the old XP days, they might work with it, but with security vulnerabilities.

    Most of your hardware like your mic, speakers, mouse, keyboard, usb controllers etc must have been compatible with Windows 7, Vista, XP.

    But there is another big problem afterwards. What-if the company closed manufacturing those devices?

    For such issues you need a free driver update software in Windows 10. A driver auto installer can easily find all the updated drivers with one-click and at one-place.

    Today, we are going to talk about Driver Booster (ver 6.5.0), which is the best driver update software in 2019. No one would like to spend lot of time downloading each driver update and then get frustrated, that a new Windows update has been released.

    What are the features of this Driver Update Utility?

    • Large Driver Database
    • Smooth Game Performance
    • Quick & Safe Driver Update
    • Fix Hardware Errors

    It is a 1-click solution which works as a Windows driver update software related to your PC or laptop. It is a free driver tool and has additional features with the Pro version.

    The large database of 3 million+ free drivers for Windows 10 or 8.1 or 8 or 7 can update computer drivers which are WHQL certified.

    This PC driver updater can help you easily and securely update outdated drivers, install missing drivers and fix incorrect drivers.

    Driver Booster 6 automatically checks for the recent version of your device drivers from Intel, Nvidia, and AMD etc.

    This will help in less system performance issues like freezing and crashing.

    It works as an online driver update tool to scan for old drivers and install the latest ones.

    [wps_button style=”3d” url=”https://www.windowstechit.com/recommends/driver-booster-check-out/”  onclick=”return gtag_report_conversion(‘https://www.windowstechit.com/recommends/driver-booster-check-out/’);”  target=”blank” background=”#2D89EF” color=”#FFFFFF” size=”13″ icon=”download” wide=”no” position=”center” radius=”auto” text_shadow=”0px 1px 1px #000″ rel=”nofollow” title=”Free Driver Updater” id=”default-button” desc=”1-Click solution to Download and Update all Windows 10/8.1/7 Drivers”]Driver Booster[/wps_button]

    The Pro version supports some additional features. Slow game performance can be a hindrance to your amusement.

    It simply updates the graphic drivers with ease and Game Ready drivers, to give you best speed and agility out of your hardware. This will take your games to the next level with minimal cost.

    The following are the system requirements

    • Windows XP/Vista/7/8/8.1/10
    • 1 GB of free disk space mainly for driver download and installation
    • 1024*768 screen resolution and above

    The following are the main features

    • Scan/Update
    • Boost
    • Tools
    • Action Center

    Click the Scan button on the home screen. Driver Booster will automatically scan all your drivers. It will come up with a list which are already up-to-date and which require updates.

    You can stop and re-scan your PC whenever you like.

    The Scan Result will show something like this –

    The total quantity of outdated device drivers and game components can be seen. The scan results depend upon the PC status. It will show 4 different type of results, based on your system condition.

    • Outdated drivers, dates of both the current version and available version are provided.
    • Missing drivers, the current status is “Missing Driver”.
    • Faulty drivers, the current status is “Faulty “.
    • Not installed game component, the current status is “Not Installed”.

    If you are using the Pro version, you can also take a back up of your driver, before its updated.

    Another interesting feature of Driver Booster 6 is that, a system restore point is created before it starts installing the new and updated version of the drivers.

    The Settings feature of Driver Booster

    The following are the options

    • General
    • Scan
    • Drivers
    • Ignored
    • Network

    Under the General option you have different items like –

    • Launch automatically at Windows startup
    • Minimize to system tray when program is closed
    • Font Size and Transparency

    By default, the Scan process will commence immediately, once the software is installed or launched. This can be disabled under “Scan setting“. One can also schedule your scans based on frequency – weekly, biweekly etc.

    You can feel secure with your updated drivers, because only those will be installed that have passed the WHQL tests.

    The downloaded drivers and backup of old drivers are safe to keep. You can chose the default location for both these type of new and default drivers. Other options like –

    • Automatically delete installed driver packages
    • Automatically back up a driver before it is installed
    • Accelerate download when you update drivers

    You can also decide to ignore any devices from getting driver updates from Driver Booster. This is for legacy drivers or when there is compatibility problem with the new drivers.

    You can also use a proxy and proxy server to connect to the Internet.

    There are some other useful functions of this software tool.

    • Auto Driver Update
    • Restore Driver Updates
    • Ignore Unwanted Updates
    • Driver Update History
    • Fix Sound
    • Uninstall Driver
    • Export list
    • Details

    Tools Available with Driver Booster

    There are additional tools that are added for extra functionality.

    • Rescue Center
    • Fix No Sound
    • Solve Device Errors
    • Troubleshoot Network Failure
    • Fix Bad Resolution
    • Clean Unplugged Device Data
    • System Information

    The Action Center will show different other IObit Software that can be useful for your PC.

    1. Advanced SystemCare Pro
    2. IObit Malware Fighter Pro
    3. IObit Uninstaller Pro
    4. NordVPN

    and many others.

    The Pro version helps in Game Boost performance. You can configure its settings. The recommended processes and settings are selected to close when you are playing a game.

    This also includes non-Windows services and others. You can select any other additional items based upon your experience.

    What are the Pros

    • No need to open any other website to download drivers.
    • Auto Driver Updater for all your current drivers.
    • Automatically scan your PC to update all drivers
    • Creates a system restore point before the drivers are updated
    • Game Boost Performance in the Pro version
    • No limit on the number of driver downloads and updates
    • Free license giveaways from time-to-time
    • Repair driver issues to make the device work properly
    • Additional tools to fix your PC problems
    • Optimize your PC with additional software
    • Recover old drivers, if the new drivers fail
    • Backup of your old drivers, before downloading new drivers
    • Roll back of your drivers is possible

    What are the Cons

    • The Scanning process starts immediately without your intervention
    • During installation, it tries to install other programs
    • An activate pop-up is always shown to get the “Pro” version.
    • The Free version is limited to only 12 driver updates

    Conclusion

    I was lucky enough to get a free Pro serial to test Driver Booster latest version. I used it on my Windows 10 PC. It successfully updates my VIA sound drivers to the latest ones.

    I would have otherwise couldn’t have found the drivers to my other device controllers and chip-set modules.

    This software made it easy to get all the drivers in one place and install them automatically. There is always an option to roll back to your previous one, if the current driver fails.

    I was also available fix a device error with this tool, without installing any additional software.

    It also updated the mobile device drivers required to connect my Android phone to PC.

    This is especially useful when you are using an USB to connect them.

    In all, I definitely recommend this product, to update windows drivers automatically, using 1-click solution.

  • How to Update Sound Card Drivers Windows 10—Different Methods

    How to Update Sound Card Drivers Windows 10—Different Methods

    Updating sound drivers on your Windows 10 system is essential for maintaining high-quality audio performance. If you’re experiencing issues such as distorted sound, no audio output, or even system crashes related to sound, it’s likely time for a sound driver update.

    In this guide, we’ll explore the steps to update sound drivers on Windows 10 to help ensure smooth and clear audio functionality.

    Knowing how to update sound drivers Windows 10 is critical, whether you’re troubleshooting or upgrading your system’s performance.

    The process to update audio drivers in Windows 10 is simple, but it’s important to follow the correct steps to avoid complications.

    Your sound card drivers for Windows 10 are responsible for managing how your system processes sound. Keeping these drivers up-to-date is crucial to ensure compatibility with new software, improve performance, and fix any bugs. Regular updates can also help with security, as outdated drivers may leave your system vulnerable to potential threats.

    To update the sound driver in Windows 10, you can use the Device Manager, a built-in Windows tool that allows you to manage your device drivers.

    If you’re unsure how to update sound drivers on Windows 10, this method will walk you through the process with ease. Additionally, manufacturers like Realtek often release sound card driver updates that can be downloaded directly from their websites.

    These updates often include bug fixes, enhanced functionality, and compatibility improvements.

    A key part of how to update sound card drivers Windows 10 involves identifying your sound card driver Windows 10 version.

    This ensures that you are downloading the appropriate driver update for your hardware. If you’re looking to perform a sound card update manually, visiting the official website of your sound card’s manufacturer is recommended.

    For those who prefer a more automated approach, third-party tools can also help in automatically finding and installing the latest sound card drivers for your system.

    In this article, we will provide detailed instructions on how to update sound card drivers through various methods. Whether you’re updating from the Device Manager, using third-party tools, or manually downloading a sound card driver update, you will find all the information you need to ensure that your audio system functions optimally. Following these steps will help you update sound drivers effectively and resolve any sound-related issues on your Windows 10 computer.

    How to Uninstall Sound Drivers Windows 10

    In the Device Manager, the list of all device drivers can be seen. But when you install any unwanted drivers, they still remain in the system.

    When you try to overwrite them, by deleting them and installing the new drivers, they don’t go away so easily. So first, you should uninstall the old or redundant drivers completely, to properly update or install the new drivers.

    This is how it is done in Windows 10.

    1. Right-click the Start Menu and select “Device Manager.”
    1. Select the driver you want to uninstall.
    2. Right-click the driver and click “Uninstall device.”
    1. In the pop-up, check “Delete the driver software for this device.”
    2. Then click “Uninstall.”

    This should delete the wrong or third-party drivers from your system. Then you can update the drivers as mentioned below.

    Note: Sometimes the above option is not displayed, if the drivers are installed by Microsoft. Then you can leave them as they are and select the right drivers as mentioned in the list below.

    Why you should Update Sound Drivers in Windows 10

    Many a . EXE files are given as downloads for sound card drivers. Along with it, other unnecessary software like adware, spyware, viruses, etc., also gets downloaded when you run it. Sometimes, when you click the download link, you will be redirected to another page. This means that site is a spammy one.

    Sound Card Manufacturer

    • Creative Sound Blaster
    • Asus Xonar
    • Asus Essence
    • StarTech
    • HT OMEGA
    • APLINK
    • SMACC
    • Enter E-4S
    • Eira
    • ATI Sound Card Drivers
    • Open Sound Card Drivers (AW32, AW300, AW230, AW200)
    • Conexant Sound Card Drivers (Conexant Audio Drivers)
    • IDT Sound Card Drivers (IDT HD Audio Drivers)
    • Intel Sound Card Drivers (Intel Audio Driver)
    • CIRRUS LOGIC Sound Card Drivers (CIRRUS Sound Drivers)
    • VIA HD Audio Drivers

    The two main sound card manufacturers are Creative and Asus. There are different models produced by these two companies. In addition to that, there are other brands that produce good-quality sound drivers.

    First of all, we need to download sound card drivers for the required Windows OS. For most of the old sound cards, Windows 7 drivers are available. But Windows 10 drivers are available for new sound cards, mostly. In most of the cases, Windows 7 drivers are suited for both 8.1 and 10.

    How to Obtain Creative Sound Card Drivers

    There are different sound cards under the Creative brand.
    https://asia.creative.com/p/sound-cards

    Based upon your location, you can open the home page. Generally, it is divided by continental region.

    The sound cards are categorized on different conditions like channel output, interface, platform, gaming, home entertainment, pro audio, recording, etc.

    The main division is of the form of

    • Internal Sound Cards
    • External Sound Cards
    • Multi-channel Sound cards
    • Recording
    • Accessories

    You can also sort them by popular and latest. There are different models like –
    Sound Blaster
    – Recond3D PCIe
    – ZxR
    – Zx
    – Z
    – Audigy Fx
    – Audigy Rx
    – X-Fi Go!Pro
    – Omni Surround 5.1
    – Play!3
    – Play!2

    Sound BlasterX G5
    Sound BlasterX G1

    Click on any model, like Sound Blaster Audigy FX. A new page opens for that model product. You can go to the bottom, to find specifications, system requirements, package contents, etc.

    Here you can click the link that says “Download Drivers.” You can also view the Windows 10 software availability chart to check its compatibility.

    You can also directly download the required Creative Sound Card drivers for old products using Google. Some of them are directly given under the Creative Worldwide Support page.

    How to Get ASUS Sound Card Drivers for Windows 10

    To find the sound drivers for ASUS, you need to visit their download center page.

    https://www.asus.com/support/Download-Center/#

    You can either enter the model name of your sound card or go through a lengthy process.

    Using Select a product, you can choose the following options.

    1. Sound Cards
    2. Type—like Entertainment, Hi-Fi Sound Cards, gaming, etc.
    3. Model

    On the right-hand side, you can find “Driver & Utility.” On clicking it, you will go to the next page.

    Here, you can select the OS, like Windows 10 64-bit or 32-bit. Download it and follow the procedure below to update your sound card driver.

    If the sound card driver from the ASUS manufacturer page, does not fit your motherboard model, then you can download from a different site, as mentioned below, or use a tool like Driver Booster.

    How to obtain VIA Sound Card Drives for Windows 10

    Unfortunately, this manufacturer does not provide Windows 10 audio drivers on its home page. But you can download compatible Windows 7 drivers and install the same for Win 10.

    First, visit the following page.
    http://download.viatech.com/en/support/driversSelect.jsp

    Then there are 4 steps to find your drivers. Let’s see an example for Windows 7.

    1. Select your operating system type
    2. Select your operating system
    3. Select the type of driver
    4. Select your VIA product

    Generally, the VIA audio card drivers are divided into two categories, as mentioned on the manufacturer’s website.

    1. VIA Envy24 PCI Audio Controllers
    2. VIA Vinyl HD Audio Codecs

    The second one is more for the old motherboard audio codecs.

    But if you insist on Windows 10 drivers, you can go to a third-party site. I installed from the following site, and the drivers worked well till now.

    https://drivers.softpedia.com/get/SOUND-CARD/VIA/VIA-Vinyl-VT2021-HD-Audio-Driver-111100e-for-Windows-10.shtml

    How to Update Sound Card Drivers in Windows 10

    There are different ways of doing this.

    1. Using Windows Update

    The safest way to install sound card drivers is to use the Windows Update functionality. This is because the drivers and packages available through this feature are verified by Microsoft.

    Sound card updates are available automatically in this section. Some of them can be seen in the optional updates section. Then you need to manually install them. Creative sound card drivers are easy to install as they are more popular.

    Installing a sound card requires some expertise. Either you need to take the help of a computer technician or follow the DIY guides available on the internet. There are PCIe slots in the desktop to install them.

    To download and update sound card drivers, follow these steps.

    1. Open Settings.
    2. Find and click on Update & Security.
    3. Click on Windows Update.
    4. Click the Check for updates button.

    The sound card hardware manufacturer releases new updates from time to time. These are then automatically downloaded through the Windows Update channel.

    But there is a catch. Manufacturers may not release the new update for the drivers instantly through the Microsoft Update channel. So you have to wait for some time.

    In other cases, Microsoft installs its own drivers for sound cards. These are substitutes for the manufacturer drivers. Sometimes these work well, and sometimes they don’t.

    If they don’t work, you need to uninstall the Microsoft drivers and install the right drivers from the manufacturer’s web page.

    2. Using Device Manager

    This method is useful, if you want to uninstall the earlier drivers and install a new set of sound card drivers. Sometimes these drivers are available on third-party sites.

    So you have to be careful, before you download them. Make sure there is no adware or malware before you install or update them.

    1. Open Start.
    2. Search for Device Manager and click the top result to open the experience.
    3. Expand the category with the hardware you want to update.
    4. Right-click the device, and select Update Driver.
    5. Click the Search automatically for updated driver software option.

    how to update sound drivers in windows 10

    This will install the latest driver, which is available within the Microsoft database. If there is a new version, it will be automatically downloaded and installed.

    3. Install Drivers Manually

    After downloading the driver package from the manufacturer website, you can double-click the .exe or .zip file. This will extract the required sound card driver files to a folder.

    1. Open Start.
    2. Search for Device Manager and click the top result to open the experience.
    3. Expand the category with the hardware you want to update.
    4. Right-click the device, and select Update Driver.
    5. Click the Browse my computer for driver software option.
    6. Click the Browse button.
    7. Browse and select the main folder with the content you have extracted earlier.
    8. Click OK.
    9. Check the Include sub-folders to allow the wizard to find the correct .inf file with the instructions to update the driver.
    10. Click the Next button.

    Sometimes you need to uninstall the old driver, before you install any new driver. This is useful if you have the original driver from the manufacturer. If the correct driver is already installed, you have to “select the device driver you want to install for this hardware.”

    If the “Show compatible hardware” is not checked, you need to check it. Then you can select the correct sound card driver from the list and update it. This is more useful when you try to install the updated version of the driver.

    As told before, if the Microsoft driver, like “High Definition Audio Device,” is installed, you can replace it with the manufacturer driver, like VIA HD Audio.

    4. Update Sound Card Drivers automatically using Driver Booster

    You can also use third-party tools to update your existing sound card drivers. One of them is Driver Booster.

    All you have to do is install the software and check for drivers. It will automatically scan your PC and check if the sound card drivers are up-to-date or not. If it is not, it will automatically download from the required website and install them.

    This is easier, as you don’t need to download the drivers from the manufacturer’s website or search on third-party websites. The Pro version of Driver Booster supports all the Windows OSs, like 10, 8.1, 8, 7, Vista, and XP.

    This software not only updates sound card drivers, but all the outdated drivers on your computer. The free version is limited to only a few drivers.

    This includes your chipset, audio, video, controller, peripherals, and other devices.

    Conclusion

    As you can see, to update sound card drivers in Windows 10, there are different methods. But the easiest of all the above procedures, is to download the drivers from the manufacturer’s website and update them. This will be spam-proof, and correct drivers will be installed.

    The drivers also depend upon the motherboard configuration. So if you are using an old motherboard like G41-MT2P, you need to either install the old drivers or find them on a good site.

    Most of the time, the old drivers will fit on the Windows 10 OS. But for some manufacturers, you need to find the right drivers. It is also important, whether you are updating the 32-bit or 64-bit drivers, based upon your OS configuration.

  • Download Creative Sound Blaster Z drivers >> Sound Not Working in Windows 10

    Download Creative Sound Blaster Z drivers >> Sound Not Working in Windows 10

    Installing the right Sound Blaster Z drivers cannot be under-estimated for the smooth functioning of digital sound in Windows 10.

    One can visit the manufacturer website page to download the driver. But after latest Update (Creators or 1703 version) , users are having problem with sound not working properly in June 2017.

    Read More – Fix  Windows 10 HDMI Sound Not Working when connected to HD output devices.

    Creative has released a more recent version of the driver on 03/03/2017 with file name – SBZ_CD_L13_1_01_10.exe. The size is around 157 MB (approx). But users complain that this driver update and Creators update are not compatible.

    Related – How to Utilize Windows 10 System Settings to Solve Display, Sound etc Problems [YouTube Videos] ?


    sound blaster z drivers download
    Image Caption : This screenshot shows the latest downloads page of Creative Sound Blaster Z drivers. One can see the release date and filename in the picture. This can work after the April 1803 update also. If it doesn’t, rollback to the old driver.

    [schema type=”review” url=”https://us.creative.com/p/sound-blaster/sound-blaster-z” name=”Creative” description=”It is related to  sound peripherals for PCs and digital equipment. ” rev_name=”Sound Blaster Z – PCIe Gaming Sound Card” rev_body=”The Creative Sound Blaster Z and ZX series sound cards give good performance for 5.1 and 7.1 audio. But after any Windows 10 update, if you face sound issues, you need to rollback to the old drivers. One can also use Creative and Microsoft drivers to solve the issue. Third-party and Alternate drivers are also a good solution. ” author=”Palla Sridhar” pubdate=”2018-07-06″ user_review=”4.5″ min_review=”0″ max_review=”5″ ]

    Windows 10 interacts with Sound Blaster Z sound card using drivers. One can record high quality audio using mic connected through one of the ports provided at the back side of the PC.

    User Review about the Creative Sound Blaster Z  driver after Windows 10 Creators Update

    A user on tenforums.com in Dec, 2017 mentioned the difficulty he faced about with his audio experience.

    [wps_quote style=”style-3″ cite=”Kuniyosh”]

    So my problem consisted of Sound Blaster Z either producing no sound with no sound signal visible in volume mixer which was often accompanied by slow video streaming or none at all. I would then reinstall drivers and would get the green bars in volume mixer but still no sound and very slow video streaming, again with no sound.

    Now when 1709 completed I had sound for the first time AFTER a shutdown and cold boot. This was without any Sound blaster software installed. The problem reoccurred when I installed the Sound Blaster Z drivers again and all the above problems reoccurred.

    [/wps_quote]

    It is always important that you install the right drivers for any of your PC hardware components. Generally, in Windows 10, 8.1, 8 and 7, Microsoft itself provides some generic drivers which makes the user experience full.

    But sometimes, if these cause different problems as mentioned below, then you need to install the drivers from the manufacturer itself.

    [wp-review id=”16101″]

    Failed Sound Blaster Z drivers installation can cause –

    • Microphone Not Working
    • Silent sound coming from the device.
    • Audio settings getting mixed up.
    • Headphone Jack not Working
    • Sound Control Panel of Windows 10 is misbehaving
    • Sound Blaster Z driver failed to recognize the microphone.
    • Sound Indicator going green, but no sound.
    • Control panel not working
    • Optical out not working
    • Headphones not working
    • Connect 2 not working
    • Mic may be working, but no sound through headset.

    Fix for Audible or Quality Sound not Working

    Installing Sound Blaster Z drivers will create two entries under Device Manager > Sound, video and game controllers.

    1. Sound Blaster Audio Controller
    2. Sound Blaster Z

    Since you are having compatibility problems with the latest driver version, do a roll-back of both the driver entries.

    Read More – Download HD Audio Drivers for Other Sound Cards like Realtek

    The last Sound Blaster Z driver before the current version was released on 24/06/2016. The file name is – SBZ_CD_L13_1_01_08.exe. So when you roll-back to this version, your sound and settings should come back to normal. Don’t forget to do a Restart of the computer.

    Download Working Creative Sound Blaster Z Driver (24/6/16)

    Also after making this fix, you may find that Windows may turn down all system sounds to 0. So you just need to raise the volume back to the default level.

    You may also need to go into Sound Blaster Console speaker settings and switch to Stereo mode, if you using the 5.1 channel. The latest working Creative Sound Blaster Z version is 6.0.103.34 (from 7.Feb.2017).

    [Source : https://www.tenforums.com/drivers-hardware/87413-lost-sound-after-latest-windows-10-update-sound-blaster-z-2.html]

    Third Party Drivers for Sound Blaster Z Sound Not Working Properly

    If the Creative drivers are not working for your Blaster Z, then you can try the alternate drivers. These are found on some websites related to driver software and technology.

    There is a tech website which provides the Sound Blaster Z drivers which are neither from Creative nor generic from Microsoft. You can see if this driver software solves your problem. The link is given here. It can work for both sound blaster z and zx models.

    Though I have not tested them personally, it is one of the solutions I recommend. This is from my experience, when nothing works, try everything (trial and error).

    If you are  using the 2015 version of Windows 10, then you can try the Audio Driver 1.01.03 version.

    Lenovo also provided sound blaster z drivers for their laptops and desktops. Its version number is 6.0.102.0037.  Both 64 bit and 32 bit software are provided for 10, 8.1 and 7. The size is around 78 MB.


    [wps_button style=”default” url=”https://pcsupport.lenovo.com/in/en/downloads/ds103440″ target=”blank” background=”#2D89EF” color=”#FFFFFF” size=”18″ icon=”download” wide=”no” position=”center” radius=”auto” text_shadow=”0px 1px 1px #000″ rel=”nofollow” title=”Default Button” id=”default-button” desc=”Creative Sound Blaster Z drivers (Windows 10 64 bit and 32 bit) from Lenovo”]Download[/wps_button]


    Update Drivers from Microsoft – Download Creative Sound Blaster Z Driver Version 6.0.105.17

    As mentioned earlier there are some default drivers provided by Microsoft for any type of sound card brand. Sometimes they work well and sometimes not. If you feel comfortable with the generic drivers (provided by Microsoft) keep them and continue listening through your mic and headphone set.


    [wps_button style=”3d” url=”https://www.catalog.update.microsoft.com/Search.aspx?q=sound%20blaster%20audio%20controller” target=”blank” background=”#008e1e” color=”#FFFFFF” size=”16″ icon=”download” wide=”no” position=”center” radius=”auto” text_shadow=”0px 1px 1px #000″ rel=”nofollow” title=”Default Button” id=”default-button” desc=”Creative Sound Blaster Z driver from Microsoft – Version 6.0.105.17 (Generic)”]Download [/wps_button]


    Problem with Cold Boot with AMD Ryzen Systems in April 2017?

    On the Creative forum, I could find some users having problem with the Ryzen systems.

    To make it work they have to shut down the computer and start again i.e cold boot only works.

    So to fix this issue, you can insert the Sound Blaster Z card in the PCI-E slot, after completely turning off the computer. This is a hazzle if you would like to do a restart or hibernate your Windows 10 computer.

    So installing the June, 2016 drivers should fix this, probably.

    In Intel systems, users have other problem. If the boot time is too quick, the sound card cannot be initialized. For this the fix is to disable the Fast Boot on BIOS. You can also boot your computer in Legacy Boot, the option available in BIOS. One can also disable Fast Startup under ‘Power Options’ in Windows 10.

    [Source: http://forums.creative.com/showthread.php?t=741969]

    Why No Sound from SPDIF or S/PDIF Out of Sound Blaster Z Card in Windows 10 in 2016?

    Using both analog and fiber optical cables to connect to SPDIF OUT may not be a logical thing. The Creative Sound Blaster Pro Studio test shows the “SPDIF-OUT” is getting audio signals, but the audio is not working.

    Also, Dolby Digital Live supported by Creative Sound Blaster Z, may not detect the supported speaker device like Logitech Z906.

    The solution for these kind of problems are like this –

    1. Make sure the Creative Control Panel works somehow.
    2. Uninstall Windows Update drivers and install the June 2016, Creative Sound Blaster Z drivers.
    2. You may need to make the speakers the default playing device, instead of SPDIF-OUT.
    3. The Analog cables may need to be disconnected. Only the Optical cable should run through.
    4. Do not disable “Speakers” in Windows 10 Sound Control Panel.
    5. Both SPDIF-OUT and speakers should be enabled in sound control panel.
    6. Select “Cinematic” in Creative Control Panel and check “DTS”.
    7. Sometimes, you need to enable or disable “What you Hear” in the recording area and select SPDIF as output.

    The following fix may also work sometimes.

    Unplug all outputs and inputs. Plug only the Optical in. Open Sound > Manage audio devices. Set SPDIF – Out as Default. Set Digital Output (optical) as Communications Device. Only Properties on SPDIF are testable (Communications Device does not respond but system should work.

    [Source : http://www.tomsguide.com/answers/id-2355866/sound-spdif-creative-sound-blaster-logitech-z906.html]

    Microsoft Generic Driver not working in 2015 after Windows Update

    Just after the release of Windows 10, it soon released a new update called Threshold 2 in Nov, 2015. So if you have updated your computer with this version, it might be possible that Windows replaces the Creative drivers with it’s own generic drivers.

    So from build 10240 onwards, you might have this problem. So for this error, you just need to uninstall the generic Microsoft drivers and update with the June, 2016 drivers. Even if you upate to 10586 build, the problem persists.

    [Source: https://www.tenforums.com/drivers-hardware/29221-audio-issues.html]

    How about the November 2015 Update problem?

    Creative Sound Blaster Z users using the Aug 2015 drivers may face a different problem.

    The following type of problems may crop up.

    1. Crossed up channels in the middle of a PC game.
    2. Movie sounds suddenly all go to the Sub-Woofer.
    3. DTS/DOLBY codec packs give irritating sounds.
    4. Switching encoders is not possible.

    For these kind of problems, it could be an hardware issue rather than software. You can try a few things, to settle this Aug, 2015 driver problem.

    – Enable VT-D in the BIOS
    – Enable legacy boot and legacy USB support in the BIOS
    – Disable fast boot
    – Re-seat the card, preferably into a different PCI-E slot

    [Source: http://www.tomshardware.com/forum/id-3063463/soundblaster-fritz.html]

    Mess Up of Sound after Windows 10 Upgrade?

    After the July 2015 release of Windows 10, it was free for upgrade for 7 and 8.1 users. So if you are one of those and Sound Blaster Z was working before, try to upgrade the Creative drivers to the June 2016 version.

    You may hear vocal voice of music as though it is coming from tunnel and other mix up.
    For all these kind of problems, you could try the above solutions.

    [Source :http://www.tomshardware.com/forum/id-2742735/windows-messed-soundblaster.html]

    Upgrade of GPU and Change of PCI-E slot?

    Sometimes you install a new CPU, RAM, graphics card etc.

    Then for reasonable reasons, you plan to shift your Sound Blaster Z card to a new slot, like from PciEx1 to PciEx8. Then you may face some ugly problem like sound working but the Control Panel is not working.

    You may get this kind of error.

    “The current selected audio device is disabled, not present,not supported by the application, or has unplugged jacks.”

    The simpel fix is to uninstall the Creative Software, drivers and reinstall the working ones.

    [Source: http://www.tomsguide.com/answers/id-3078963/soundblaster-software-failure-pciex1-pciex8-slot-switch.html]

    USB Rode PodCaster Mic Problem with Sound Blaster Z

    Sometimes the PodCaster USB Mic is connected to the sound card using the 3.5mm output. In the Audio Control panel, you may see both the Sound Blaster Z and USB mic, which may confuse you.

    The simple fix is to connect the USB Rode PodeCaste to the USB port. In the Sound Manager, make the mic as the default recording device.

    This will technically mean that you can use the mic to speak and listen through the speakers, for example in an event etc.

    [Source : http://www.tomshardware.com/answers/id-3040946/soundblaster-usb-mic-issues.html]